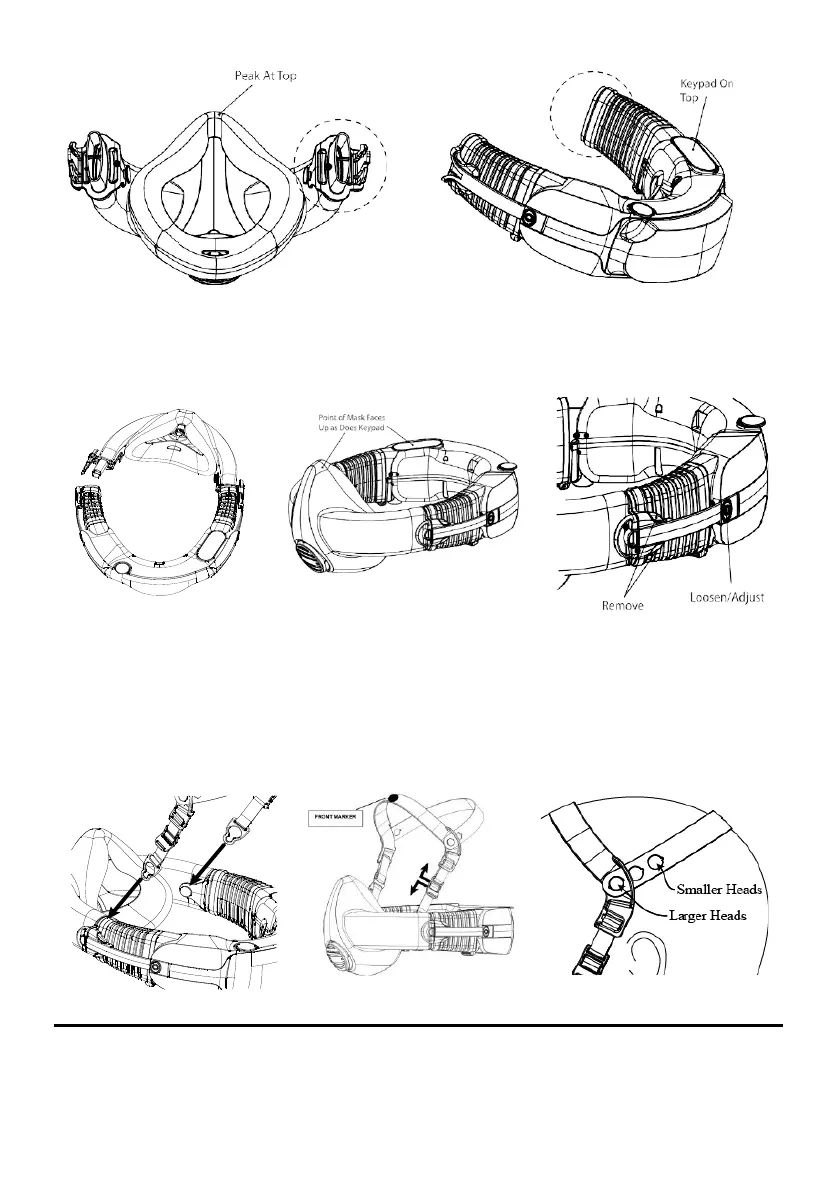
Figure 3 – Right hand mask AirClip
Figure 4 – Right hand power unit AirClip
Join the AirClips, so that the mask is attached to the power unit (Figure 5). Check that the mask is the right
way up! The pointed nose section of the mask must face up, in the same direction as the keypad (Figure 6).
Leave the other mask arm and bellow open until you are fitting the respirator. Familiarise yourself with the
Adjust Buttons and the Mask Release Buttons (Figure 7).
Figure 5 – Mask on power
unit
Figure 6 – Mask and Keypad Orientation
Figure 7 – Mask Release and
Adjust Buttons
•
Fit the harness
Holding the harness find the two keyhole clips at the end of each elastic strap and fit these to the buttons on the
inside of each AirClip (Figure 8). Ensure that the harness strap with the FRONT marker is pointing towards the mask
and that there are no twists in the straps (Figure 9). Adjust the harness as follows:
•
To move the mask up, tighten the elastic straps by sliding the cleat down the strap as shown in
Figure 9
.
•
To adjust for a smaller head size, shorten the rear strap by using a hole further along the
strap, as shown
below in Figure 10.
Figure 8 – Attach Harness
Figure 9 – Harness Fitting and
Adjusting
Figure 10 – Adjusting harness rear
strap