Chapter 3 Configuring The CHAT 60
1155
8. While the caller is still on the phone, count from 1 to 10 in a normal voice. Ask the caller if they can hear
you clearly. Click and move the
OOuuttppuutt
slider until the caller can hear you clearly. Repeat the test count as
needed to find the optimal microphone volume for the device.
9. Click
SSaavvee ttoo DDaattaabbaassee
to capture the optimized settings. The
AAdddd SSeettttiinnggss ttoo DDaattaabbaassee
dialog appears.
Enter appropriate name in the
MMooddeell
field, then click the
SSaavvee ttoo DDaattaabbaassee
button.
10. The optimal audio settings for the device or application are now ready for use. Repeat steps 1 through 9
for any additional devices and applications.
To switch between audio settings for different devices and applications, click the
MMyy DDeevviicceess
button, select the
desired device or application, then click the
AAppppllyy ttoo CCHHAATT
button. The audio settings are instantly applied for
the chosen device or application.
CONNECTING YOUR CHAT 60 TO EXTERNAL DEVICES
The following sections explain how to connect your CHAT 60 to devices other than a PC or Mac.
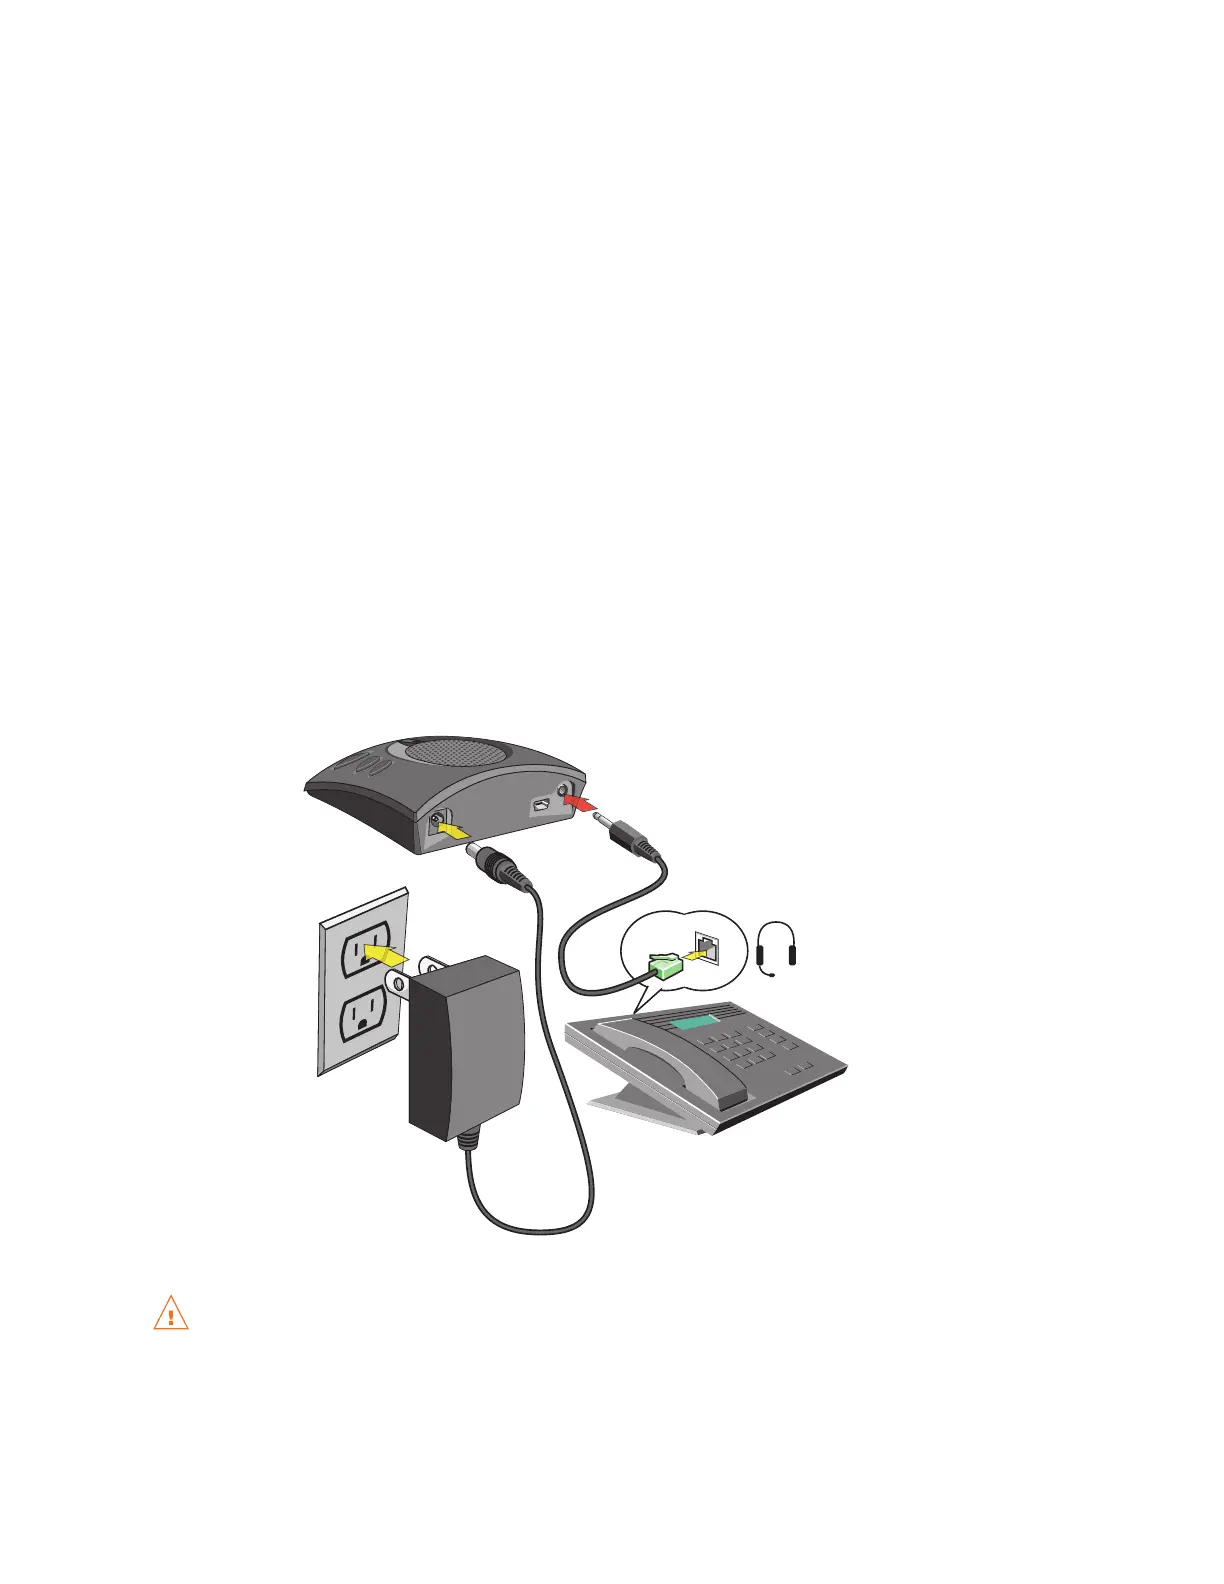
CCoonnnneeccttiinngg ttoo aa TTeelleepphhoonnee
1. Using the CHAT 50 power supply (also available seperately), connect the CHAT 60 to a power outlet.
2. Using a ClearOne telephone connection cable (available separately), connect the CHAT 60 to your
telephone’s headset jack. Contact your dealer to order ClearOne cables and accessories.
DDOO NNOOTT
plug the telephone cable from the CHAT 60 into a jack on the telephone that is intended for
connecting a telephone line. Doing so can cause serious damage to the telephone or the CHAT 60.
(Custom cable
not included)