Inspection and Maintenance
8-22
750-368
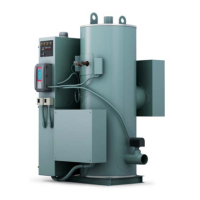
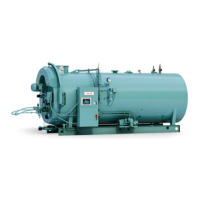
CBEX Elite 100-1200 HP
Checking parallel alignment, both horizontal and vertical, can be accomplished by laying a straightedge across
the coupling halves and checking with a thickness gauge to obtain the amount of misalignment. The check
should be done on the top of the coupling and at 90 degrees. A useful aid is to hold a flashlight behind the
straightedge so that any gap can readily be seen.
Shim stock of appropriate thickness and area is then used under either the feet of the pump or the motor to
establish parallel alignment. A tolerance of .008” is a permissible limit.
After parallel alignment is established, check for angular alignment, which is done by checking the gap between
coupling halves. The coupling should have a minimum gap of 1/16” and a maximum of 3/32”.
Set the spacing between the halves at one point by using a thickness gauge and then rotate the coupling slowly
to be sure that clearance at that point remains the same through 360 degrees of rotation. Adjust to obtain proper
gap by loosening the hold-down bolts and shifting either the pump or the motor as required. Generally, a slight
tapping on either the front or rear legs is all that is needed to obtain lateral adjustment. Rear legs may require
shimming for vertical correction.
Tighten the hold-down bolts after adjustments are made and recheck the alignment.
Calipers can also be used to check angular alignment. Measure the overall distance of the outer ends of the cou-
pling halves at 90º intervals. Shift the pump or motor, as required, so that the ends of the coupling are the same
distance apart at all points. The coupling will then have proper angular alignment.
Remember that alignment in one direction may alter alignment in another. Re-check both angular and parallel
alignment procedures after making any alteration.
A properly aligned coupling will last longer and will provide trouble-free mechanical operation.
8.17.8 — Air Compressor Replacement
Do not attempt field repairs on the compressor. An inoperative unit should be replaced. Use the following proce-
dures when replacing the pump. Be sure to tag the motor leads if disconnected to simplify re-connection.
Dismantling: 100-800 HP
1. Lift out the two front cylinder pins that hold the screen, and remove the screen.
2. Disconnect the flared nut on tubing behind screen and lift tubing high enough to prevent drainage of lubricat-
ing oil from the tank.
3. Disconnect the flared nut at the orifice fitting.
4. Remove the two sheet metal screws that hold the cylinder in place. One screw is located at the top rear of the
cylinder, the other is at the bottom front.
5. Remove the entire heat exchange assembly, consisting of the cylinder, the finned tubing, and the oil line “B”.
6. Remove the fan from the air pump.
7. Disconnect the flexible air line from the lube tank.
8. Remove the coupling guard by pushing in on both sides until it clears the clamp.
9. Loosen the clamp at the rear of the tank and remove the tank with copper tubing attached.
10. Leave the rear pump bracket (coupling end) in place to aid in realignment of the replacement pump. Do this
by removing the two capscrews that extend through the bracket into the pump housing. Temporarily leave the
front bracket attached to the pump.