Disassembly
Removing and Installing the Video Card 2 - 23
2.Disassembly
Installing a New Video Card
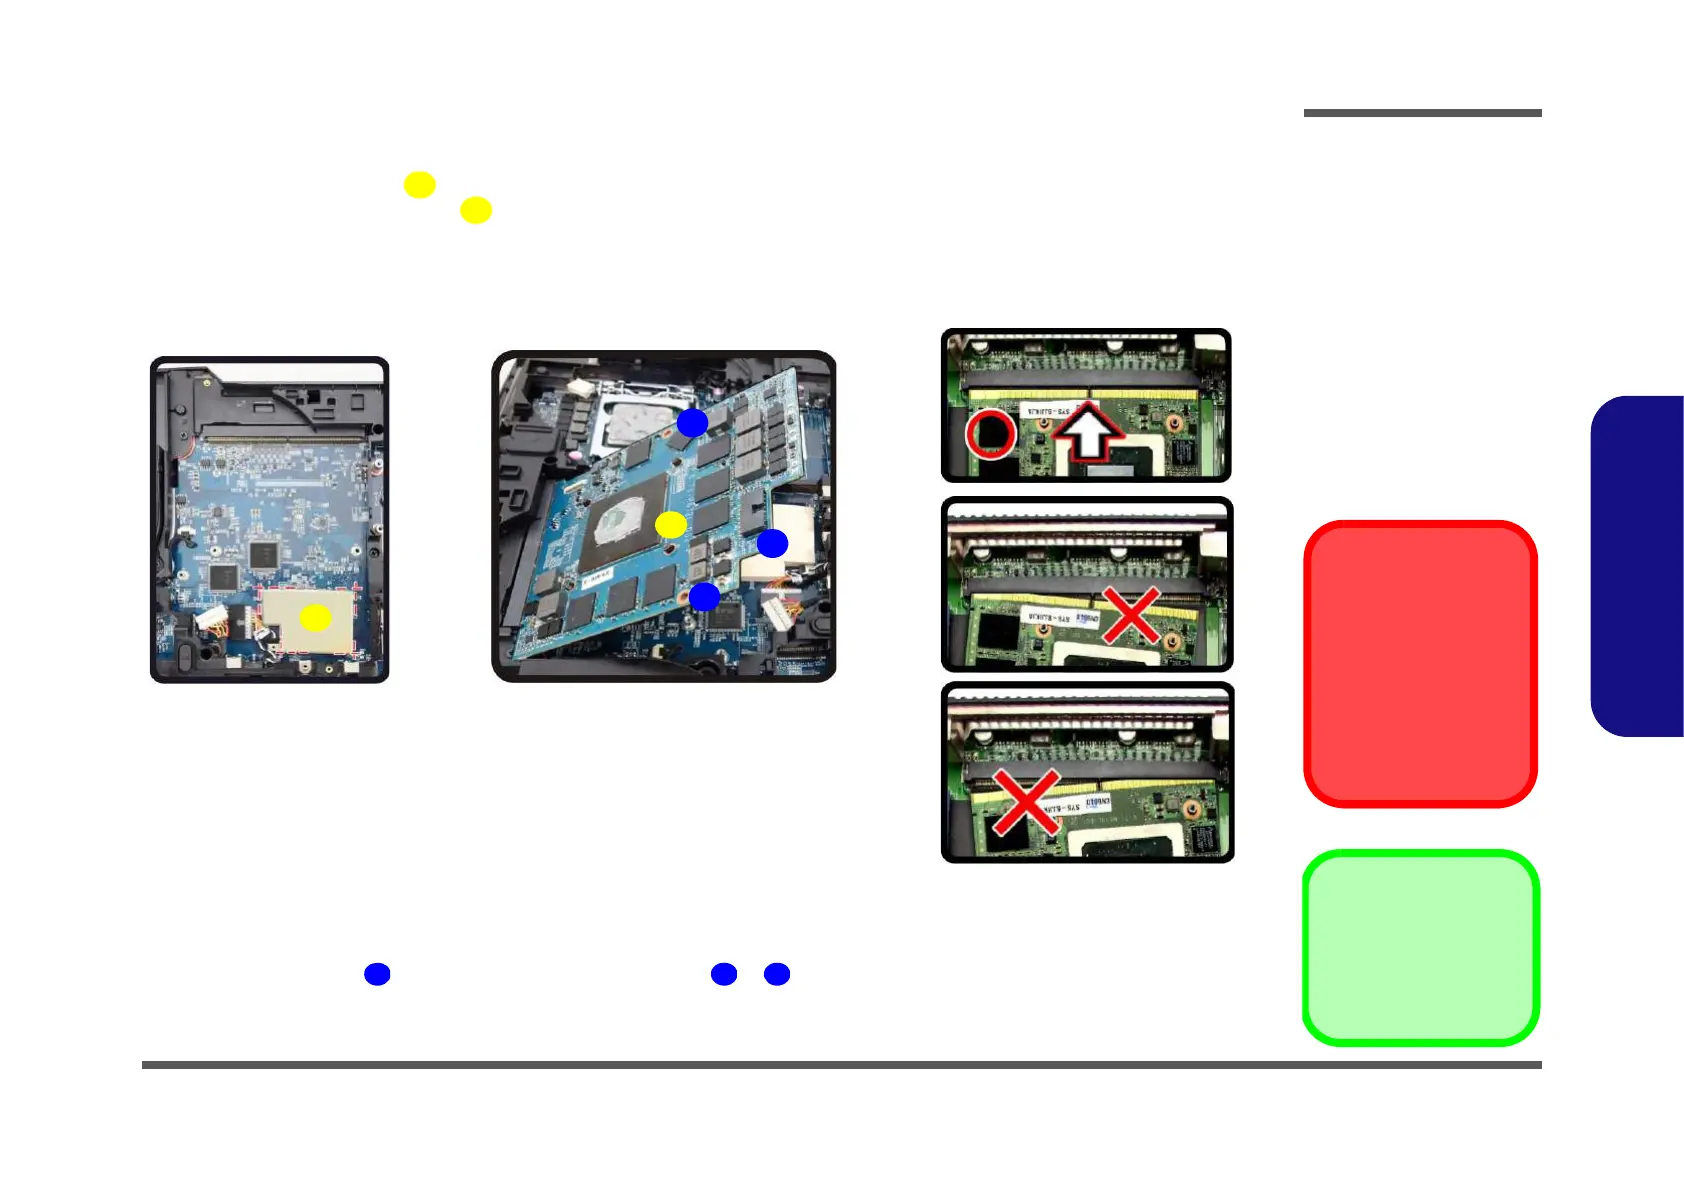
1. Place the thermal pad on the computer as shown (Figure 18e).
2. Prepare to fit the video card
into the slot by holding it at about a 30° angle (Figure 18f).
3. The card needs to be fully into the slot, and the video card and socket have a guide-key and pin which align to
allow the card to fit securely (Figure 18g)
.
4. Fit the connectors firmly into the socket, straight and evenly.
5. DO NOT attempt to push one end of the card in ahead of the other.
6. The card’s pin alignment will allow it to only fit one way. Make sure the module is seated as far into the socket
as it will go. DO NOT FORCE the card; it should fit without much pressure.
7. Connect the cable and secure the card with screws & (Figure 17 on page 2 - 22).
8.
Place the heat sink back on the card, and secure the screws in the order indicated in Figure 17 on page 2 - 22.
9.
Reinsert the component bay cover, and secure with the screws as indicated in Figure 11 on page 2 - 15.
Figure 18
Installing a New
Video Card
e. Insert the video card at
a 30 degree angle.
f. Fit the connectors
straight and even, and
secure the card with the
screws.
13. Video Card
14. Thermal Pad
•2 Screws
Caution
The heat sink, and video
card area in general,
contains parts which are
subject to high tempera-
tures. Allow the area
time to cool before re-
moving these parts.