Disassembly
Removing and Installing a Processor 2 - 9
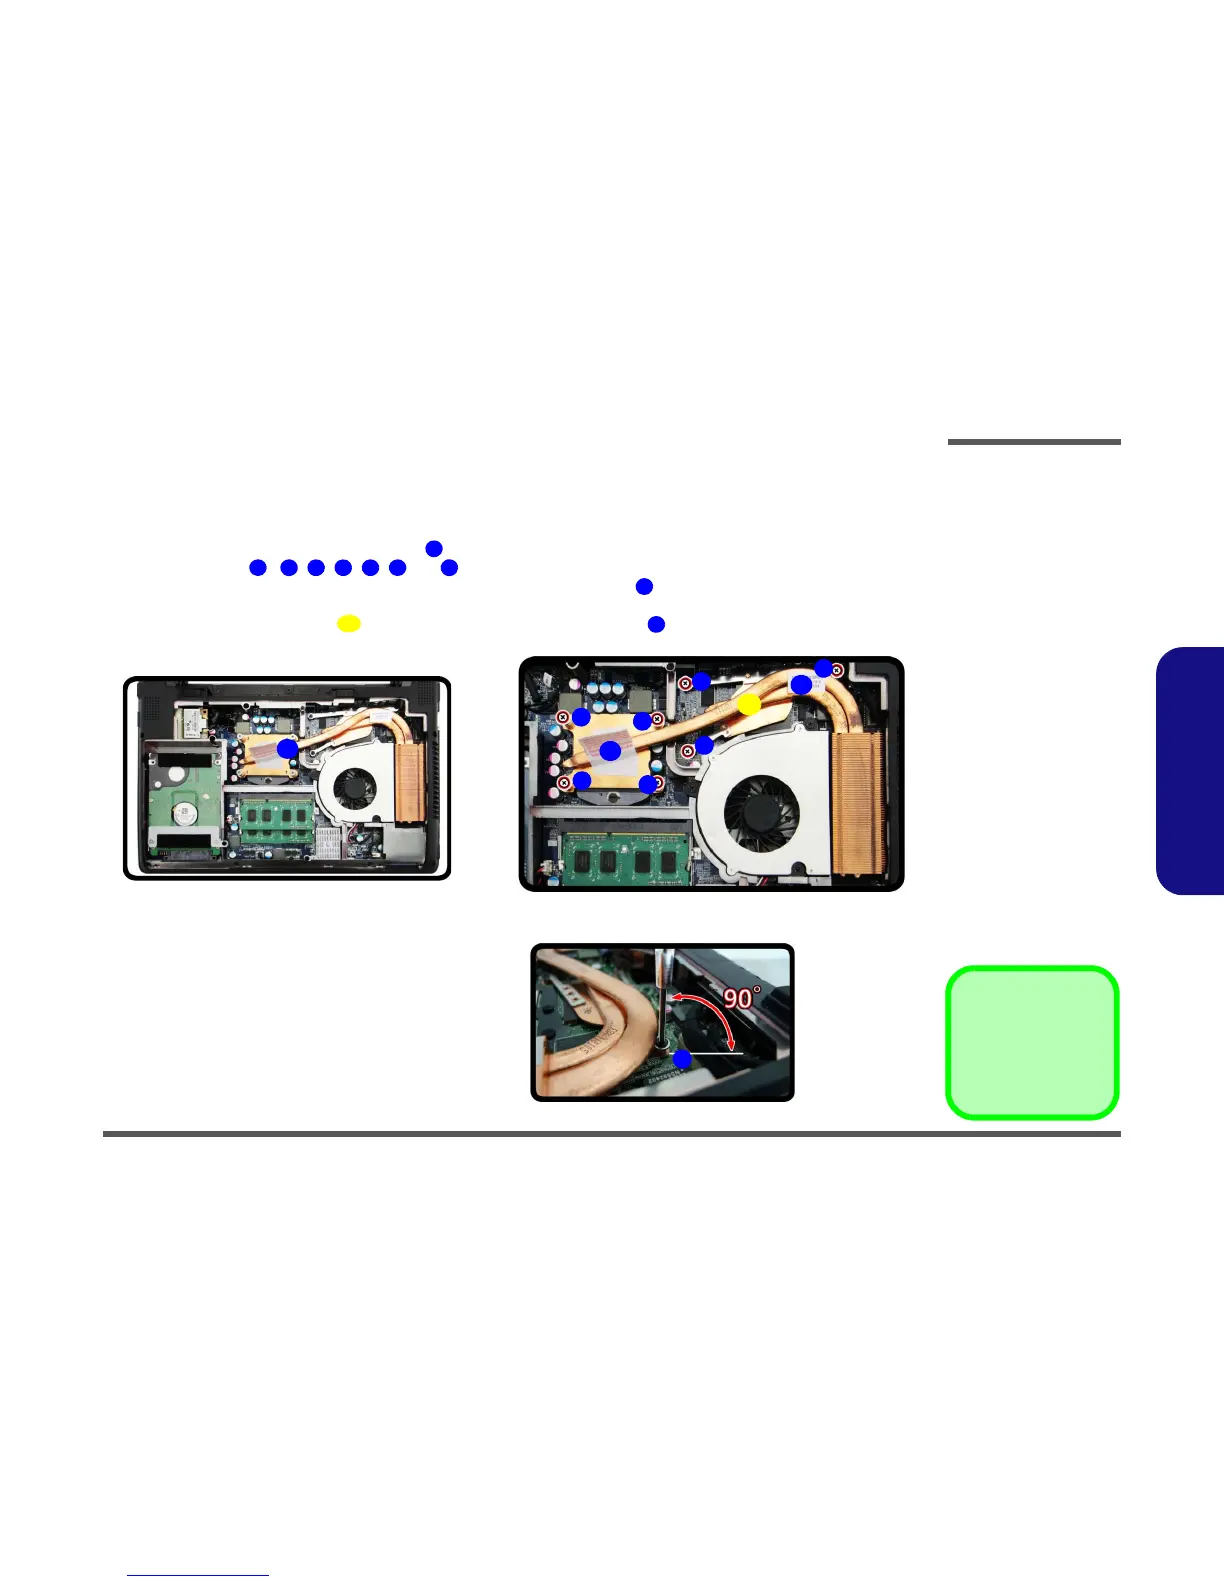
2.Disassembly
Removing and Installing a Processor
Processor Removal Procedure
1. Turn off the computer, remove the battery (page 2 - 5) and the component bay cover (page 2 - 12).
2. The CPU heat sink will be visible at point (Figure 5a) on the mainboard.
3. Remove screws
, , , , , and , the reverse order indicated on the label. *Note: Make sure that the
size of the screwdriver is below 4mm. when removing or tighting screw , and its position should be at a 90
degree angle from the mainboard (Figure 5b).wo tab
4. Carefully lift up the heat sink off the computer by pulling the two tabs .
h
 Loading...