Disassembly
2 - 10 Removing the Hard Disk Drive
2.Disassembly
Removing the Hard Disk Drive
The hard disk drive can be taken out to accommodate other 2.5" serial (SATA) hard disk drives with a height of 9.5mm
(h). Follow your operating system’s installation instructions, and install all necessary drivers and utilities (as outlined in
Chapter 4 of the User’s Manual) when setting up a new hard disk.
Hard Disk Upgrade Process
1. Turn off the computer, remove the battery (page 2 - 5) and remove the keyboard (page 2 - 9).
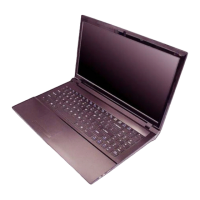
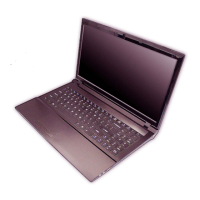
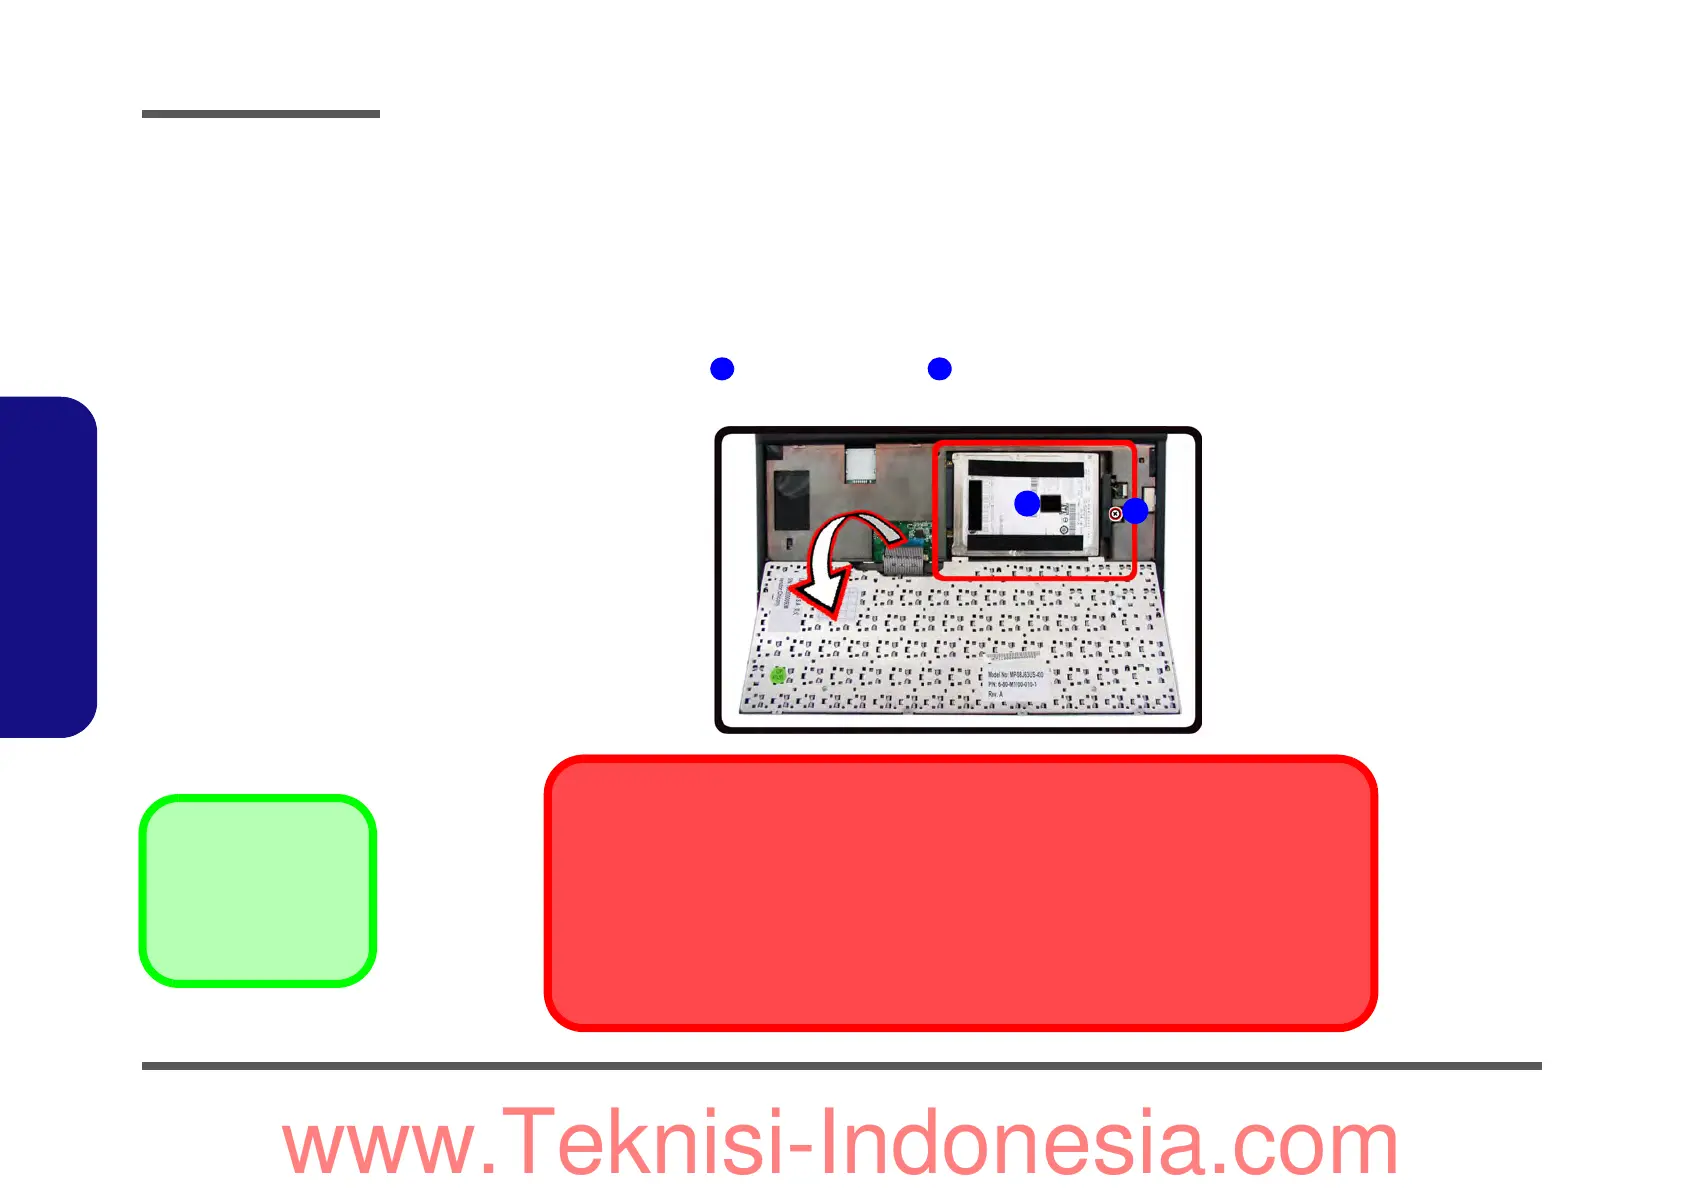
2. Locate the hard disk at point and remove screw (Figure 6a
).
Figure 6
HDD Assembly
Removal
a. Locate the hard disk and
remove the screw.
•1 Screw
1
a.
HDD System Warning
New HDD’s are blank. Before you begin make sure:
You have backed up any data you want to keep from your old HDD.
You have all the CD-ROMs and FDDs required to install your operating system and programs.
If you have access to the internet, download the latest application and hardware driver updates for
the operating system you plan to install. Copy these to a removable medium.
2
www.Teknisi-Indonesia.com
 Loading...