CLIMATEMASTER WATER-SOURCE HEAT PUMPS
Tranquility
®
Compact Belt Drive (TCH/V) Series
Rev.: July 25, 2017
18
ClimateMaster Water-Source Heat Pumps
TCH Field Conversion of Air Discharge
Overview -
Horizontal units can be fi eld converted
between straight (side) and back (end) discharge using
the instructions below.
Note: It is not possible to fi eld convert return air
between left or right return models due to the
necessity of refrigeration copper piping changes.
Preparation - Field conversion must be completed on
the ground. If the unit is already hung it should be taken
down for the fi eld conversion. Place in a well-lighted
area. Conversion should only be attempted by a qualifi ed
service technician.
Side to Back Discharge Conversion
1. Remove back panel and side access panel
2. Loosen 2 motor slide nuts, raise motor slide assembly
and remove belt and motor sheave.
3. Remove blower sheave. Remove motor bolts and
carefully remove motor.
4. Remove 2 motor clips and reattach to opposite side.
5. Unbolt (3 per side) complete housing assembly.
6. Rotate complete assembly into new position. Locate
over mounting holes in base, reattach using 3 bolts per
side.
7. Mount motor, motor sheave, blower sheave and belt.
Make sure wires are not pinched and not over sharp
edges. Adjust motor downward to tighten belt. Raise
or lower motor slide assembly with adjusting bolt
and retighten 2 slide nuts. Check for correct tension
(See Tensioning V-Belt Drives page). Rewire motor (at
contactor) for correct rotation. Spin blower wheel to
ensure wheel is not obstructed.
8. Replace 2 panels.
Back to Side Discharge Conversion - If the discharge is
changed from back to side, use above instruction noting
that illustrations will be reversed.
Left vs. Right Return - It is not possible to fi eld convert
return air between left or right return models due to the
necessity of refrigeration copper piping changes. However,
the conversion process of side to back or back to side
discharge for either right or left return confi guration is
the same. In some cases, it may be possible to rotate the
entire unit 180 degrees if the return air connection needs
to be on the opposite side. Note that rotating the unit will
move the piping to the other end of the unit.
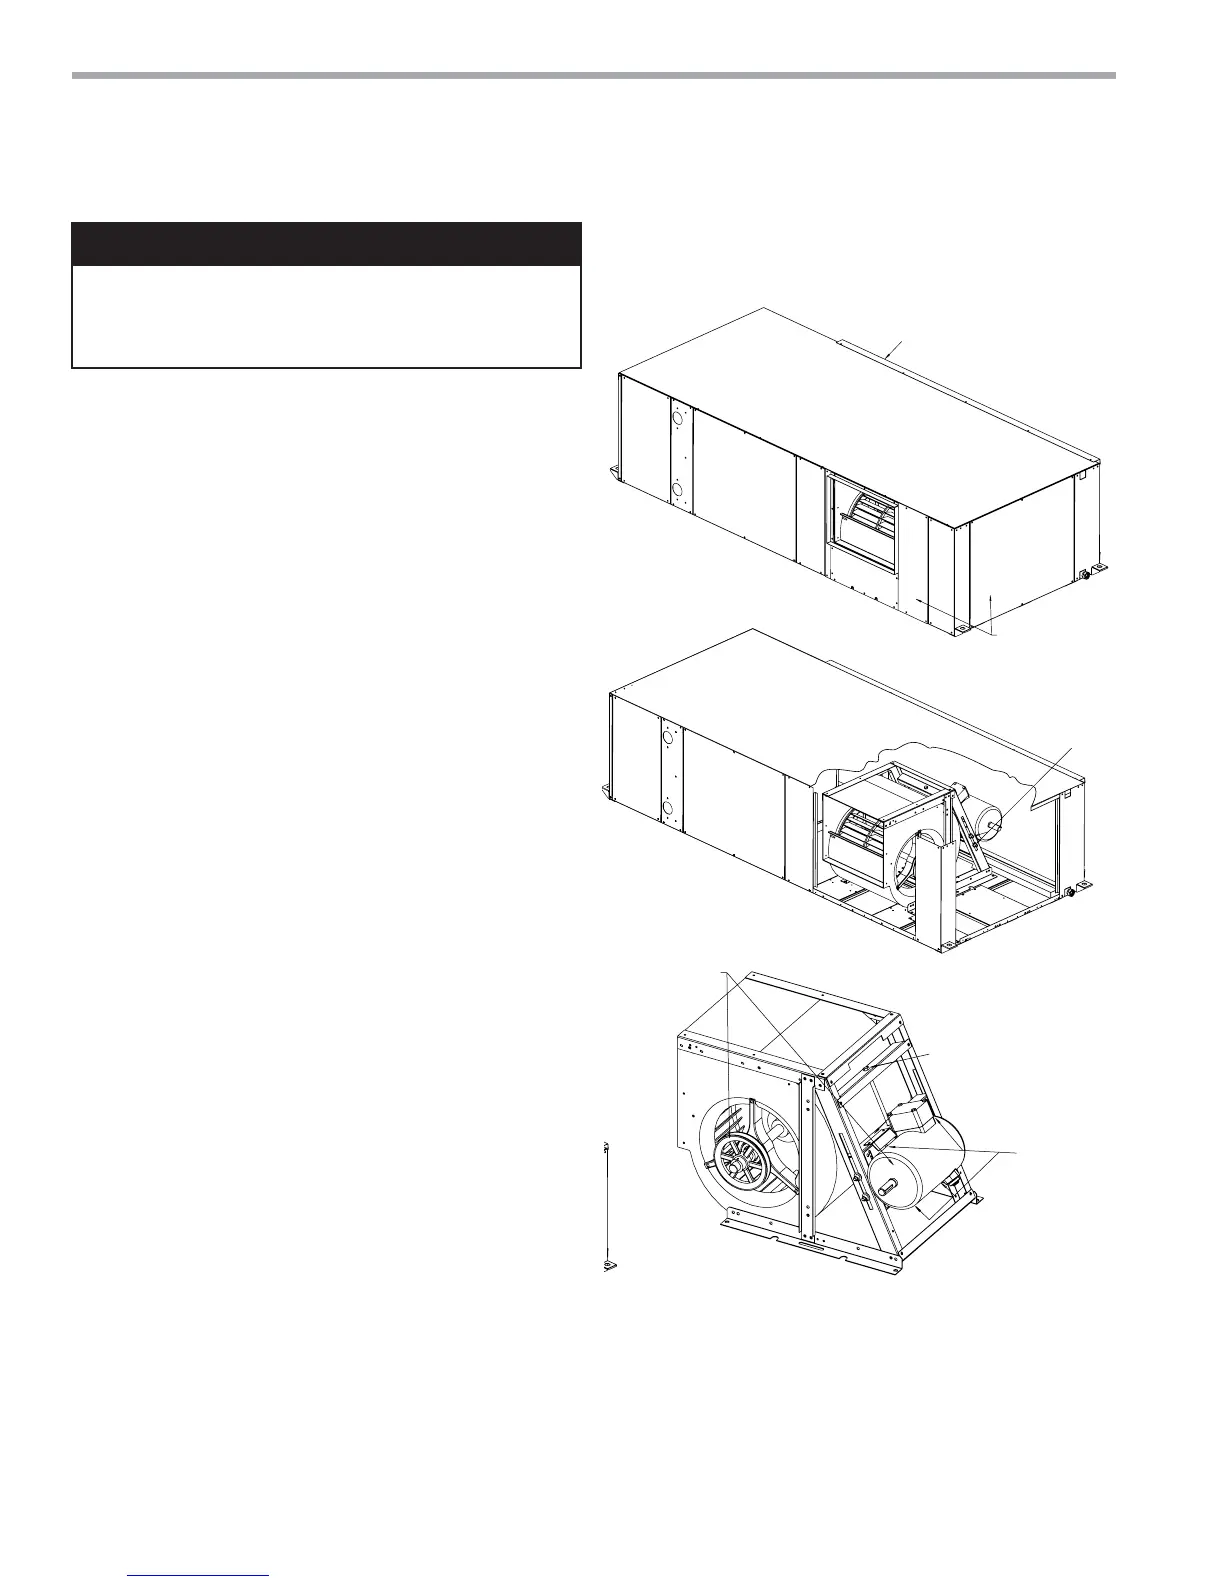
WARNING!
Step 2
Loosen 2 motor slide nuts,
raise slide assembly, remove
Step 1
R
a
Remove blower panel
and access panel
Return air
Front
Figure 4: Left Return Side Discharge to Back
Figure 4 Continued on Following Page
Step 3
Remove motor
and blower
Adjusting bolt -
used to raise or
lower motor slide
Remove 4
motor bolts
WARNING! To avoid possible injury or death due to
electrical shock, open the power supply disconnect switch
and secure it in an open position during installation or
conversion.