11
Installation
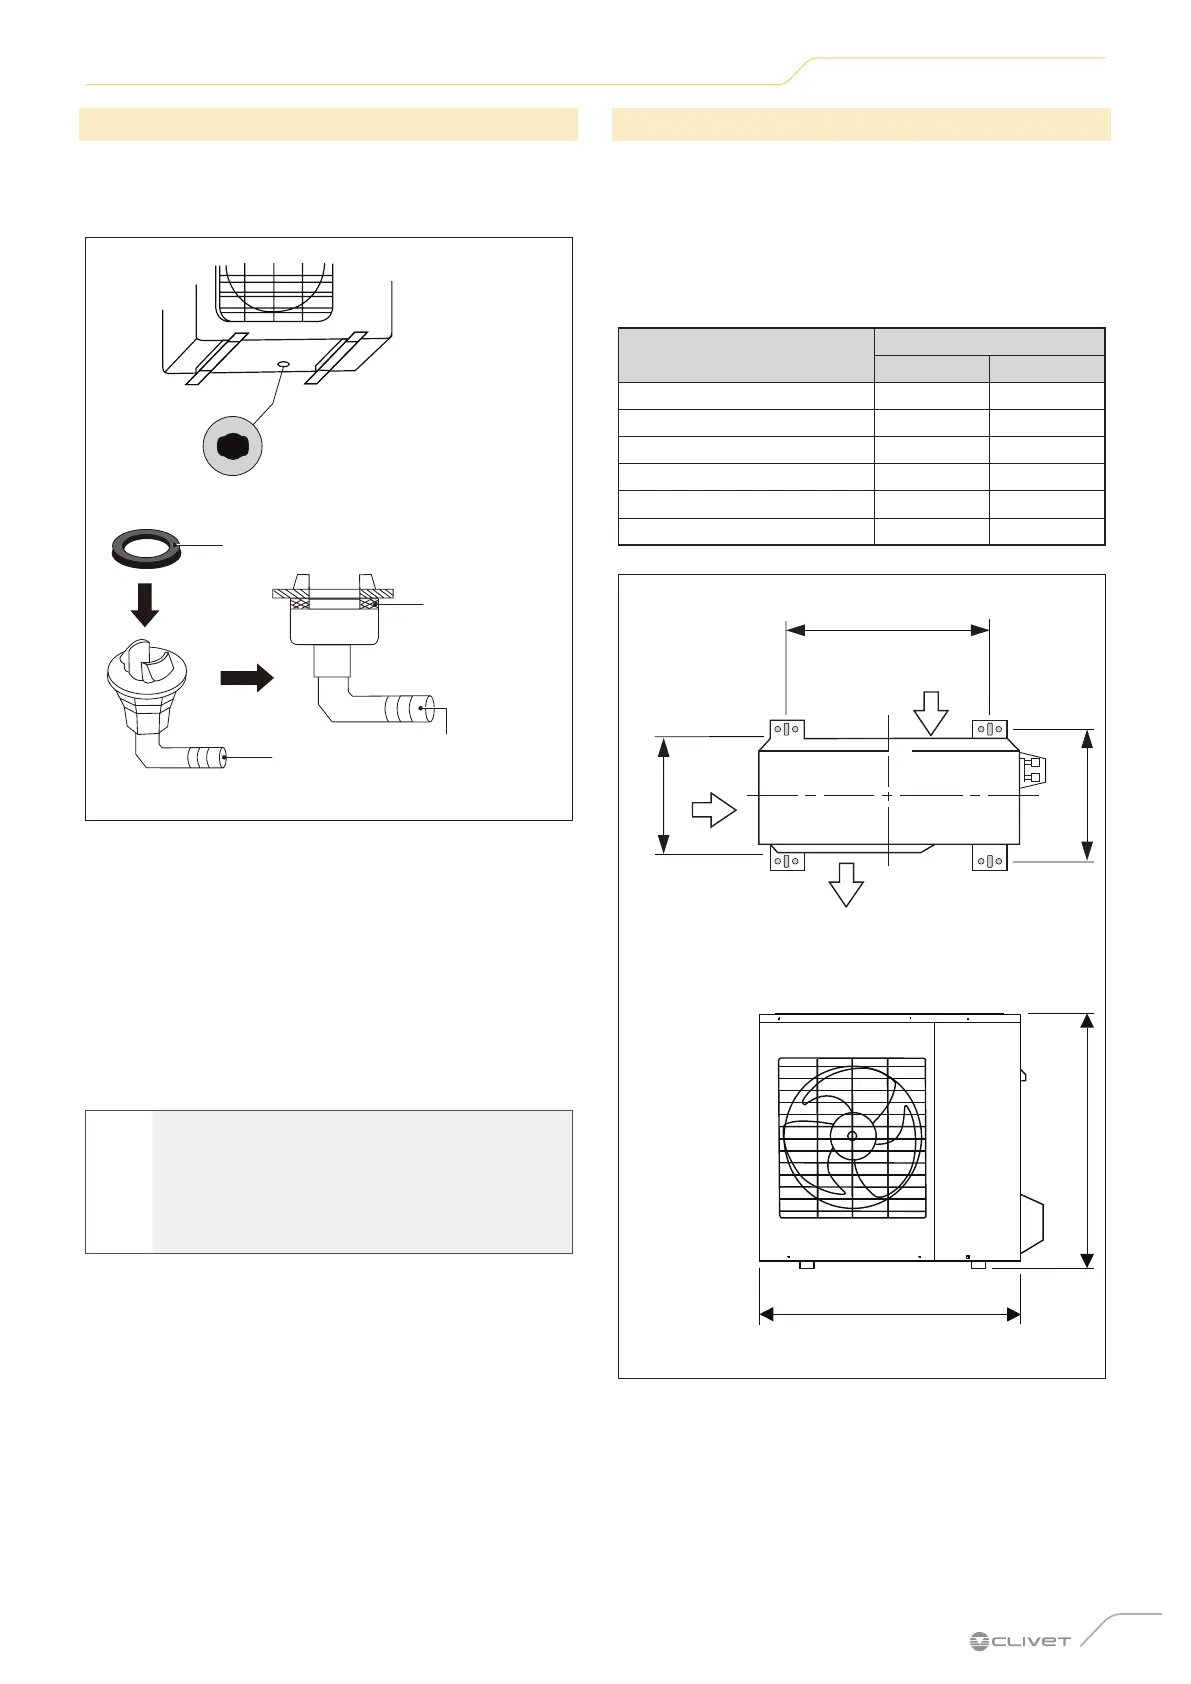
2.4.2 Installation of the drain connection
Units with heat pump require a drain connection. Before
fixing the outdoor unit in place, you must install the drain
fitting at the base of the unit.
Hole at the base panel
of the outdoor unit
Exhaust fitting
Gasket
Gasket
Fig. 5
1 Apply the rubber gasket to the end of the drain fitting
to be connected to the outdoor unit.
2 Insert the drain fitting into the hole at the base panel
of the unit.
3 From the position observing the front of the unit, turn
the drain fitting 90° until it clicks into place.
4 Connect a drainage hose extension (not included) to
the drain fitting to divert water from the unit during
heating mode operation.
l
WARNING
In cold climates, check that the drainage pipe
is as vertical as possible to ensure proper
water flow. If the water flows out too slowly, it
can freeze in the pipe and get stuck in the unit.
2.4.3 Mounting the outdoor unit
The outdoor unit can be fixed to the floor or to a wall
mounted bracket.
Below are the dierent sizes of the outdoor units and the
distances between their mounting feet.
Prepare the installation base of the unit according to the
dimensions below.
Outdoor unit
27M 35M
Width (mm) 765 765
Depth (mm) 333 333
Height (mm) 555 555
Weight (kg) 26,4 26,4
Distance "A" (mm) 452 452
Distance "B" (mm) 286 286
B
Larghezza
Uscita aria
Ingresso aria
Ingresso
aria
Altezza
Air inlet
Air inlet
Air outlet
Width
Height
Fig. 6
If the unit is to be installed on the floor or on a concrete
mounting platform, proceed as follows:
1 Mark the positions of the four expansion bolts
according to the measurements shown in the
mounting measurements diagram.
2 Drill the holes for the expansion anchors.
3 Clean the holes from concrete dust.