Page 31For technical questions, please call 1-888-866-5797.Item 63890
Advanced
Note: This menu allows you to configure
automatic system maintenance, load factory
defaults, update the firmware settings, etc.
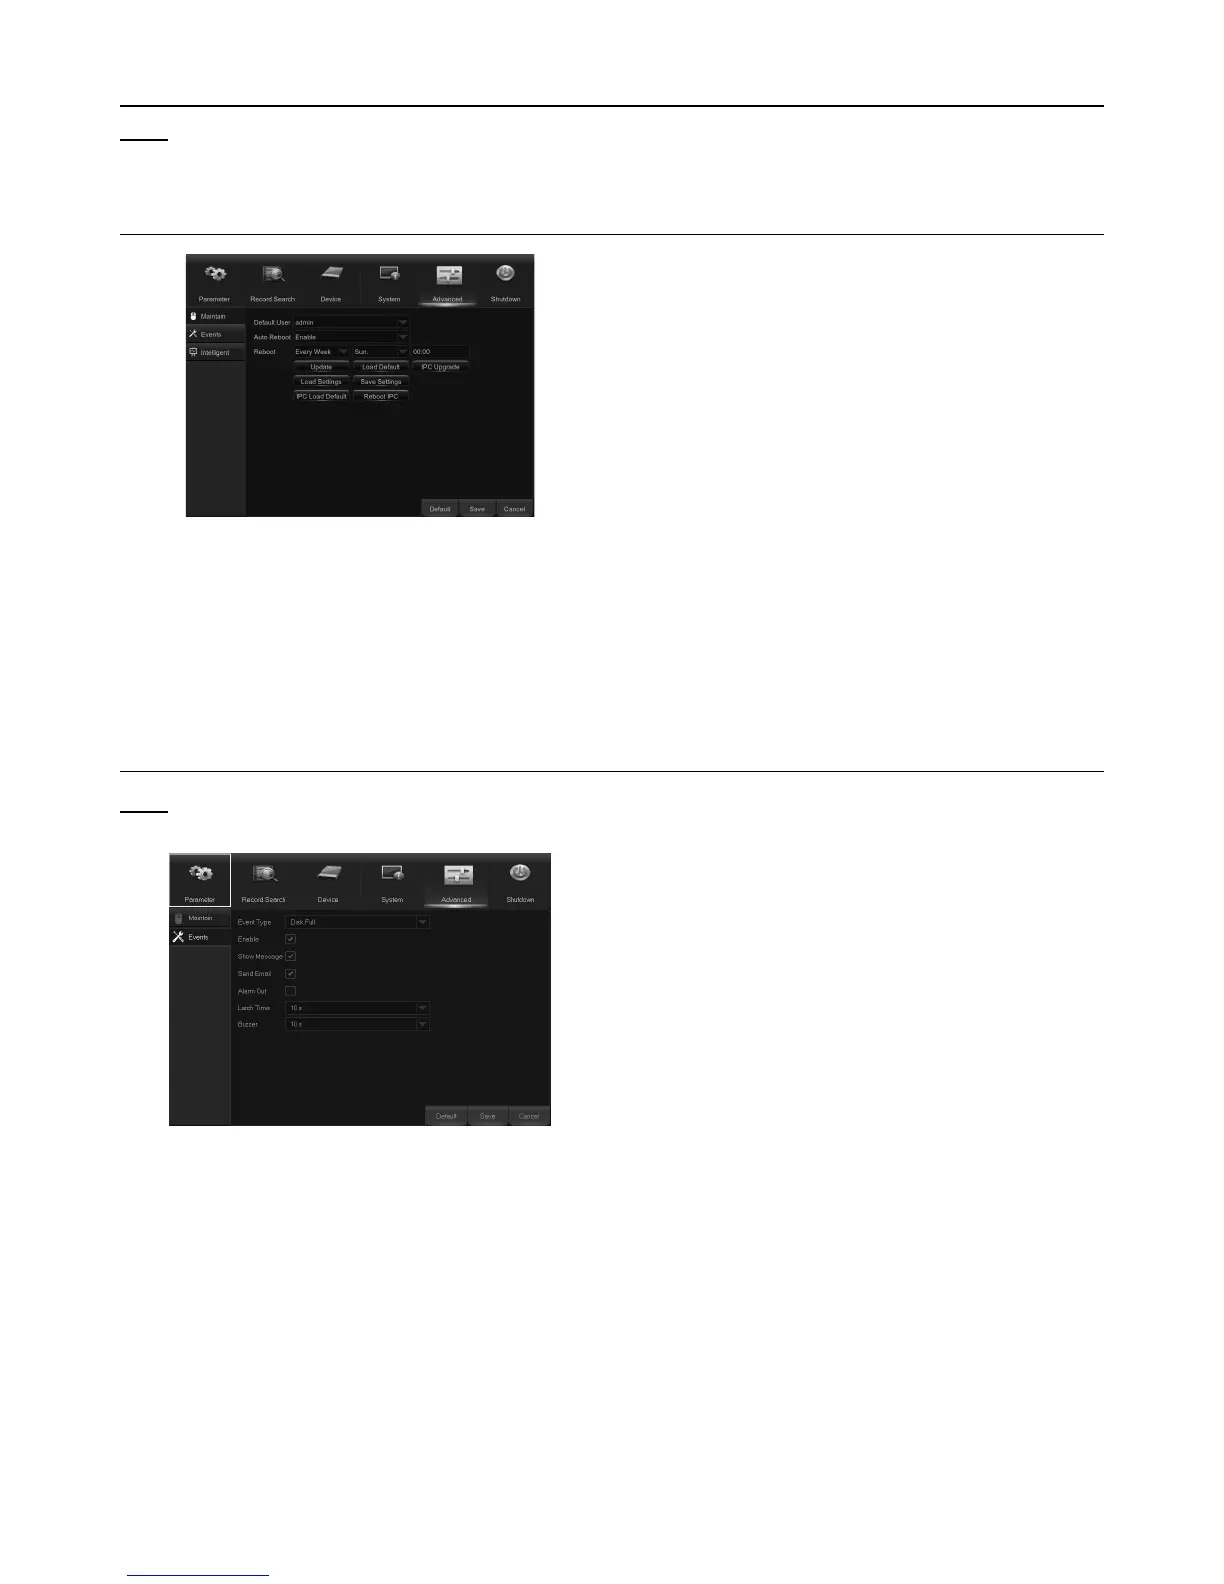
Maintain
Figure BM
Default User: If you want to login to the DVR
automatically for live view after each startup, then
only an administrator user account
can be set for auto login.
Auto Reboot: Set Enable to reboot
the DVR based on a schedule.
Reboot: Set the rebooting schedule
based on day, week, or month.
Update: Click to load the update file and then
upgrade the firmware. DO NOT power off
the DVR or remove the USB during the upgrading.
Load Settings: Select this option to import the
setting that you have saved earlier, using the
Save Settings function.
Load Default: Use this feature to restore the
factory default settings of the DVR. It is
recommended to load defaults for all
options, after upgrading the firmware.
Save Settings: Select this option to save the DVR
current settings, such as the video recording
settings, network configurations, etc. to the USB device.
Events
Note: This menu allows you to set the type of events
that you want the DVR to notify you about.
Figure BN
Event Type: Select the event type. Options are:
Disk Full: When HDD is full.
Disk Error: If HDD is not detected properly.
Video Loss: If camera is not detected properly.
Enable: Check the box to enable
the monitoring of the event.
Show Message: Check the box to display a
message on the screen when Disk Full, Disk
Error, or Video Loss event happens.
Send Email: Let the DVR to send you an
auto-email when an event occurs.
Alarm Out: Click to enable the external alarm
device to sound. This is an optional function.
Latch Time: Determine how long the external sensor
alarm device to sound (10s, 20s, 40s, 60s).
Buzzer: Set the buzzer duration when the event occurs
(Off/10s/20s/40s/60s). To disable buzzer, select OFF.