Page 13For technical questions, please call 1-888-866-5797.Item 63890
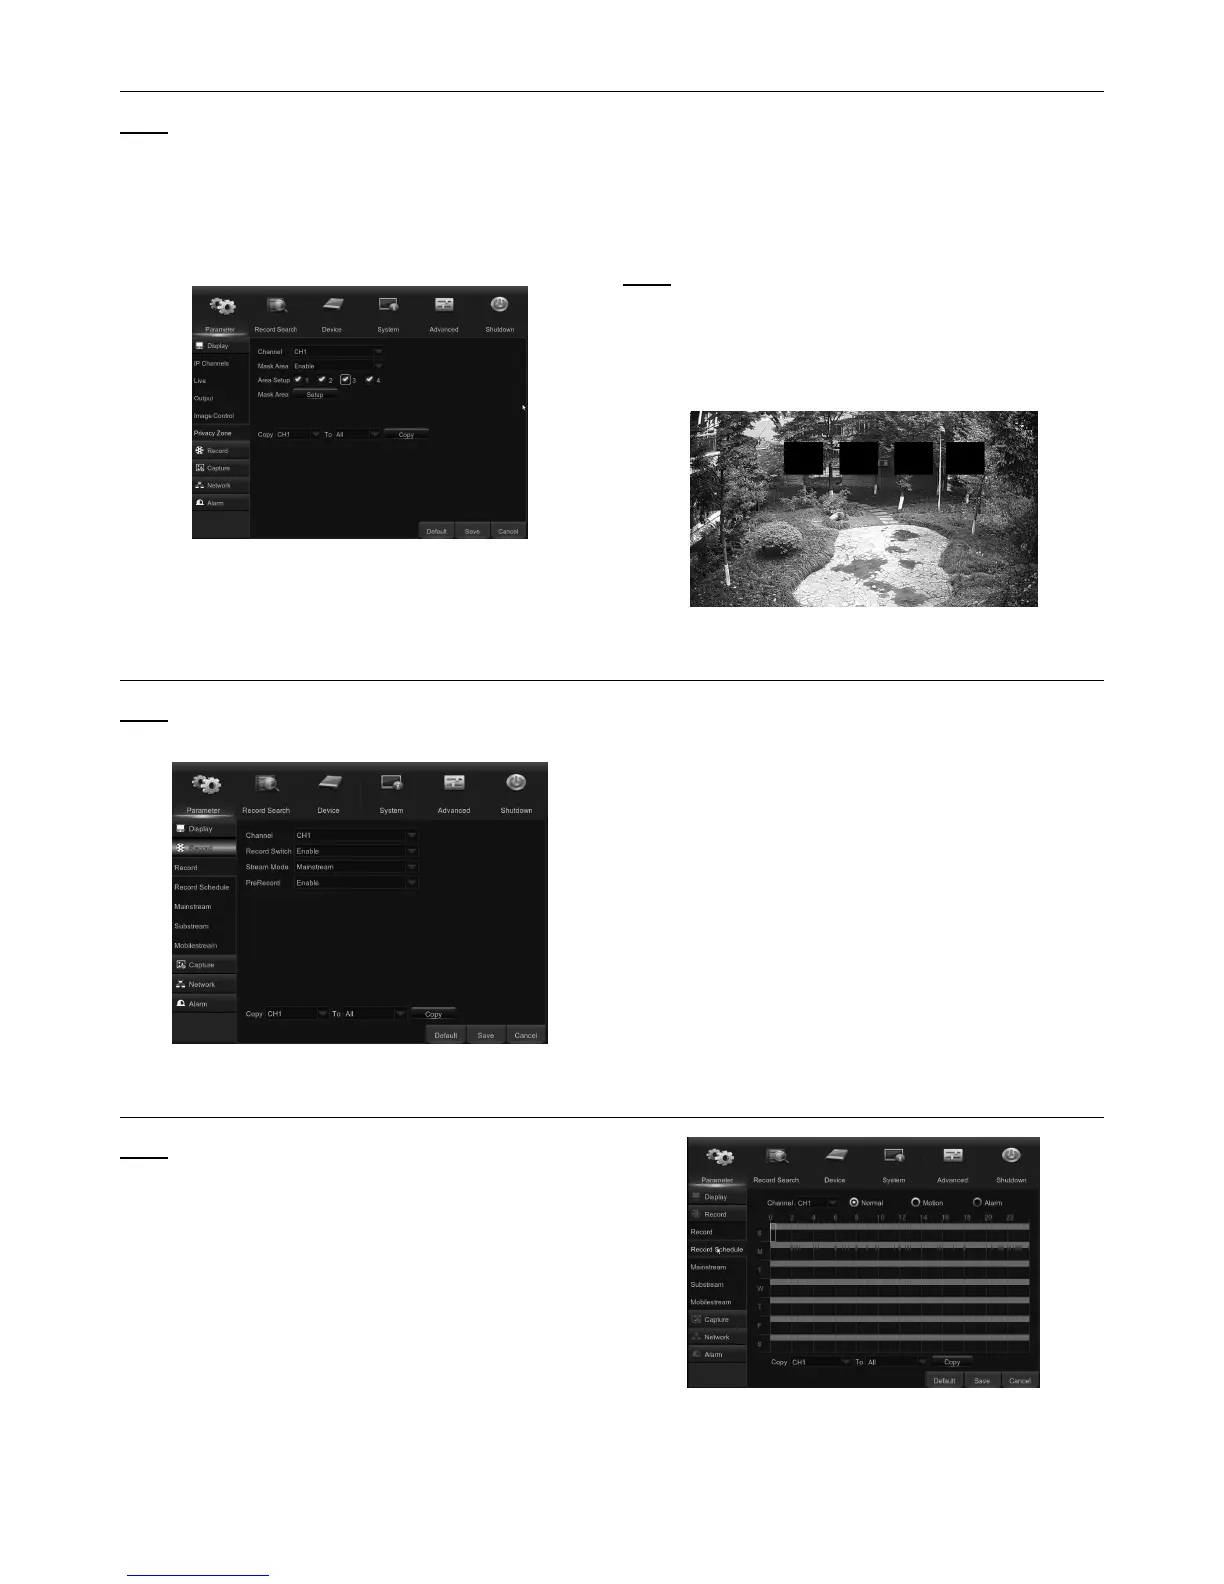
Private Zone
Note: This menu allows you to create Privacy
Zone(s) if you want to partially cover up part of the
image. You can create up to four privacy zones in
any size and location on the channel view. These
zone(s) appear as “red box rectangle areas.” Just
click inside the default red-lined rectangle and drag
it where you want to create a privacy zone.
Figure M
1. Select the Channel where you want to set privacy
zone(s), then set Mask Area to Enable. Decide
how many privacy areas you want to set and
check the area(s) in Area Setup, and click Setup
to open the channel in full screen mode and
start marking the privacy zones See Figure Q.
Note: Depending on the number of areas you have
chosen in Area Setup, you will see areas covered with
black rectangles on the channel view. See Figure N.
2. When you have finished marking the areas,
right-click to return to the Main Menu.
Figure N
Record
Note: This menu allows you to configure
the channel recording parameters.
Figure O
Channel: Select the channel to set
its recording parameters.
Record Switch: Enable in order to allow
the video to be recorded to the HDD.
Stream Mode: Choose the recording resolution. The
available options are Mainstream and Substream.
PreRecord: If this option is enabled, the DVR starts
recording a few seconds before an event occurs. Use
this option if your primary recording type is motion-based.
Record Schedule
Note: This menu allows you to specify when the DVR
records video and defines the recording mode for
each channel. The recording schedule alternates
between Normal (continuous) recording, Motion
recording, and Alarm recording. To set the recording
mode, click first on the mode button (Normal, Motion,
or Alarm), then drag the cursor to mark the slots. The
recording schedule is valid only for one channel. If
you want to use the same recording schedule for
other channels, use the Copy To function.
Figure P
Channel: Select the channel to set
its recording parameters.