Victory 3_en.pdf http://en.codelight.com.cn
26
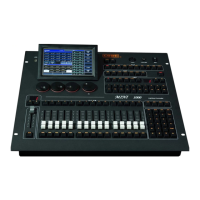
5> The record mode defaults in ‘Fixture’. Press [Rec. Mode] if you want to
record by another mode;
Record Mode = Fixture ----- all attributes of fixtures will be saved.
Record Mode = Channel ----- only the changed attributes of fixtures will be
saved. This function makes fixtures in different attributes can be run
synchronously.
Record Mode = Stage ----- all fixtures in stage (all the patched fixtures) will
be saved whatever they are being selected.
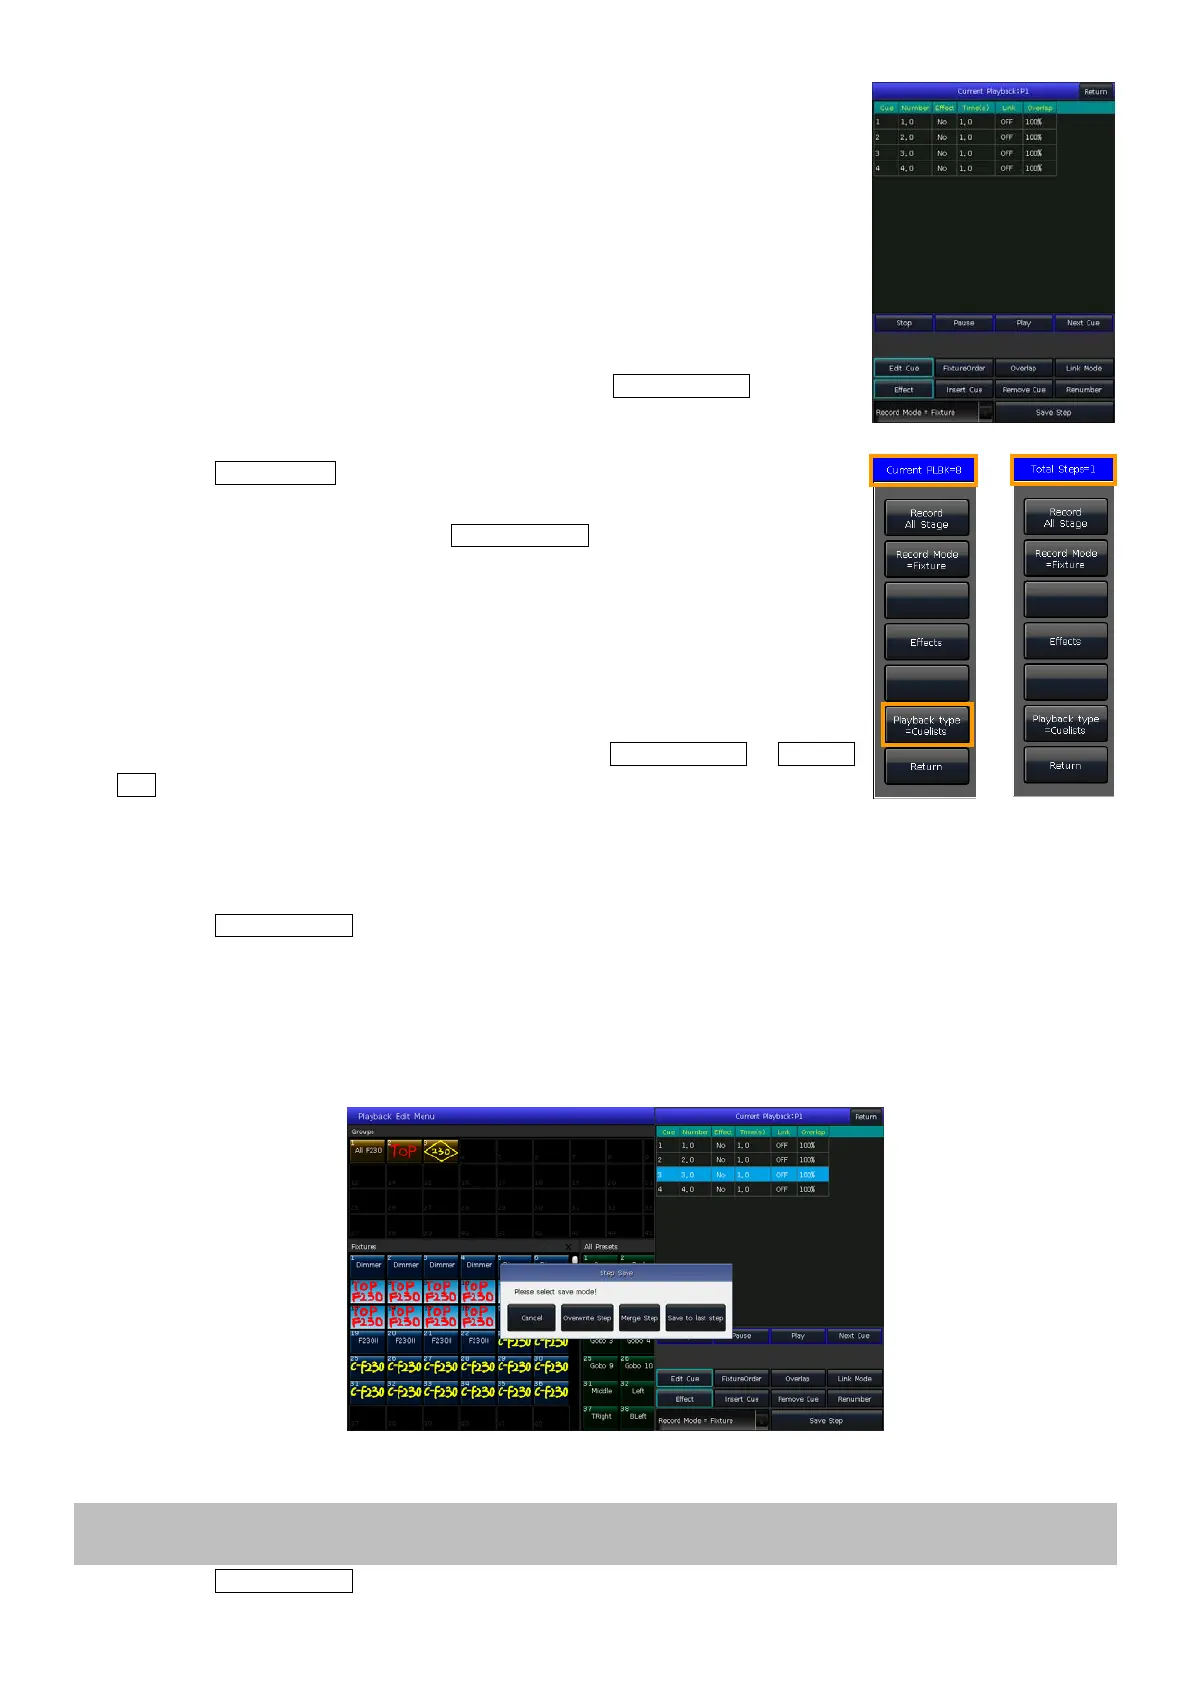
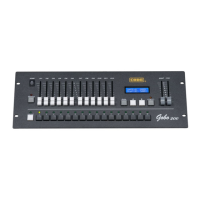
6> Press the playback key or press [Save Step] to save the step;
7> Repeat the steps from 3 to 6 until the end. Press Edit Playback to exit.
Besides, you can also create the Cue-lists playback under cue mode.
1> Press Save to Cue in ‘LIVE SHOW’;
2> Select record and run mode you want, select as [Playback type=Cuelists];
(At the moment, the indicator led of Edit Playback will flash.)
3> Select the fixtures and set a scene by the attribute keys and wheels;
4> Select a playback key for the Cue-lists. The top of the menu bar on the touch
screen will display as ‘Current PLBK=n’ (n means the number of playback fader);
5> Set a scene by the attribute keys and wheels;
6> Press again the playback key which indicator led keeping on to record, the top
of the menu bar on the touch screen will display as ‘Total Steps=1’;
7> Repeat the steps from 3 to 6 until the end. Press Edit Playback or Save to
Cue to exit when finished.
7.4.2. Edit Cue-lists
7.4.2.1. Edit Cue-lists Steps
1> Press Edit Playback in ‘LIVE SHOW’;
2> Select a Cue-lists to be edited;
3> Select a cue from the Cue-lists;
4> Select [Edit Cue], the scene will be loaded with the used fixtures;
5> You can edit the scene directly or select other fixtures for a new scene;
6> Press [Save Step];
7> Select [Overwrite Step] to take place the old step; Select [Merge Step] can add it into the original step;
Select [Save to last step] will save as a new step;
Note: If the newly added scene contains the fixtures used in the original cue, those fixtures will be covered when
using the merge function.
8> Press Edit Playback to quit when finished.