4
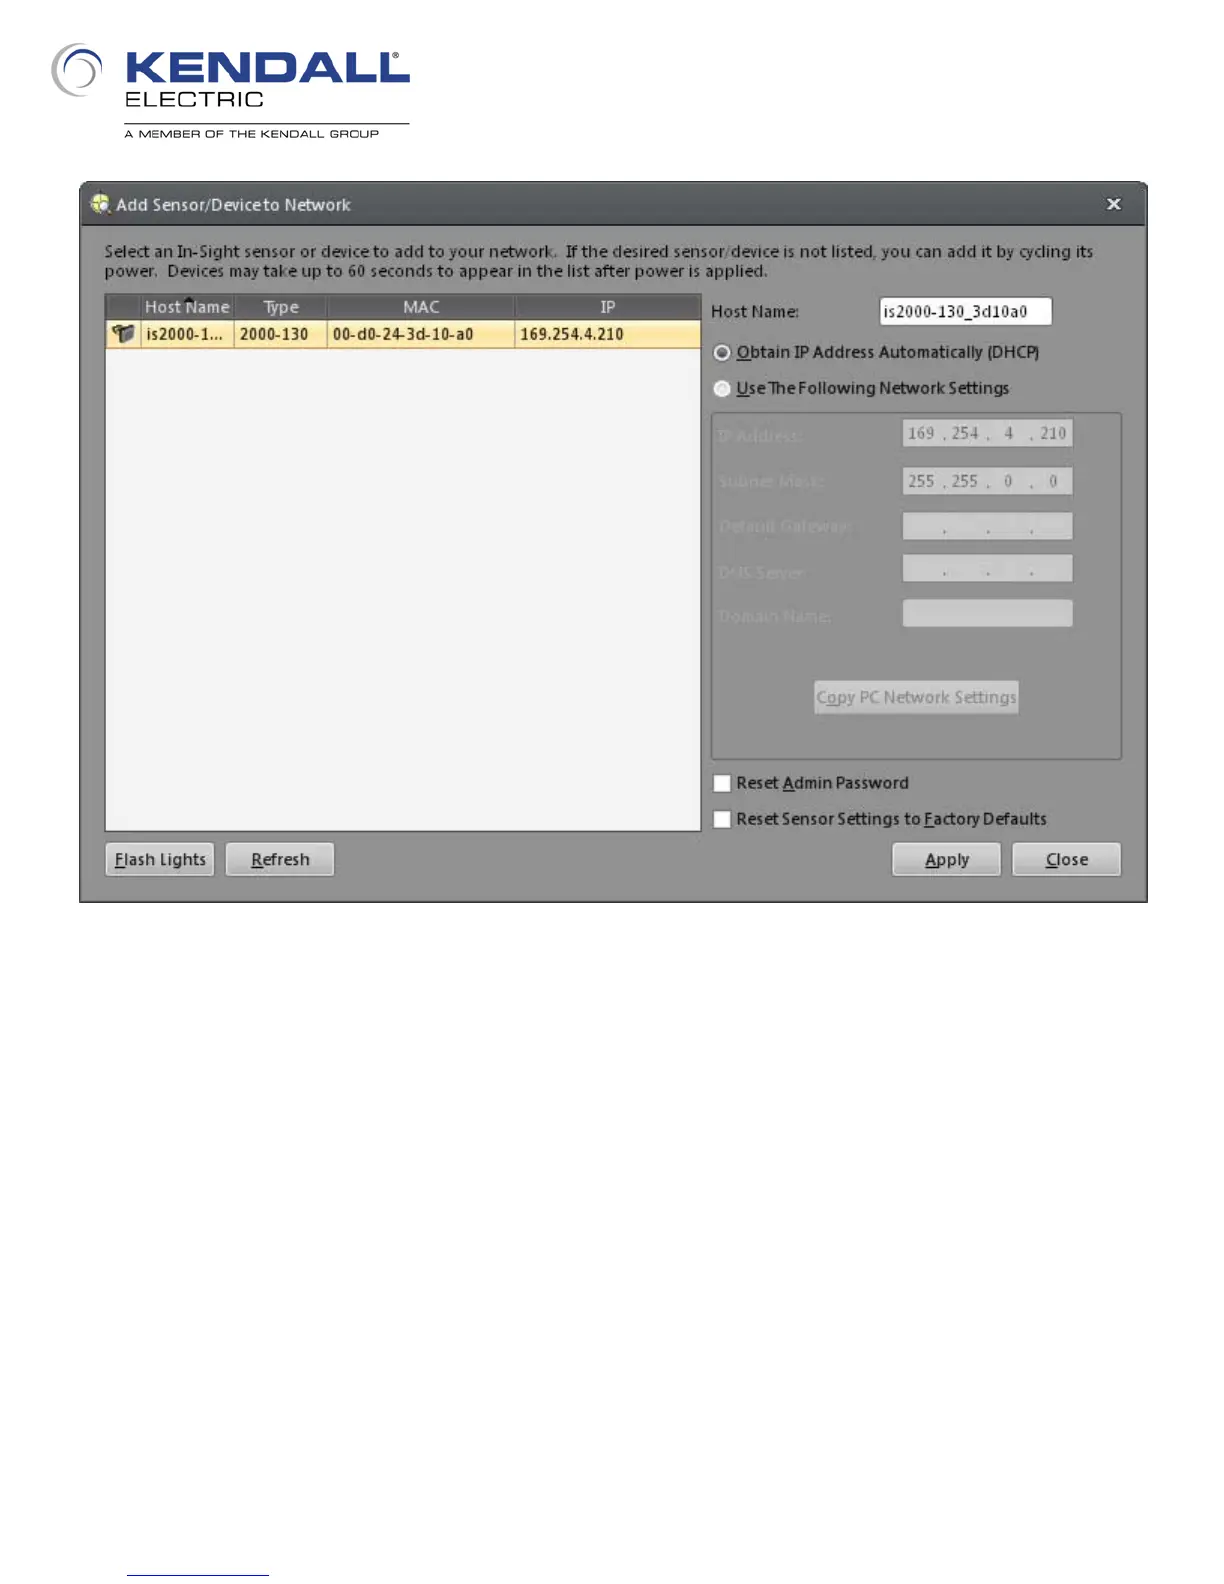
The connected In-Sight 2000 should have been discovered and displayed in the list of devices.
Click on the line that shows the unit to select it. From this dialog you can change the name of the
unit if you desire. Notice that at this point the setting of the IP address is selected as DHCP. Click
on the radio button next to Use The Following Network Settings. When you do this the entry fields
and button below it become active (no longer grayed out). If you know the subnet of your computer
and what address you would like to use and the subnet mask you can enter those into the
appropriate fields. An easier method is to click the Copy PC Network Settings button. This will use
the settings of the Ethernet network adapter in your computer to assign an appropriate IP address
and the subnet mask to your In-Sight 2000. This assumes that your computers Ethernet network
adapter is not set to DHCP.
From this dialog you can also reset the administrative logon password (if it had been set and
forgotten) and reset the entire system to factory defaults; all system settings except for the IP
address will be reset.
Fig. 3: Add Sensor/Device to Network
 Loading...