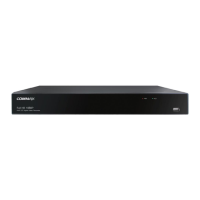
5. Record Schedule
Go to “Main Menu” → “Parameter” → “Record” → “Record Schedule” to get the Record Schedule
interface to make record schedule for DVR, as shown in Fig. 5-9.
Fig. 5-9
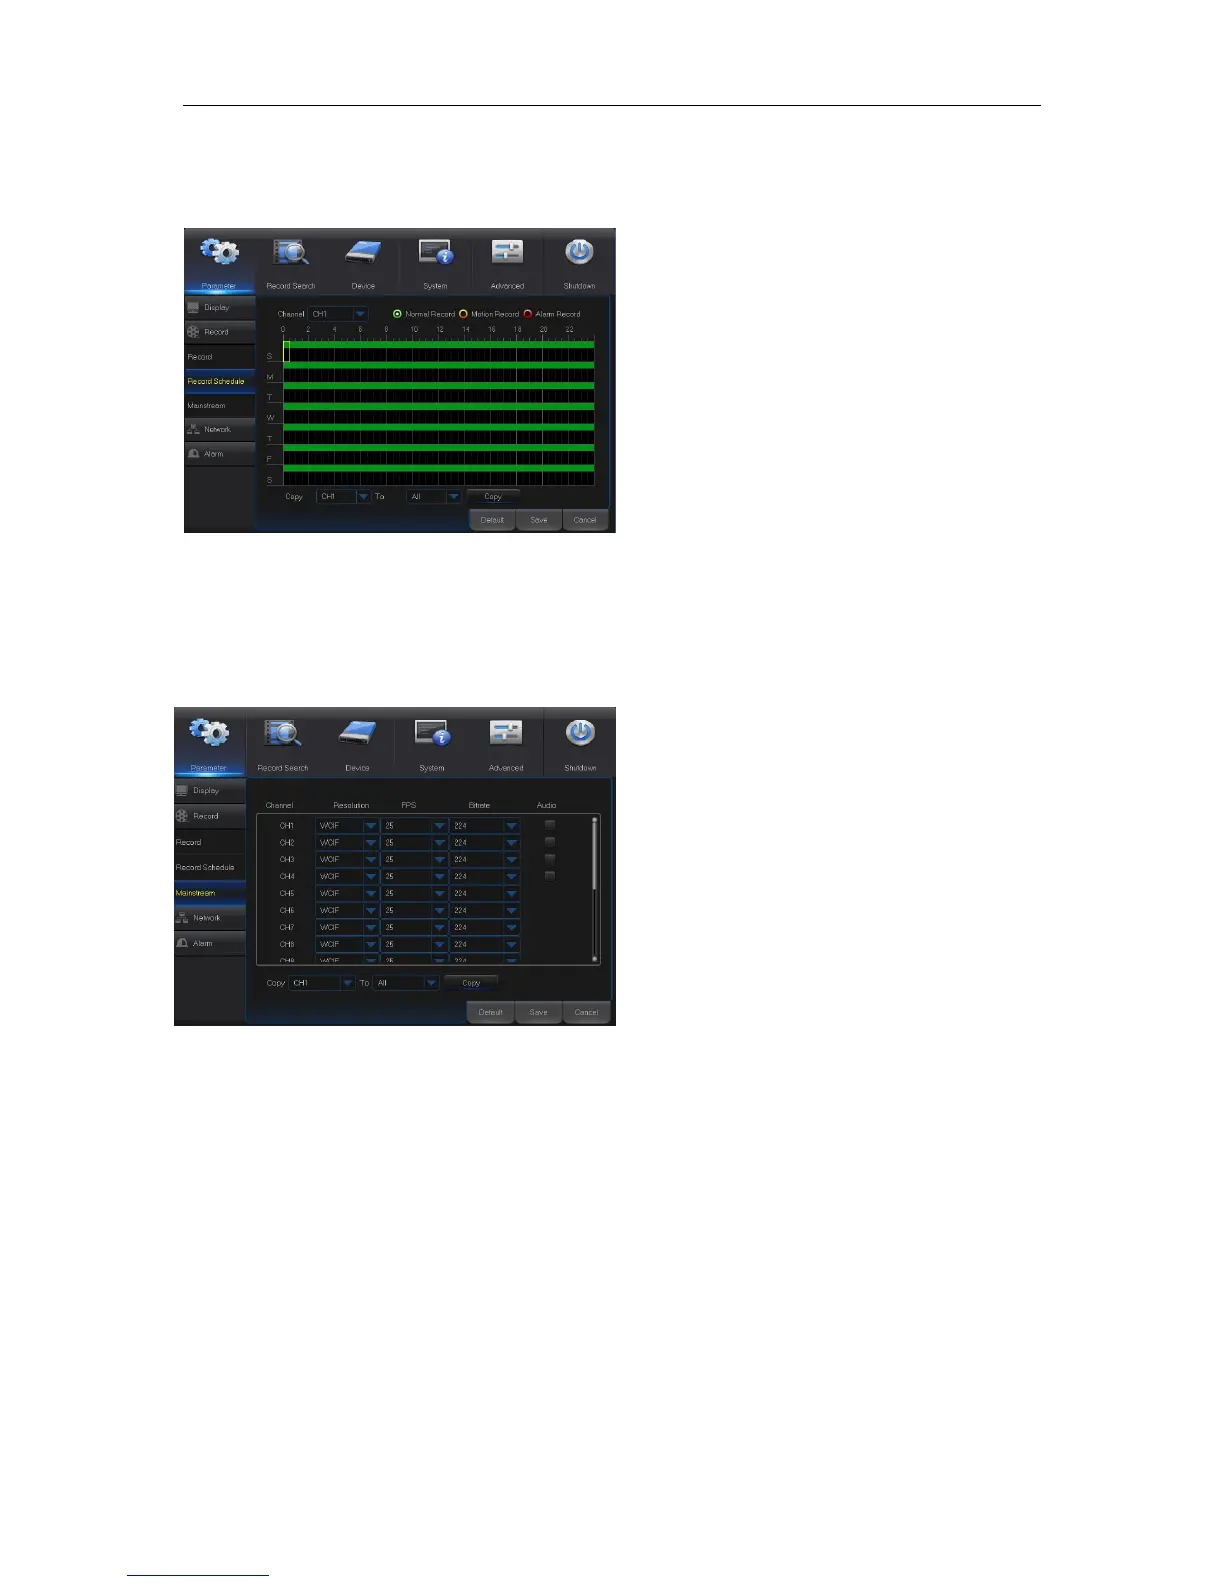
6. Mainstream
Go to “Menu” → “Parameter” → “Record” → “Mainstream” to get the menu interface, as shown in
Fig. 5-10.
Fig. 5-10
Select the channel and the date to be set. One
week’s schedule can be set.
The record schedule of the current channel can
be copied to any other channel or all channels.
Note:
1. In the Record menu and Record Search
menu, No Color stands for no record;
2. “Green” stands for normal record and
“yellow” stands for motion record
3. “Red” stands for alarm record,
Mode: Support 960H, 720p and 1080p
recording resolution.
FPS: Max. 15FPS in case of 1080p camera,
and Max. 30FPS in case of 720p or analog
camera
Bitrate: Bitrate for local storage. User may
select in the drop down list.
Audio: Check the box to record channel
audio during recording and there will be
audio output during playing record.
Un-check the box to disable recording audio
and there will be no audio output during
playing the record
 Loading...