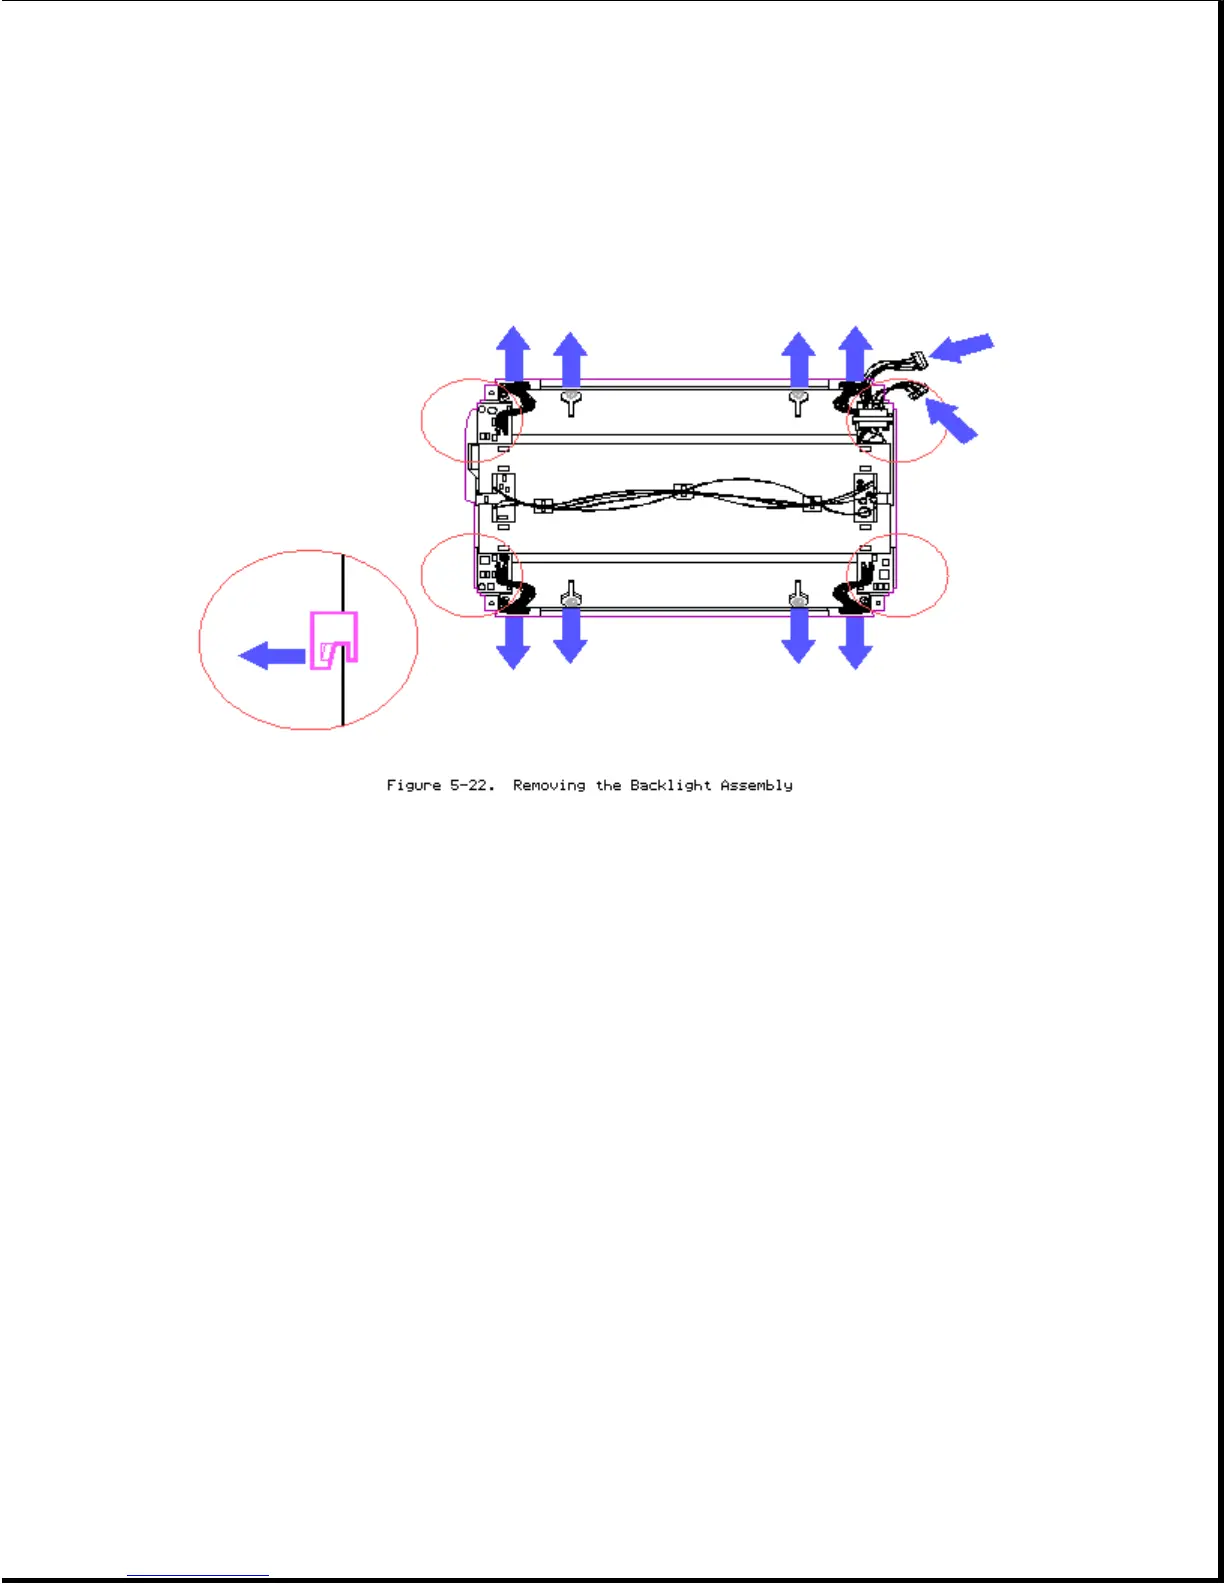
4. Place the display assembly screen down on a soft, clean surface.
5. Using a Phillips screwdriver, remove the four screws securing the display
assembly to the backlight assembly (Figure 5-22).
6. Carefully release the display assembly cables from the four corner
brackets (Figure 5-22).
7. Release the five tabs securing the backlight assembly to the display
assembly (Figure 5-22).
To replace the backlight assembly, reverse the steps in the above
illustration.
>>>>>>>>>>>>>>>>>>>>>>>>>>>>>>>>>>>>>>><<<<<<<<<<<<<<<<<<<<<<<<<<<<<<<<<<<<<<<
CAUTION
When installing the display assembly cables into the four corner brackets,
ensure that the cable wires are not pulled, twisted, or pinched.
>>>>>>>>>>>>>>>>>>>>>>>>>>>>>>>>>>>>>>><<<<<<<<<<<<<<<<<<<<<<<<<<<<<<<<<<<<<<<
NOTE: When replacing the backlight assembly, align the five tabs with the
display assembly.
Display Inverter Board
To remove the display inverter board, complete the following steps: