5
GETTING
STARTED
OK
MENU
Bolus
Logbook
Trends
Setup
OK
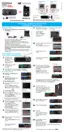
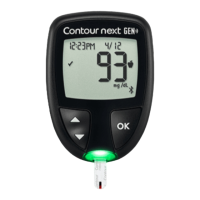
The Main Menu has four choices: Bolus, Logbook, Trends and Setup. Press the or
button to scroll to your desired selection. When your choice is highlighted, press
OK
.
Turn On
Initial Setup
• The three buttons next to the screen allow you to make your selection by pressing the
button next to your choice.
• Scroll up or down for additional choices when the or arrows appear on the meter
screen.
• When your choice is highlighted, make a selection by pressing OK.
NOTE: Press and hold the or button to scroll through the list faster.
Button
OK Button
Button
CAUTION: Unplug meter from charging source before beginning Setup.
Using the Main Menu
Initial Setup
1. Before use, fully charge your meter. See
page iv.
Using the Selection/Scrolling Buttons
2. Press and hold the top Menu
button until the meter turns on.
After a welcome screen, you see
the Language choicescreen.
81552940_CntrNextLINK2_4_UG_EN_FpBp_v5.indd 5 8/18/16 11:21 AM
GETTING
STARTED
4
Active Insulin 1.5 u
Bolus Basal
l
mmol/L
Active Insulin 1.5 u
Bolus Basal
BG
12: 00
PM
®
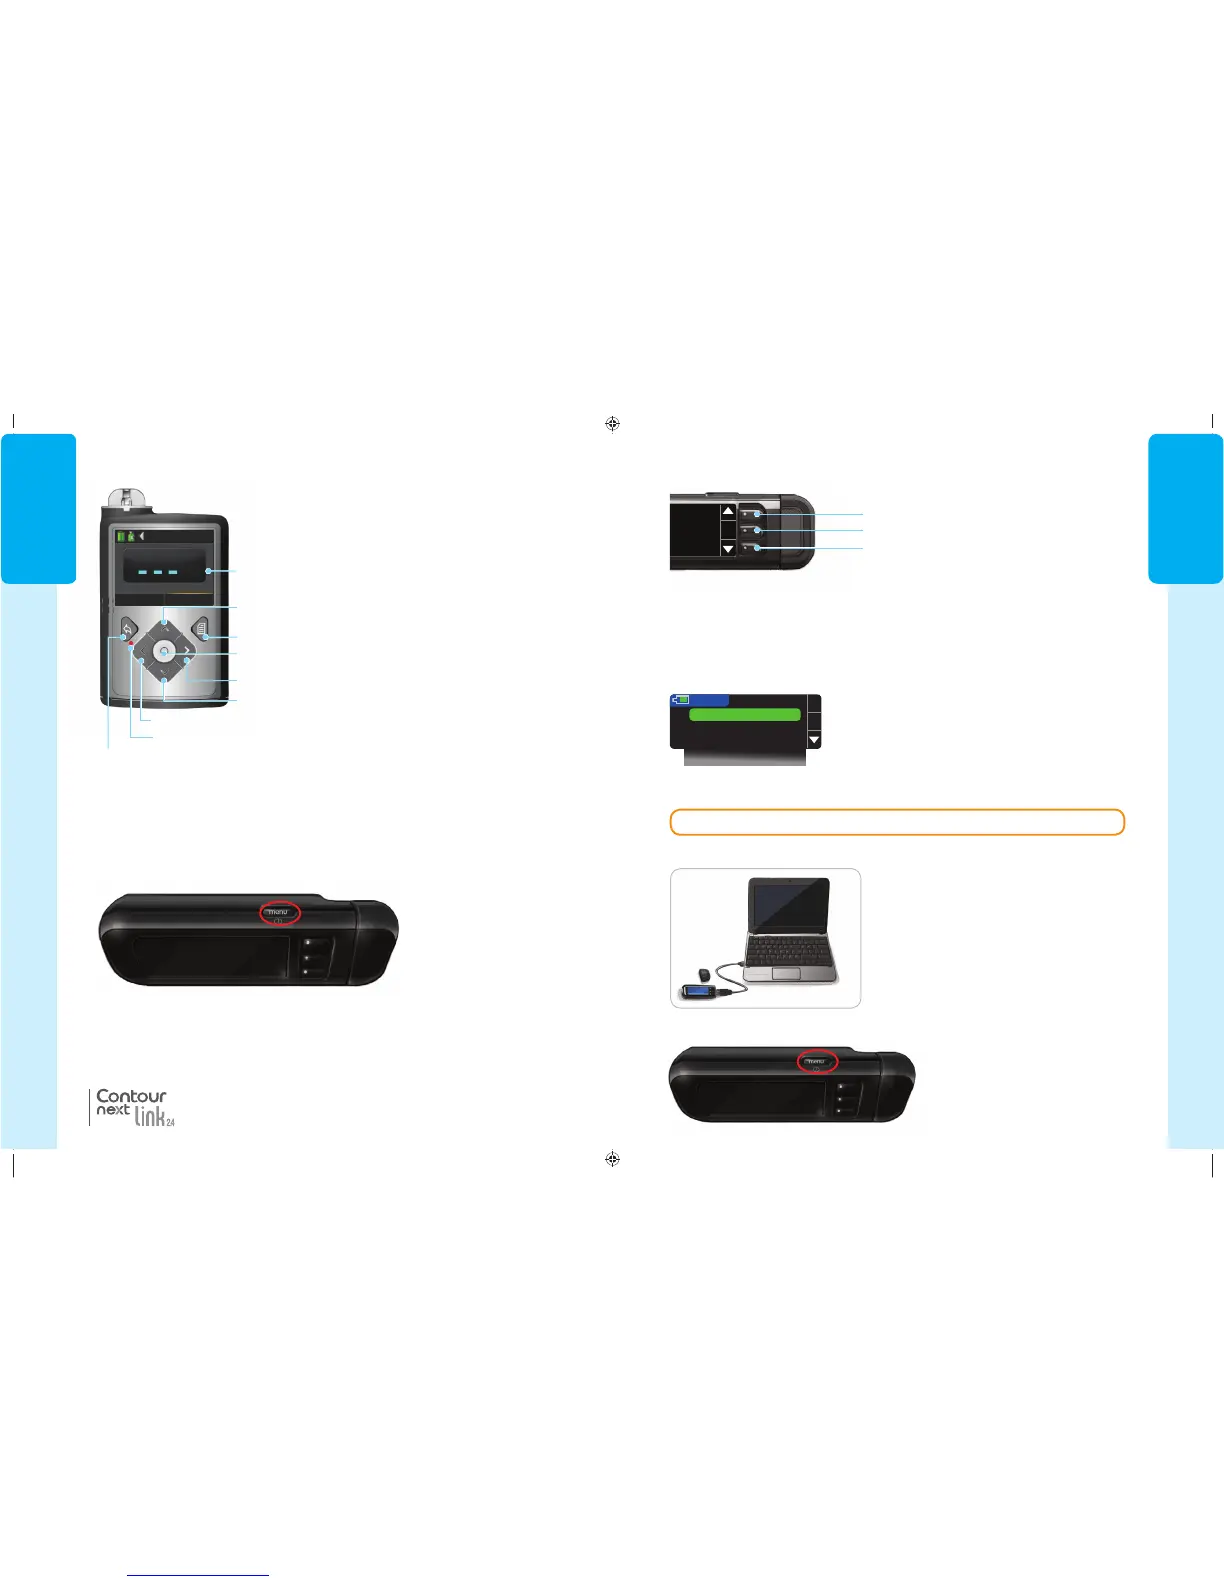
Meter Overview
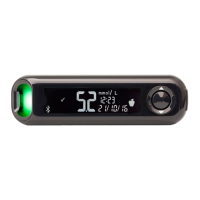
Turning the Meter On or Off
• Press and hold the top Menu button to turn the meter on or off.
• Insert a test strip to turn the meter on.
• Meter turns off after 3 minutes of inactivity.
The top Menu button has three functions:
• To turn the meter on/off, press and hold the top Menubutton.
• To go back one screen from most screens, press the top Menu button once.
• To turn on/off the test strip port light, quickly press the top Menu button two times.
Meter Overview
Using the Top Menu Button
“Talks” to Your Compatible MiniMed
®
Pump
Your CONTOUR
®
NEXT LINK 2.4 meter can
automatically send your blood glucose result
or a bolus directly to your MiniMed insulin
pump, if your meter and pump are linked. This
eliminates the need to manually enter a bolus
or your blood glucose result into your pump.
Up to 3C
ONTOUR NEXT LINK 2.4 meters can be
connected to your MiniMed insulin pump. To use
the meter link feature, your CONTOUR NEXT LINK 2.4
meter and MiniMed insulin pump must be within
1.83 meters of each other. If you are not using the
meter link feature, you may want to set the Send
option to Never on your C
ONTOUR NEXT LINK 2.4
meter to save batterypower.
Display
Screen
Menu
Select
Right
Up
Back
Notification
Light
Left
Down
81552940_CntrNextLINK2_4_UG_EN_FpBp_v5.indd 4 8/18/16 11:21 AM
5
GETTING
STARTED
OK
MENU
Bolus
Logbook
Trends
Setup
OK
The Main Menu has four choices: Bolus, Logbook, Trends and Setup. Press the or
button to scroll to your desired selection. When your choice is highlighted, press
OK
.
Turn On
Initial Setup
• The three buttons next to the screen allow you to make your selection by pressing the
button next to your choice.
• Scroll up or down for additional choices when the or arrows appear on the meter
screen.
• When your choice is highlighted, make a selection by pressing OK.
NOTE: Press and hold the or button to scroll through the list faster.
Button
OK Button
Button
CAUTION: Unplug meter from charging source before beginning Setup.
Using the Main Menu
Initial Setup
1. Before use, fully charge your meter. See
page iv.
Using the Selection/Scrolling Buttons
2. Press and hold the top Menu
button until the meter turns on.
After a welcome screen, you see
the Language choicescreen.
81552940_CntrNextLINK2_4_UG_EN_FpBp_v5.indd 5 8/18/16 11:21 AM
GETTING
STARTED
4
Active Insulin 1.5 u
Bolus Basal
l
mmol/L
Active Insulin 1.5 u
Bolus Basal
BG
12: 00
PM
®
Meter Overview
Turning the Meter On or Off
• Press and hold the top Menu button to turn the meter on or off.
• Insert a test strip to turn the meter on.
• Meter turns off after 3 minutes of inactivity.
The top Menu button has three functions:
• To turn the meter on/off, press and hold the top Menubutton.
• To go back one screen from most screens, press the top Menu button once.
• To turn on/off the test strip port light, quickly press the top Menu button two times.
Meter Overview
Using the Top Menu Button
“Talks” to Your Compatible MiniMed
®
Pump
Your CONTOUR
®
NEXT LINK 2.4 meter can
automatically send your blood glucose result
or a bolus directly to your MiniMed insulin
pump, if your meter and pump are linked. This
eliminates the need to manually enter a bolus
or your blood glucose result into your pump.
Up to 3C
ONTOUR NEXT LINK 2.4 meters can be
connected to your MiniMed insulin pump. To use
the meter link feature, your CONTOUR NEXT LINK 2.4
meter and MiniMed insulin pump must be within
1.83 meters of each other. If you are not using the
meter link feature, you may want to set the Send
option to Never on your C
ONTOUR NEXT LINK 2.4
meter to save batterypower.
Display
Screen
Menu
Select
Right
Up
Back
Notification
Light
Left
Down
81552940_CntrNextLINK2_4_UG_EN_FpBp_v5.indd 4 8/18/16 11:21 AM
81552940_CntrNextLINK2_4_UG_EN_FpBp_v6_placed.pdf:8