EM 6400 User Manual v03.02. – d12
9
2.2.1.The Indicators
Table 2.1: Kilo, Mega and Negative Indicators
M
Mega: When lit, indicates that the reading is in Mega, (10^6). 10,000 K is shown
as 10.00 M. 1.0 M is displayed as 1000 K.
When Kilo and Mega are both glowing, the reading is in Giga (10^9). 10,000 M is
shown as 10.00 G. 1.0 G is shown as 1000 M.
-
Neg: - When lit, indicates that the reading is negative Per IEEE 100 and industry
standard practice by meter-men, the following are Negative:
• When the flow of watts is forward: Capacitive (Leading) VARs & PF are
negative.
• When the flow of watts is reverse: Inductive (Lagging) VARs & PF and Watts
are negative.
K
Kilo: When lit, indicates that the reading is in Kilo (10^3). 10,000 is displayed as
10.00 K. 1.0 K is shown as 1000.
Table 2.2: Giga, Mega (M), Kilo (K) & Decimal Point Scaling
RMS Reading Indicator
Less than 0.001 K, M OFF, displays “0.000”
Less then 9999 K, M OFF
Above 9999 K ON, M OFF
Above 9999 k
M ON, K OFF
Above 9999 M Giga (K + M indicators ON)
Upto 9999G Giga
Above 9999G Display shows “Hi” for positive numbers, “Lo” for negative numbers
RMS readings are four digits. Energy readings have eight digits, including four additional
fractional digits. The maximum number the meter handles is 9,999 G for RMS and energy
values.
This means that the energy readings of the meter will overflow at 3 values of kWh or kVAh
(selectable through PROG menu - Setup) depending upon the PT and CT ratios programmed.
See Table 3.4 “Integrator Overflow Value
”.
2.2.2.The Keys
Operating the meter is easy using the five smart keys to navigate through the Keypad
Operations Table. The display pages “expand” as you go right, much like the directory or
explorer “tree” displayed on any computer. The display shows where you’re headed.
Table 2.3: The Key pad operation table
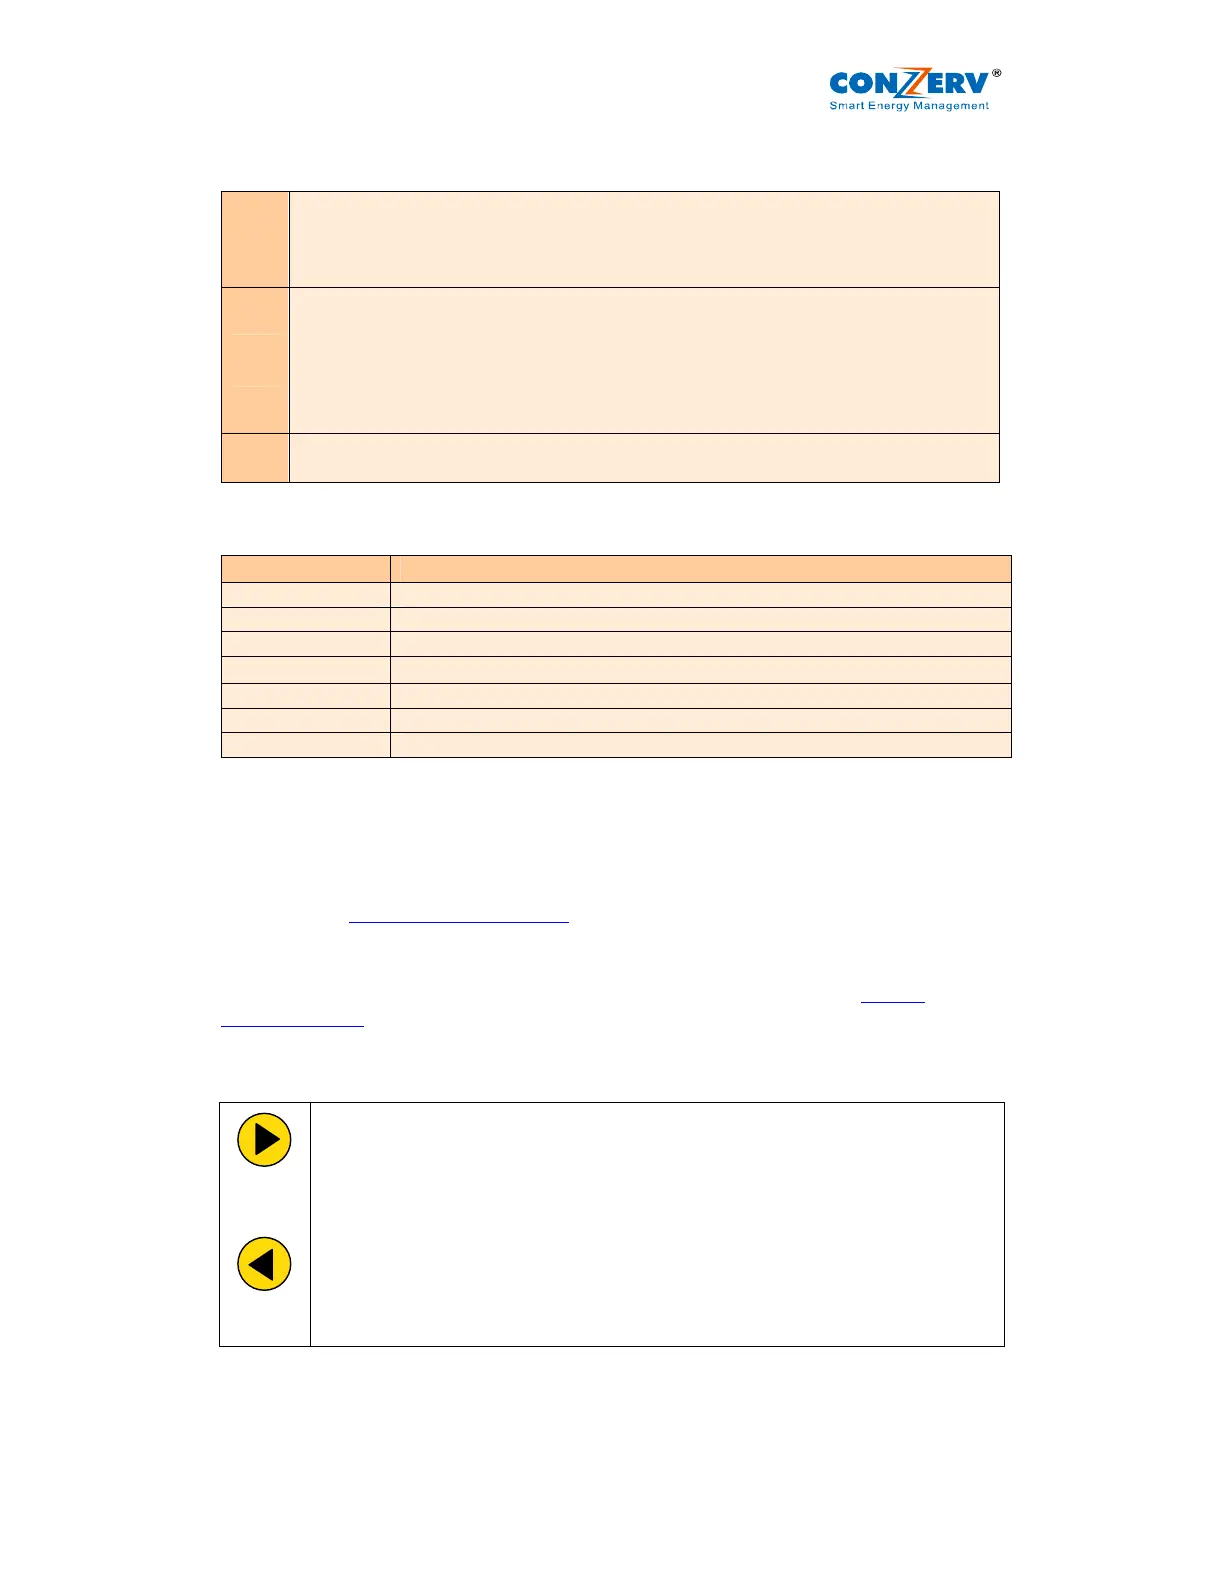
Right Key:
• Go forward into sub-parameter pages.
• During Edit Setup values, select next (right side) digit.
Left Key:
• The Opposite of the right key.
• Go back towards to the main parameter pages. Going left past “PROG”
requires code entry to enter PROG menu (Setup and Clear)
• During Edit Setup, selects previous (left side) digit
• Exits from Edit mode, back to the PROG menu - Setup.
 Loading...