English
Ice cream freezer
8
5.1 Placing and check of the parts
Place the device on the floor, on a flat and steady surface.
Install the device away from any source of heat, avoiding a direct exposition to sun
radiation and making sure that air can freely circulate around each side of the device
itself.
The devices with AIR CONDENSING need at least a 50 cm free space in
front of the condenser’s grill, to assure the refrigerating plant correct
functioning. Further information are reported on the Technical Book
(Technical Data section).
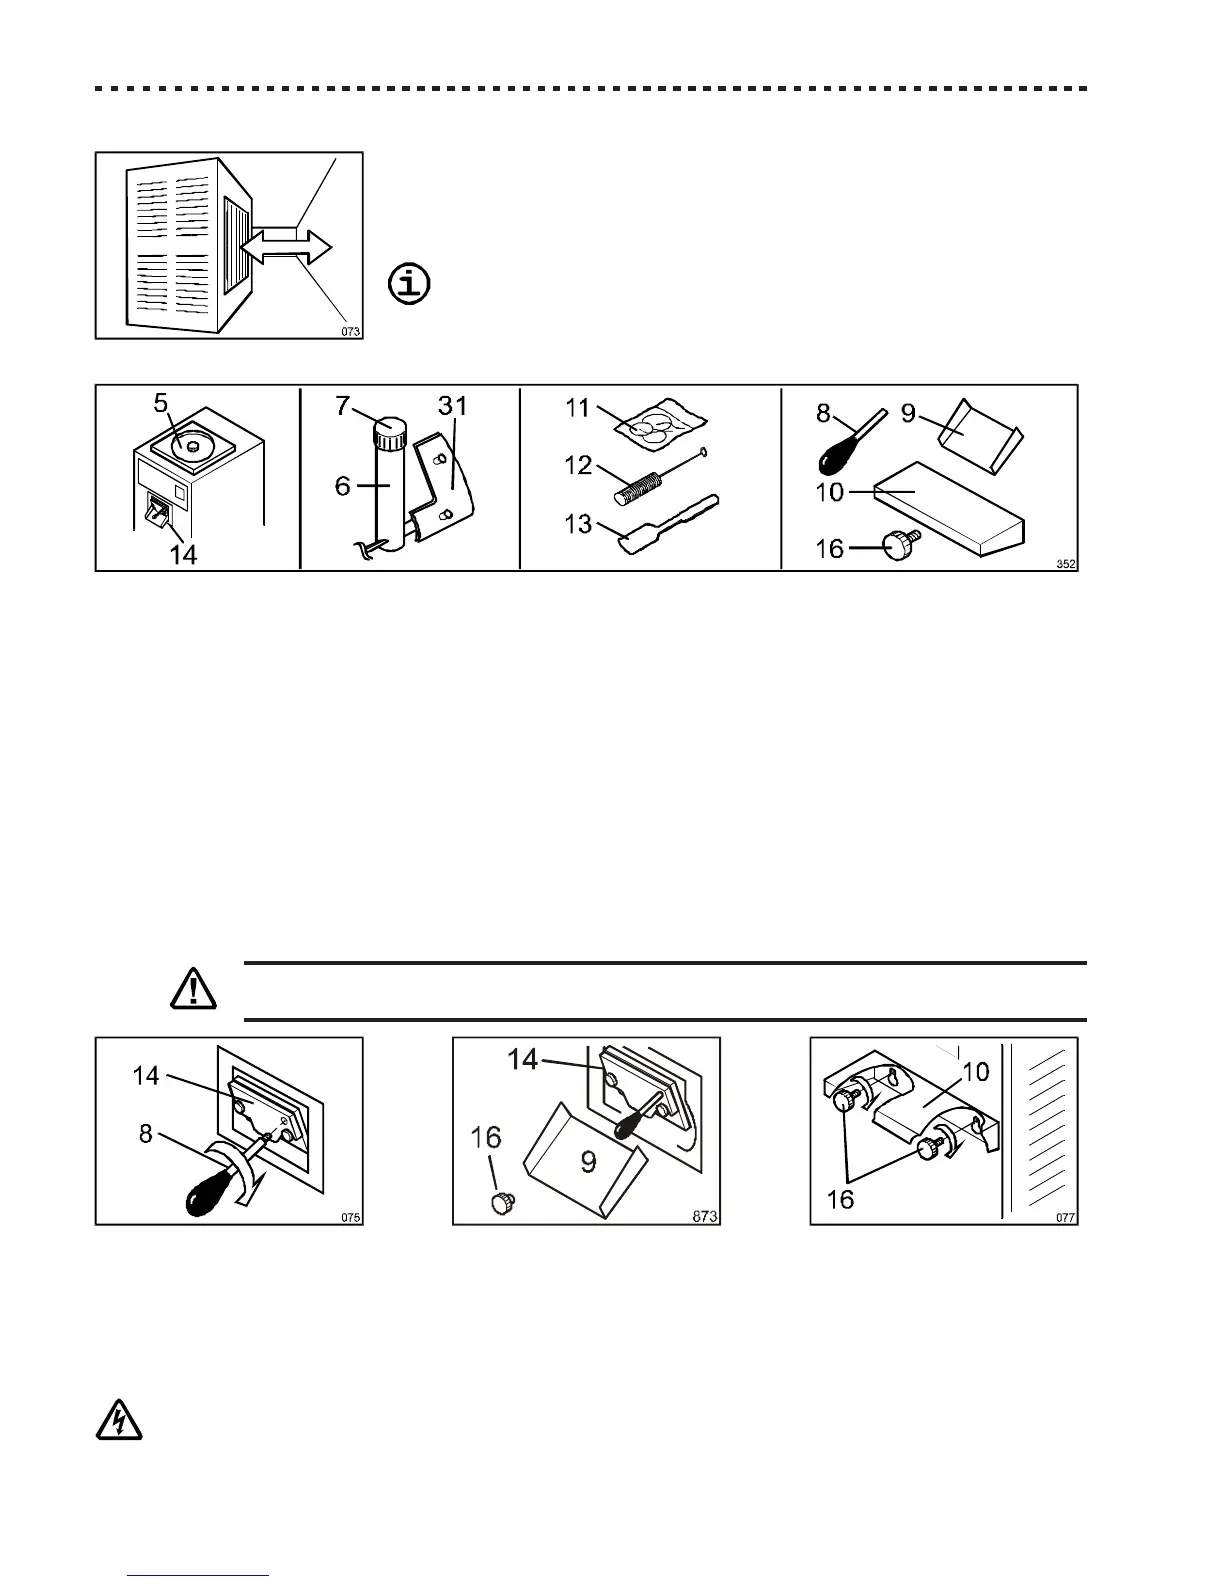
Check that the following items are all included in the package:
- lid [5];
- beater [6], correctly fixed inside the cylinder with its knob [7] and supplied with adjustable blades [31] (1…3 according
to the model);
- extraction door [14]);
Also check that the following items are included:
- spare part kit [11], tube-brush [12] and ice-cream blade [13];
- basin support [10], knobs [16], the lever [8] and the extraction door chute [9];
- all the technical documentation (in addition to this handbook): the Technical Handbook, the EC’s Conformity Certifi-
cation and Electrical Test’s Schedule.
5.2 Machine’s parts reassembling
THE REASSEMBLING MUST BE MADE BEFORE CONNECTING THE MACHINE TO THE ELECTRICAL SUPPLY
SYSTEM.
- Screw the lever [8] in the extraction door [14];
- if the chute [9] is supplied disassembled, install it under the extraction door [14] by screwing the knob[16];
- install the basin support [10] by fixing it to the front panel with knobs [16].
5.3 Electrical connection
THE SUPPLY’S VOLTAGE REQUIRED BY THE DEVICE IS HIGH, SO, IT IS PARTICULARLY DANGEROUS.
THE WORKS ON THE SUPPLY’S ELECTRICAL CIRCUITS MUST BE MADE WORKMANLIKE BY QUALI-
FIED STAFF.