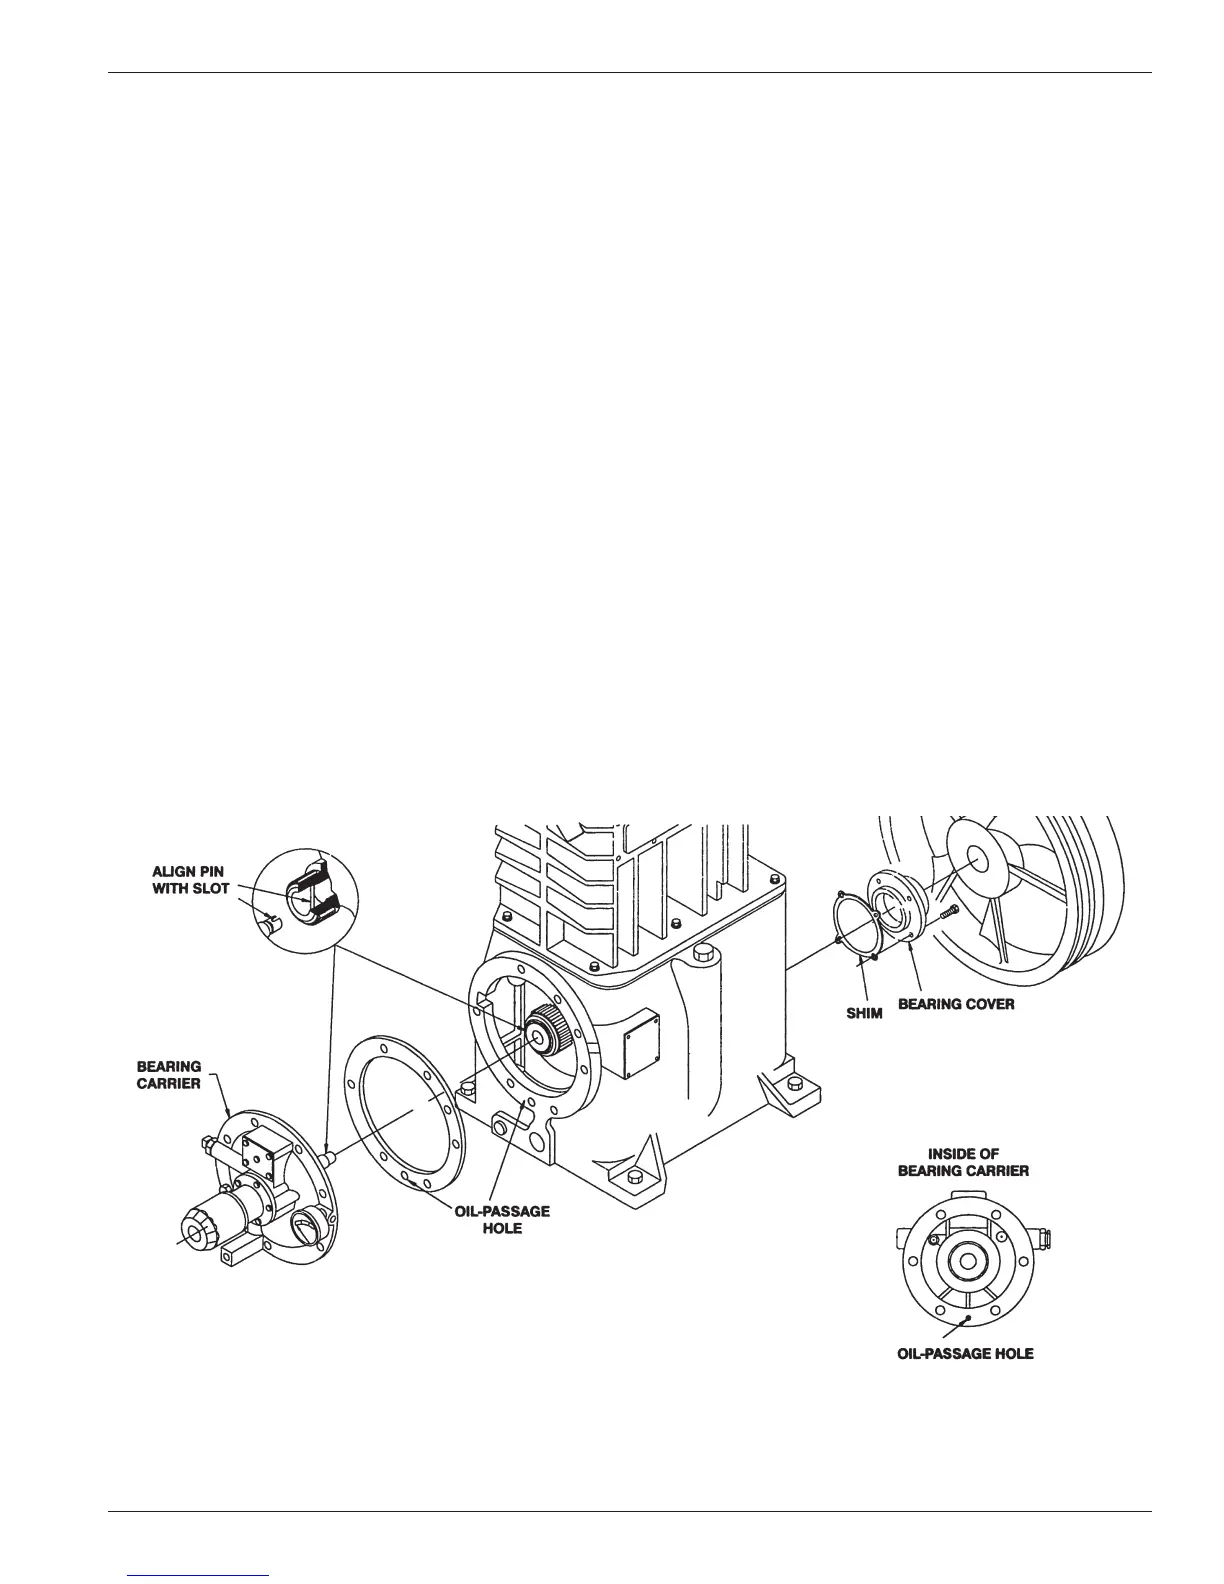
Figure 4.7: Bearing carrier replacement
4.7 Bearing Replacement for
Crankcase and Connecting Rod
1. To replace the crankcase roller bearings, wrist pin
bushing and connecting rod bearings, begin by
removing the cylinder cap, heads, cylinder, pistons,
crosshead guide and crosshead assemblies.
2. Drain the crankcase and remove the inspection plates.
3. Before disassembly, choose and mark one connecting
rod and the corresponding connecting rod cap. DO
NOT MIX CONNECTING RODS AND CAPS. Loosen
and remove the connecting rod bolts in order to
remove the crosshead and connecting rod assembly.
4.7.1 Wrist Pin Bushing Replacement
1. To replace the wrist pin bushing, remove the retainer
rings that position the wrist pin in the crosshead.
2. Press out the wrist pin so the crosshead and connecting
rod may be separated. Inspect the wrist pin for wear
and damage and replace if necessary.
3. Press out the old wrist pin bushing and press a new
bushing into the connecting rod. DO NOT MACHINE
THE O.D. OR I.D. OF THE BUSHING BEFORE
PRESSING INTO CONNECTING ROD.
4. Make sure the lubrication hole in the bushing matches
the oil passage in the connecting rod. If the holes do
not align, drill out the bushing through the connecting
rod lubricant passage with a long drill. Bore the wrist
pin bushing I.D. as indicated. See Appendix E for
details. Over boring the bushing can lead to premature
failure of the wrist pin bushing.
5. Inspect the oil passage for debris and clean thoroughly
before proceeding.
6. Press the wrist pin back into the crosshead and wrist
pin bushing and reinstall retainer rings. NOTE: The
fit between the wrist pin and bushing is tighter than
lubricated air compressors and combustion engines.
4.7.2 Replacing Connecting Rod Bearings
Connecting rod bearings are easily replaced by removing
the semicircular bearings. Make sure the indentations
in the connecting rod bearing and connecting rod line
up when installing the new bearings. MAKE SURE
THE ARROW AND/OR ALIGNMENT NOTCH ON
CONNECTING ROD AND CAP ARE ALIGNED.
Before reinstalling the crosshead/connecting rod
assembly, make sure the crankshaft throw and bearing
surface are clean and lubricated. Tighten the connecting
rod bolts to the torque values listed in Appendix B.
17