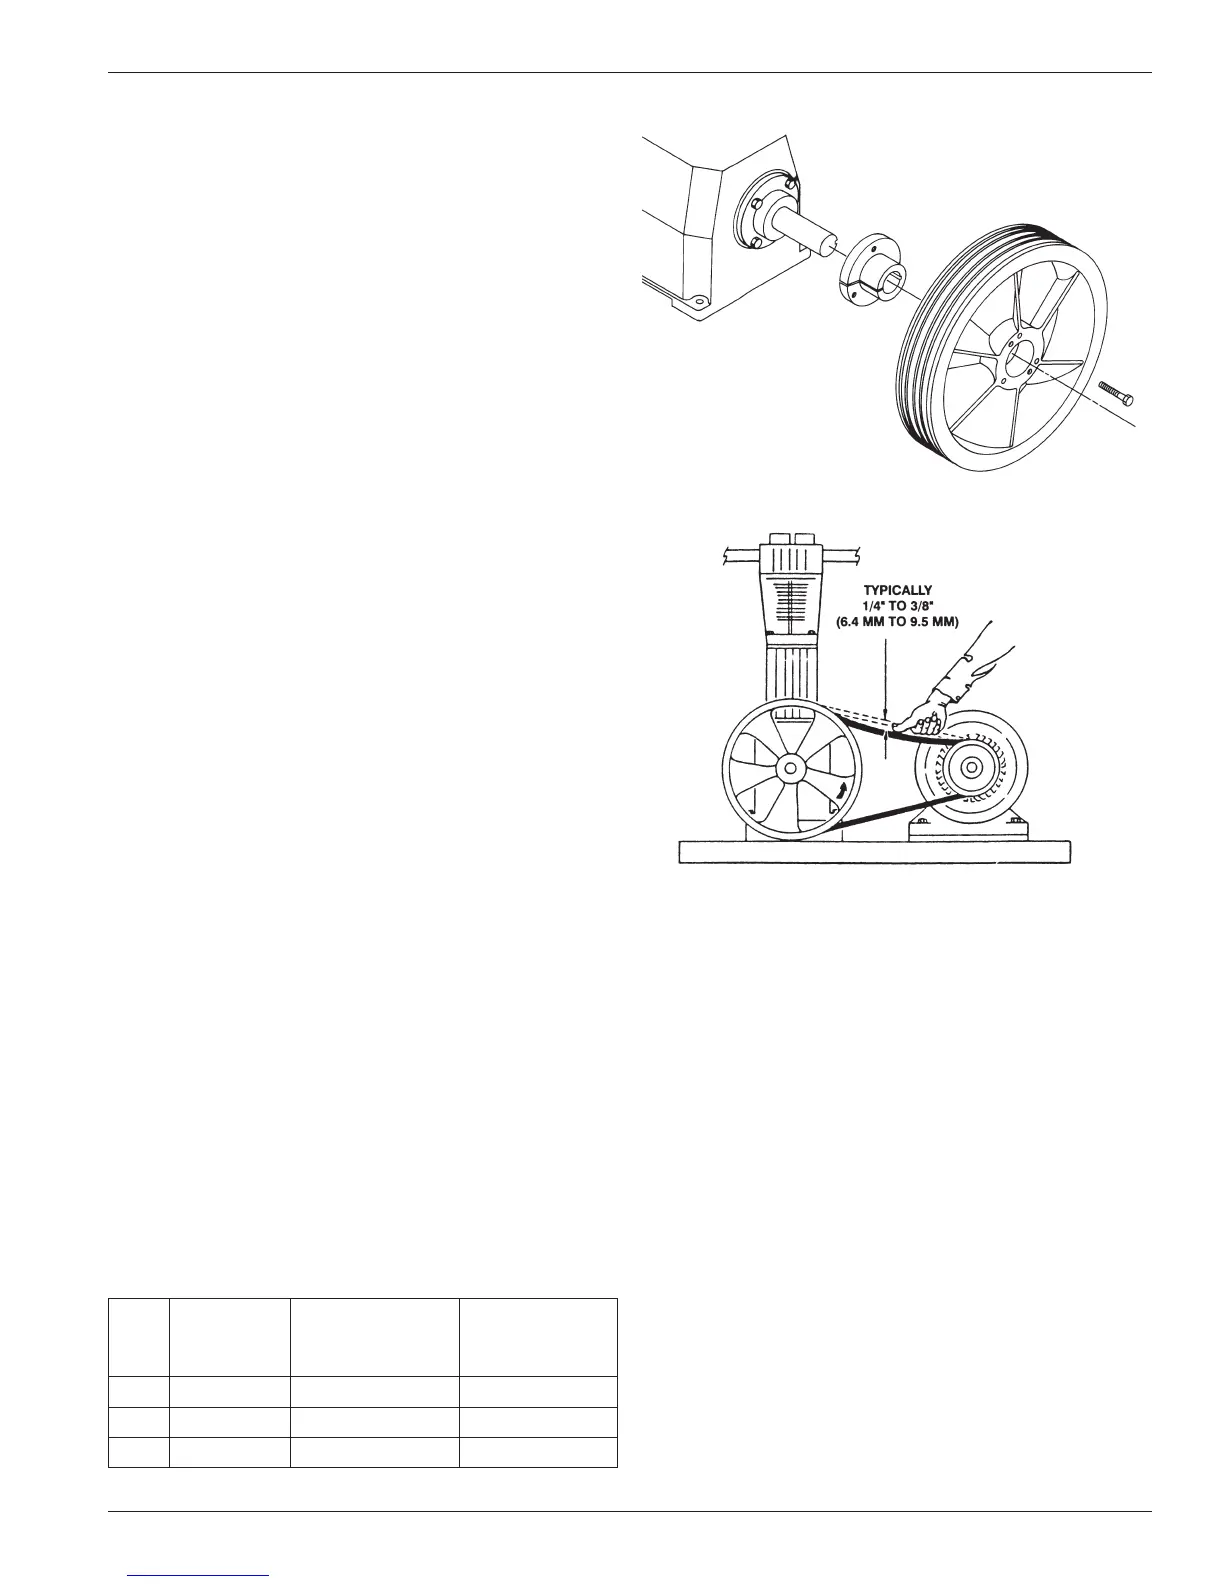
Figure 2.2A: Flywheel installation
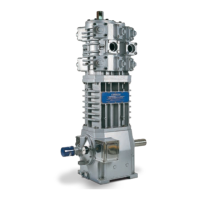
Figure 2.2B: Belt tension
Tighten the belts so that they are taut, but not extremely
tight. Consult your V-belt supplier for specific tension
recommendations. Belts that are too tight may cause
premature bearing failure. Refer to figure 2.2B.
2.3 Crankcase Oil
Pressure Adjustment
Your Corken compressor is equipped with an automatically
reversible gear type oil pump. It is essential to ensure
the pumping system is primed and the oil pressure is
properly adjusted in order to assure smooth operation.
Before starting your compressor, check and fill the
crankcase with the proper amount of lubricating oil.
When the compressor is first started, observe the
crankcase oil pressure gauge. If the gauge fails to
indicate pressure within 30 seconds, stop the machine.
Loosen the oil filter and remove the pressure gauge.
Restart the compressor and run it until oil comes out of
the pressure gauge opening or around the filter. Tighten
the filter and reinstall the gauge.
NOTE: Read this entire chapter, then proceed with
the startup checklist.
2.1 Inspection After
Extended Storage
If your compressor has been out of service for a long
period of time, you should verify that the cylinder bore
and valve areas are free of rust and other debris. For
valve and/or cylinder head removal instructions, refer to
chapter 4 of this IOM manual.
Drain the oil from the crankcase and remove the
nameplate and crankcase inspection plate. Inspect the
running gear for signs of rust and clean or replace parts
as necessary. Replace the crankcase inspection plate
and fill crankcase with the appropriate lubricant through
the nameplate inspection opening. Squirt oil on the
crossheads and rotate the crankshaft by hand to ensure
that all bearing surfaces are coated with oil.
Rotate unit manually to ensure running gear functions
properly. Replace nameplate and proceed with startup.
2.2 Flywheel and V-belt Alignment
Before working on the drive assembly, be sure that the
electric power is disconnected. When mounting new
belts, always make sure the driver and compressor are
close enough together to avoid forcing.
Improper belt tension and sheave alignment can cause
vibration, excessive belt wear and premature bearing
failures. Before operating your compressor, check
alignment of the V-grooves of the compressor flywheel
and driver sheave. Visual inspection often will indicate if
the belts are properly aligned, but use of a square is the
best method.
The flywheel is mounted on the shaft via a split, tapered
hub and three bolts (see figure 2.2A). These bolts should
be tightened in an even and progressive manner to the
specified torque values listed below. There must be a
gap between the bushing flange and the flywheel when
installation is complete. Always check the flywheel
runout before startup and readjust if it exceeds the value
listed in Appendix B.
Hub
Size
Diameter
in. (cm)
Bolt Torque
Ft-lb (kg-meter)
Set Screw
Torque Ft-lb
(kg-meter)
SF 4.625 (11.7) 12-18 (1.7–2.5) 22 (3.1)
E 6.0 (15.2) 30-36 (4.1–4.9) 22 (3.1)
J 7.25 (18.4) 75-81 (10.3–11.1) 10 9 (15.1)
Chapter 2—Starting Up Your Corken Compressor
9