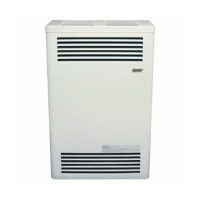
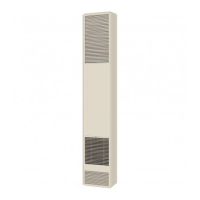
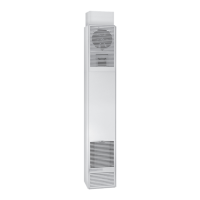
LOCATION
1) The wall furnace must be installed on an outside wall.
2) For most efficient performance, locate furnace as centrally as possible in the area to be heated and where occupants may
move about freely without coming into contact with the grille.
3) If the furnace is installed in a basement, a 12” clearance must be maintained between ground level and the bottom of the
vent cap. Do not install furnace where vent cap will terminate in a window well or any other opening below ground level.
INSTALLATION
Failure to follow these instructions carefully could result in poor performance, property damage, personal
injury or death.
STEP 1. LOCATE VENT OPENING. Locate wall studs and center 9” vent opening a minimum of 22”
for CDV15 or 24-1/8” for CDV25/33 above the floor. To locate furnace at minimum clearance from floor, remove template from
carton and set on floor at location desired. On model CDV15, position template no closer than 1” from either side wall. For
model CDV25/33, position template 1” minimum from a left side wall or 0” from a right side wall. Check outside wall to be sure
there is proper clearances around the vent cap. See Figure 3. Next, mark and cut out the vent openings on both the inside and
outside walls (be sure to keep the holes level). See Figure 5. If a higher location on the wall is desired, raise bottom of template
to desired height, make sure template is level and centered between studs, mark and cut out vent openings.
STEP 2. ROUGH-IN GAS SUPPLY . Install a ½” diameter gas supply line. This line can enter through the
floor, side, or rear wall. For location of gas connection to valve, see Fig. 4. The gas supply line must have an individual manual
shut off valve located outside the cabinet, accessible from the room where the heater is installed. Install a drip leg immediately
ahead of the gas valve and provide a 1/8” N.P.T. plugged tapping, accessible for test gauge connection, immediately upstream of
the gas supply connection. The furnace and the individual shut off valve must be disconnected from the gas supply piping system
during any pressure testing of that system at test pressures in excess of 1/2” psig (3.5kPa). The furnace must be isolated from the
gas supply piping system by closing the individual manual shut off valve during any pressure testing of the gas piping system at
test pressures equal to or less than 1/2” psig (3.5kPa).
STEP 3. INSTALLING FURNACE – 5” TO 9” WALLS. Use only the exhaust tube, air intake
tube, wall thimble extension, and vent terminal provided with furnace. Do not attempt to lengthen the exhaust or air intake tubes,
this could cause an imbalance in the furnace resulting in poor performance and pilot outage, see Figure 6. Extend the telescoping
wall thimble extension (surrounding the wall thimble assembly) to approximately 9 inches. Center the wall thimble assembly in
the 9 inch opening and attach to inside wall using eight (8) screws. The wall thimble extension should extend through the
opening and be adjusted so end of wall thimble extension is even with outside wall. Install furnace flush to wall by sliding
exhaust tube and air intake tube through the wall thimble assembly. Secure the furnace to the wall with screws through each of
the four holes in the mounting brackets located on the back of the furnace. These holes are spaced so as to allow the screws to
enter into studs that are on 16 inch centers. On certain types of wall, anchors (not provided) may be required. Slide the vent
terminal onto the exhaust tube and the air intake tube. Secure vent terminal and vent terminal spacer plate to wall providing a
slight downward slope to the vent tubes. This will prevent water from entering. Anchors (not provided) may be required. Caulk
around vent terminal spacer plate with putty provided. See Figure 7. NOTE: Some framing may be necessary to provide a flat
surface for the vent terminal spacer plate to butt against, so rain cannot enter through cut out.
Page 5