19
STEP SIX:
ASSEMBLING THE SAW TABLE
Parts required (with part#): Qty: Tools required:
89: table bracket 1 12mm wrench
79A: working table 1 rubber mallet
77: table centre insert 1 machinist’s square
80: table pin 1
92: lock knobs 2
87: hex screws, 5/16” x 1 1/4” 2
88: flat washers, 5/16” 2
116: hex bolt, 3/8” x 3” 1
117: hex nut, 3/8” 1
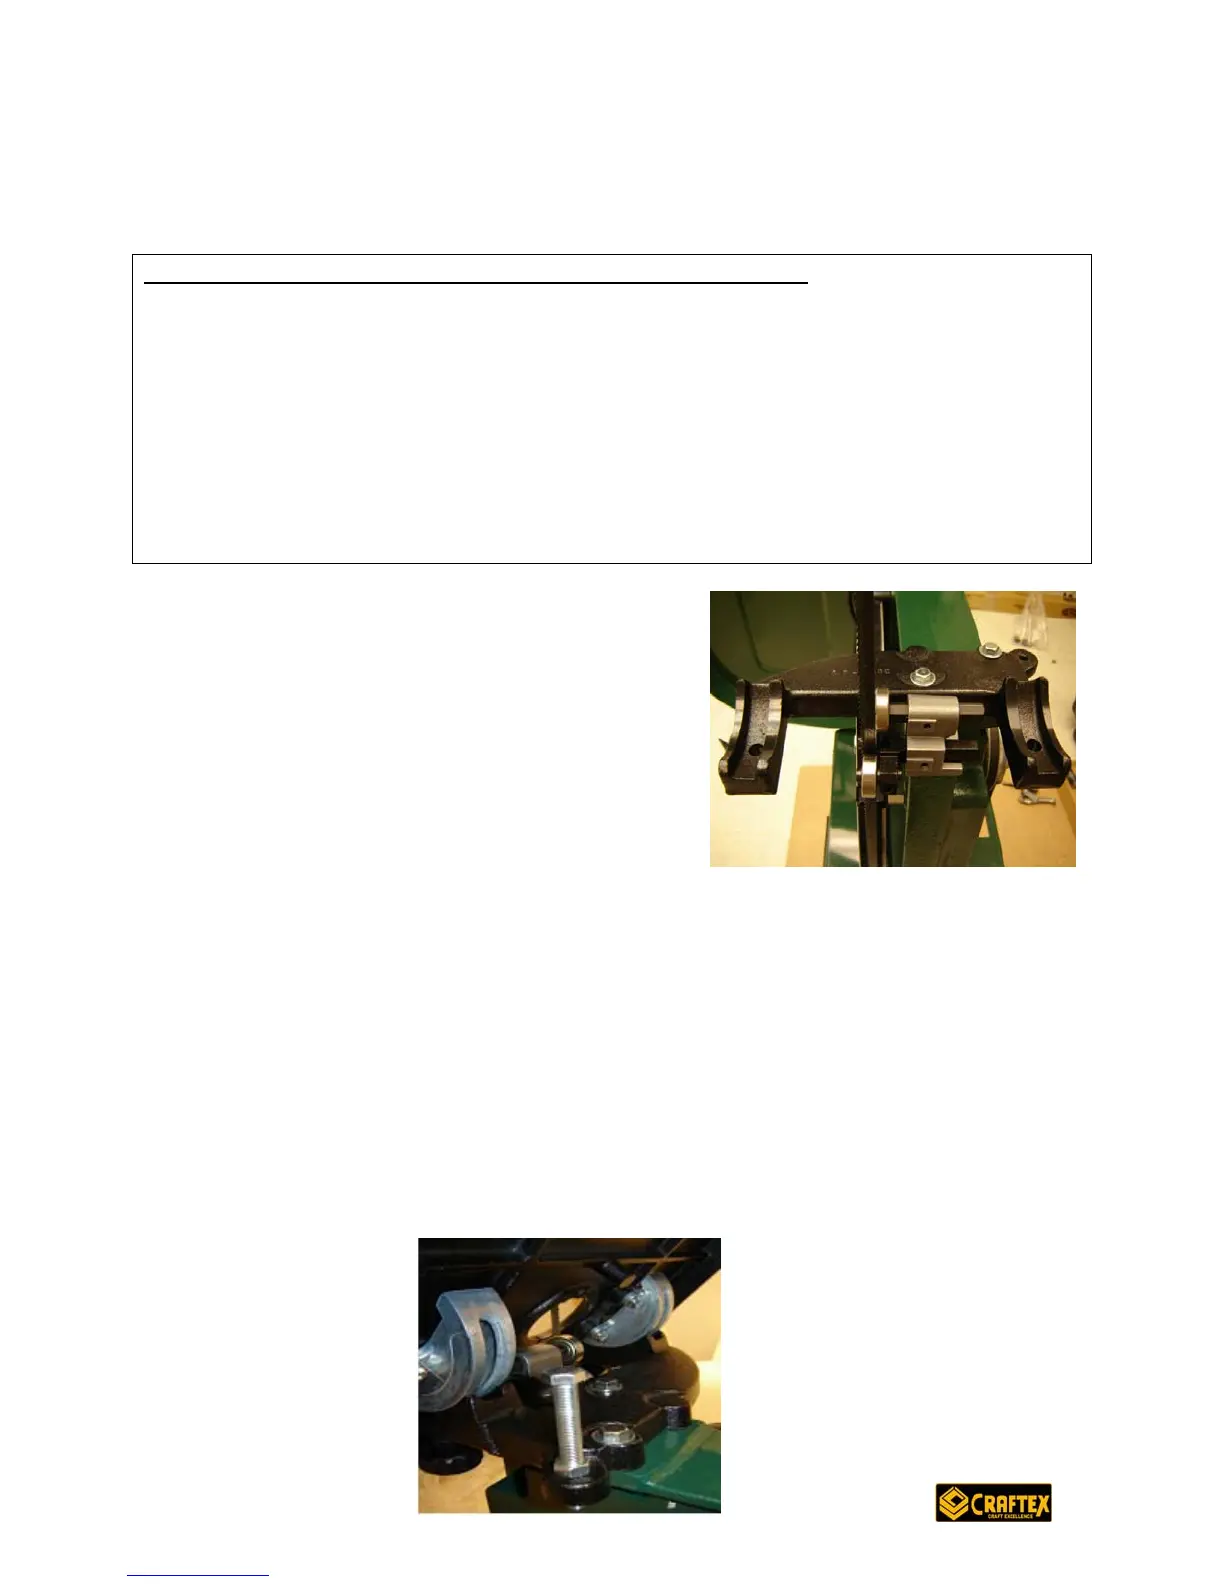
1. Mount the table bracket (part #89) over the
two vertical pins. Attach the two hex screws
(#87) with washers (#88) to secure the table
bracket to the unit.
2. Remove the table pin (#80) from the working
table (#79A).
3. Insert the working table and turn it until the
bottom bolts drop into the corresponding
holes on the table bracket. Tighten on the lock knobs (#92) to the bottom bolts
underneath the table bracket.
4. Tilt up the working table. Insert the bolt (#116) and nut (#117) into the table
bracket until the surface of the table when lowered is at a 90-degree angle to the
blade (confirm with a square). Adjust the scale pointer underneath the table to
zero degrees. To adjust the table angle when cutting, adjust the lock knobs.
5. Clean the working table surface with a clean cloth and mineral spirits or varsol (if
you have not done so already).
6. Insert the table centre (#77) and tap in the table pin (#80), small tapered side
first.