22
STEP NINE:
ATTACHING THE DUST COLLECTION HOSE,
PULLEY COVER AND BACK PANEL
Parts required (with part#): Qty: Tools required:
dust collection hose 1 Phillips screwdriver
154: pulley cover 1 12mm wrench
202: stand brace 1 12mm wrench socket
153: pan screws, 3/16” x 1/2” 2
203: carriage bolts, 5/16” x 5/8” 4
204: flat washers, 5/16”-16 4
205: nuts, 5/16” 4
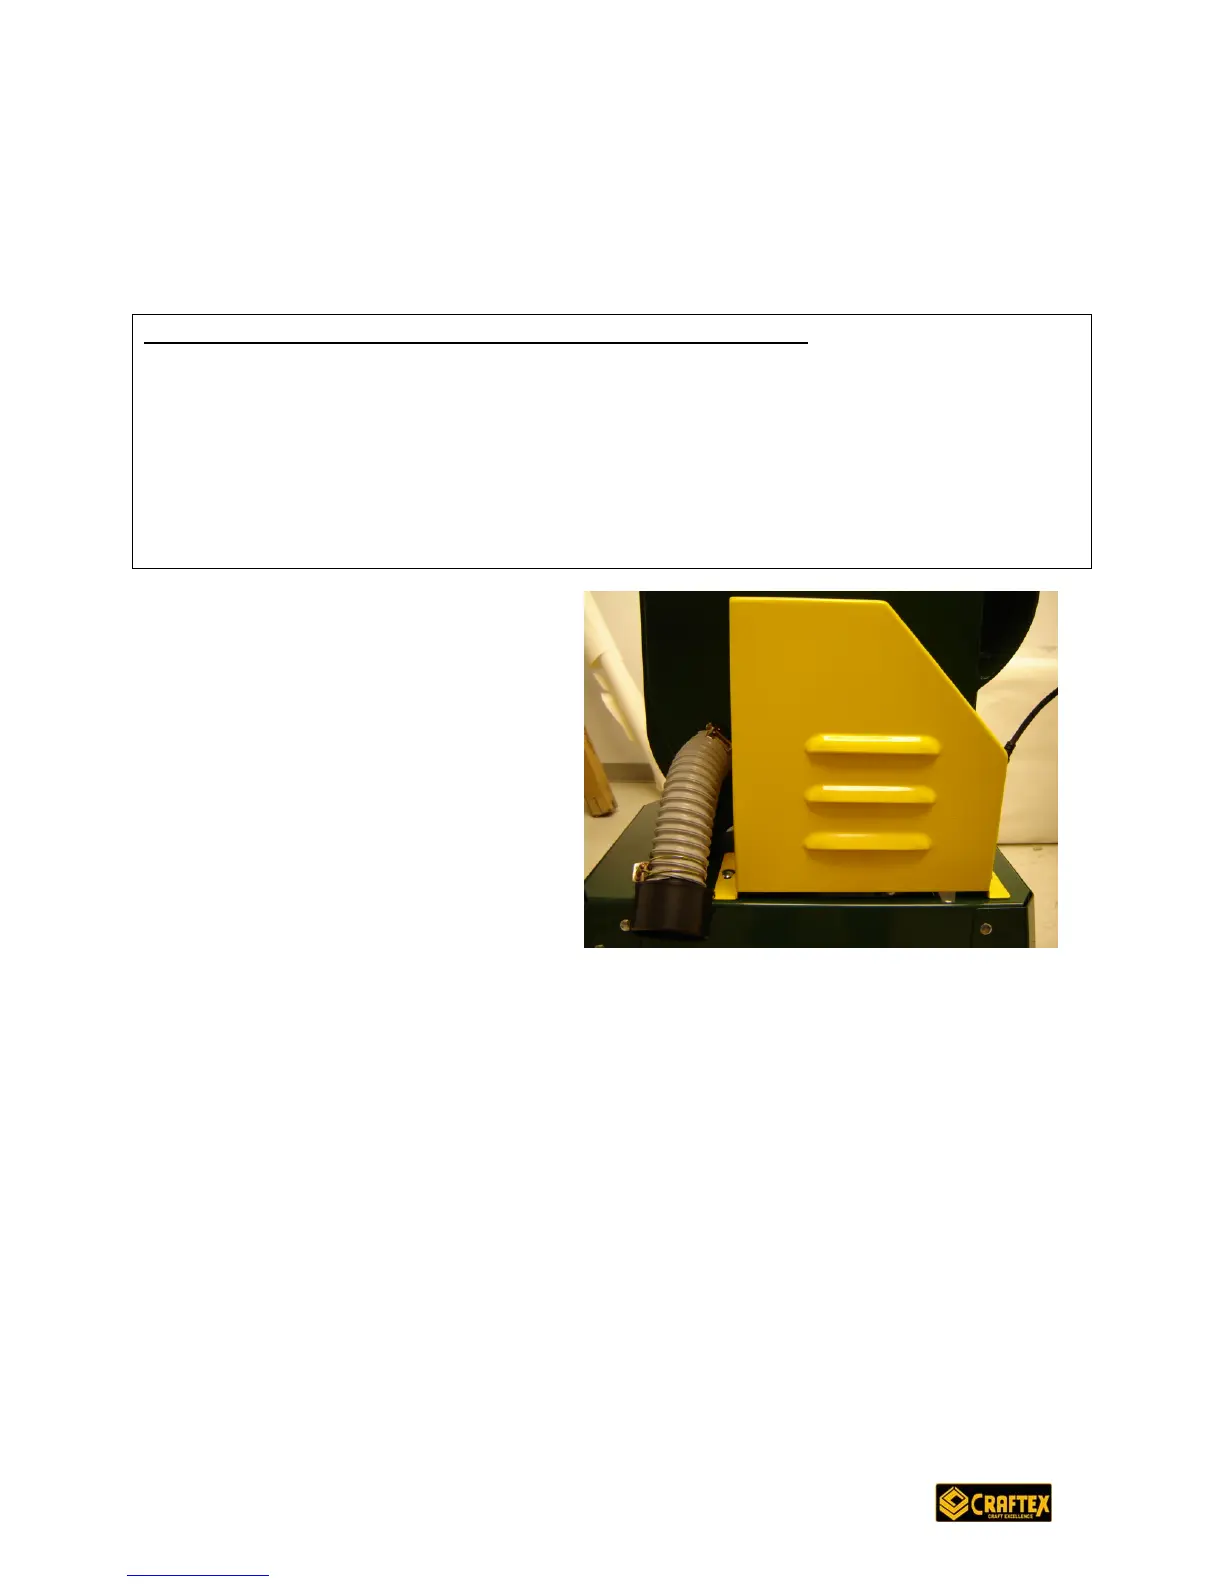
1. Attach the dust collection hose
to the exhaust port on the right
side of the unit using the
attached clamp. (Note: the
accumulation of dust on a motor
can cause it to overheat and
break down. Be sure to keep
your work area dust-free.)
2. Position the pulley cover (part
#154) so that it sits flat on the
stand and flush against the right
side of the unit. Attach it to the
stand using pan screws (#153). Thread these into the stand and tighten.
3. Before installing the back panel, turn on your machine and make sure you are
happy with the belt tensions. Remember, turn off the machine and unplug it
before making any adjustments.
4. Turn off the machine and unplug it again. Attach the back panel for the stand
(#202) using remaining four carriage bolts (#203), washers (#204) and nuts
(#205) (it will be necessary to get on the floor under the machine to do this).
TAKE A MOMENT TO REVIEW THAT EVERYTHING IS IN ORDER, ALL NUTS AND
BOLTS ARE TIGHTENED AND YOUR SAW IS READY TO MAKE ITS FIRST CUT.
 Loading...