9
STEP ONE:
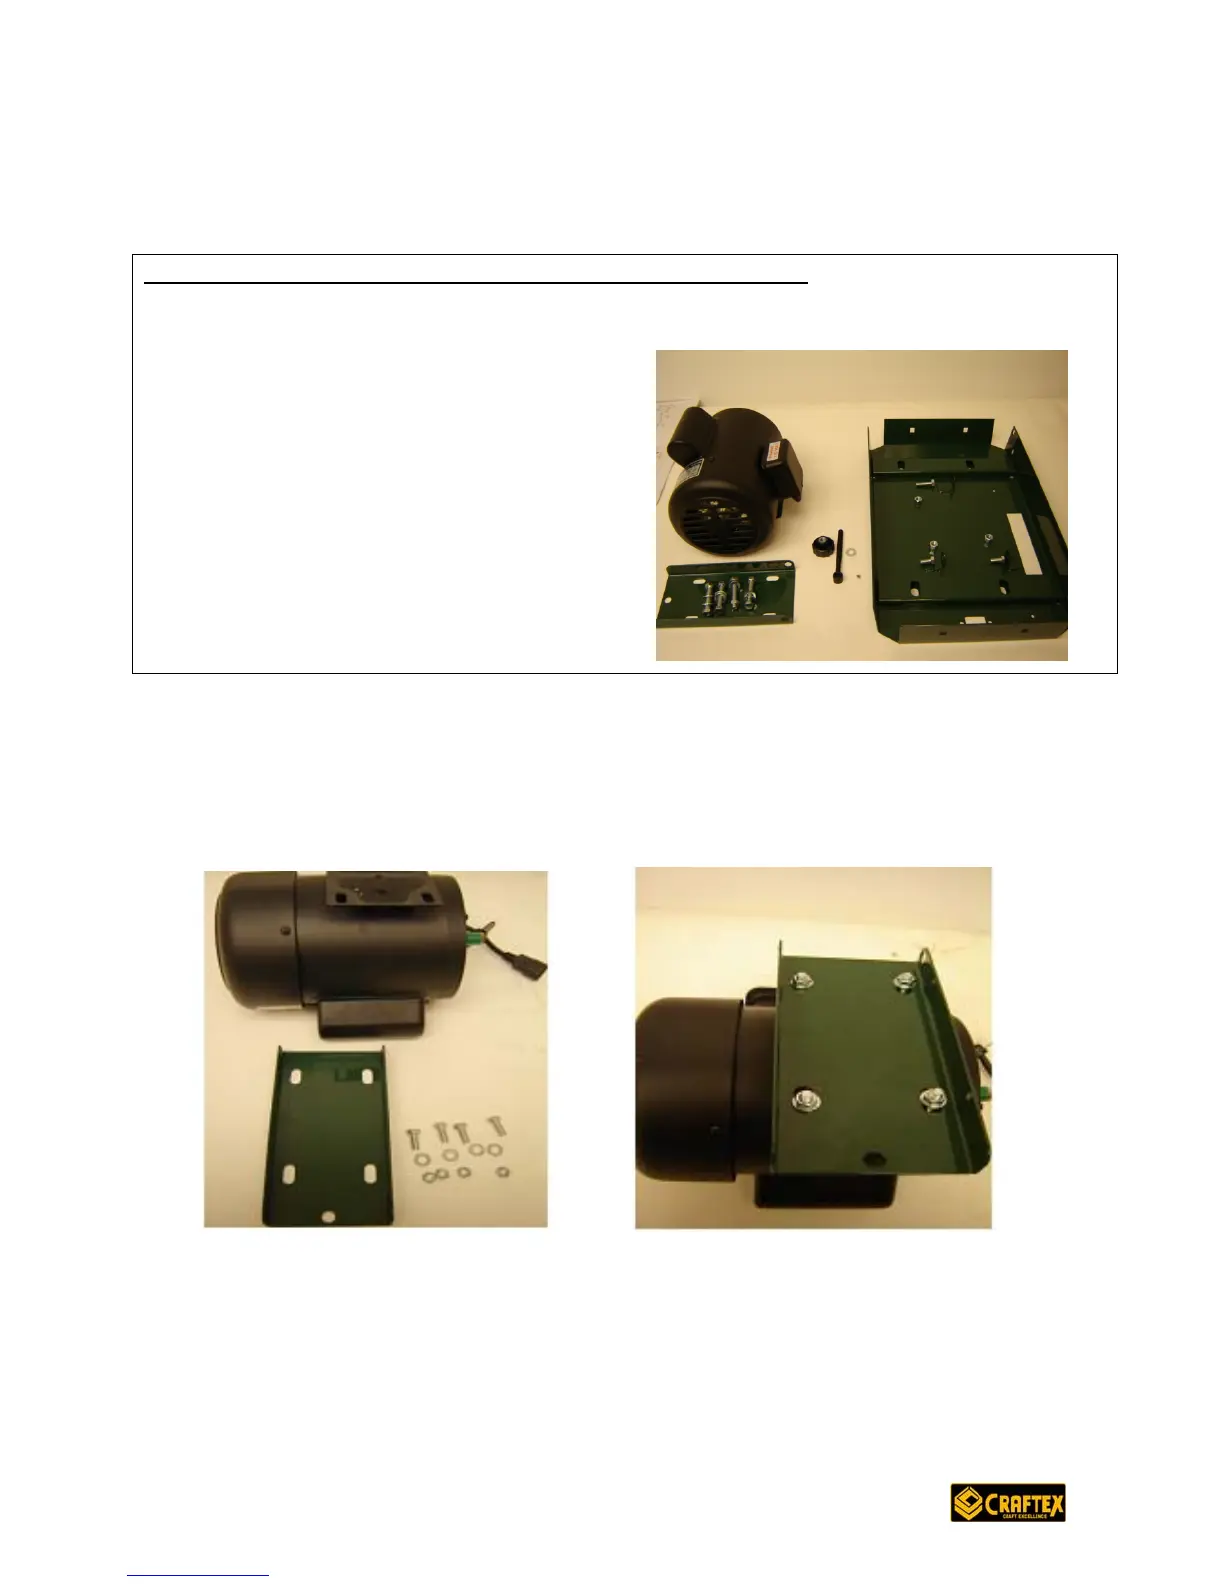
MOTOR MOUNT ASSEMBLY
Parts required (with part#): Qty: Tools required:
201: stand top 1 14mm wrench
209: motor 1
212: motor plate 1
210: motor knob 1
213: eye screw 1
205: nuts, 5/16” 4
214: self-locking nuts, 3/8” 3
215: hex bolt, 3/8” x 1 1/4” 1
216: flat washers, 5/16”-20 4
217: hex bolt, 3/8” x 3/4” 2
218 hex bolt, 5/16” x 3/4” 4
221: flat washer, 3/8” 1
1. With the motor plate/motor mount bracket (part #212) upside down, assemble it
to the motor (#209), using 3/4” bolts (#218), washers (#216) and nuts (#205).
Tighten only fingertip tight (final tightening will be done when adjusting drive belt
tension in STEP FOUR, #8).