CambiodeAceitedel Motor
NOTA:Cambieelaceitedespu_sdelas5 primerashorasdeoperaci6ny despu_sde
cada50horasdeoperaci6no unavezportemporada.
1. Vacieel combustibledeltanquehaciendofuncionarel motorhastaqueel
tanquedecombustibleest_ratio. Cerci6resedequelatapadelcombustible
est_asegurada.
2. Coloqueunrecipienteadecuadopararecolectarelaceitebajoeltap6nde
drenajedeaceite.
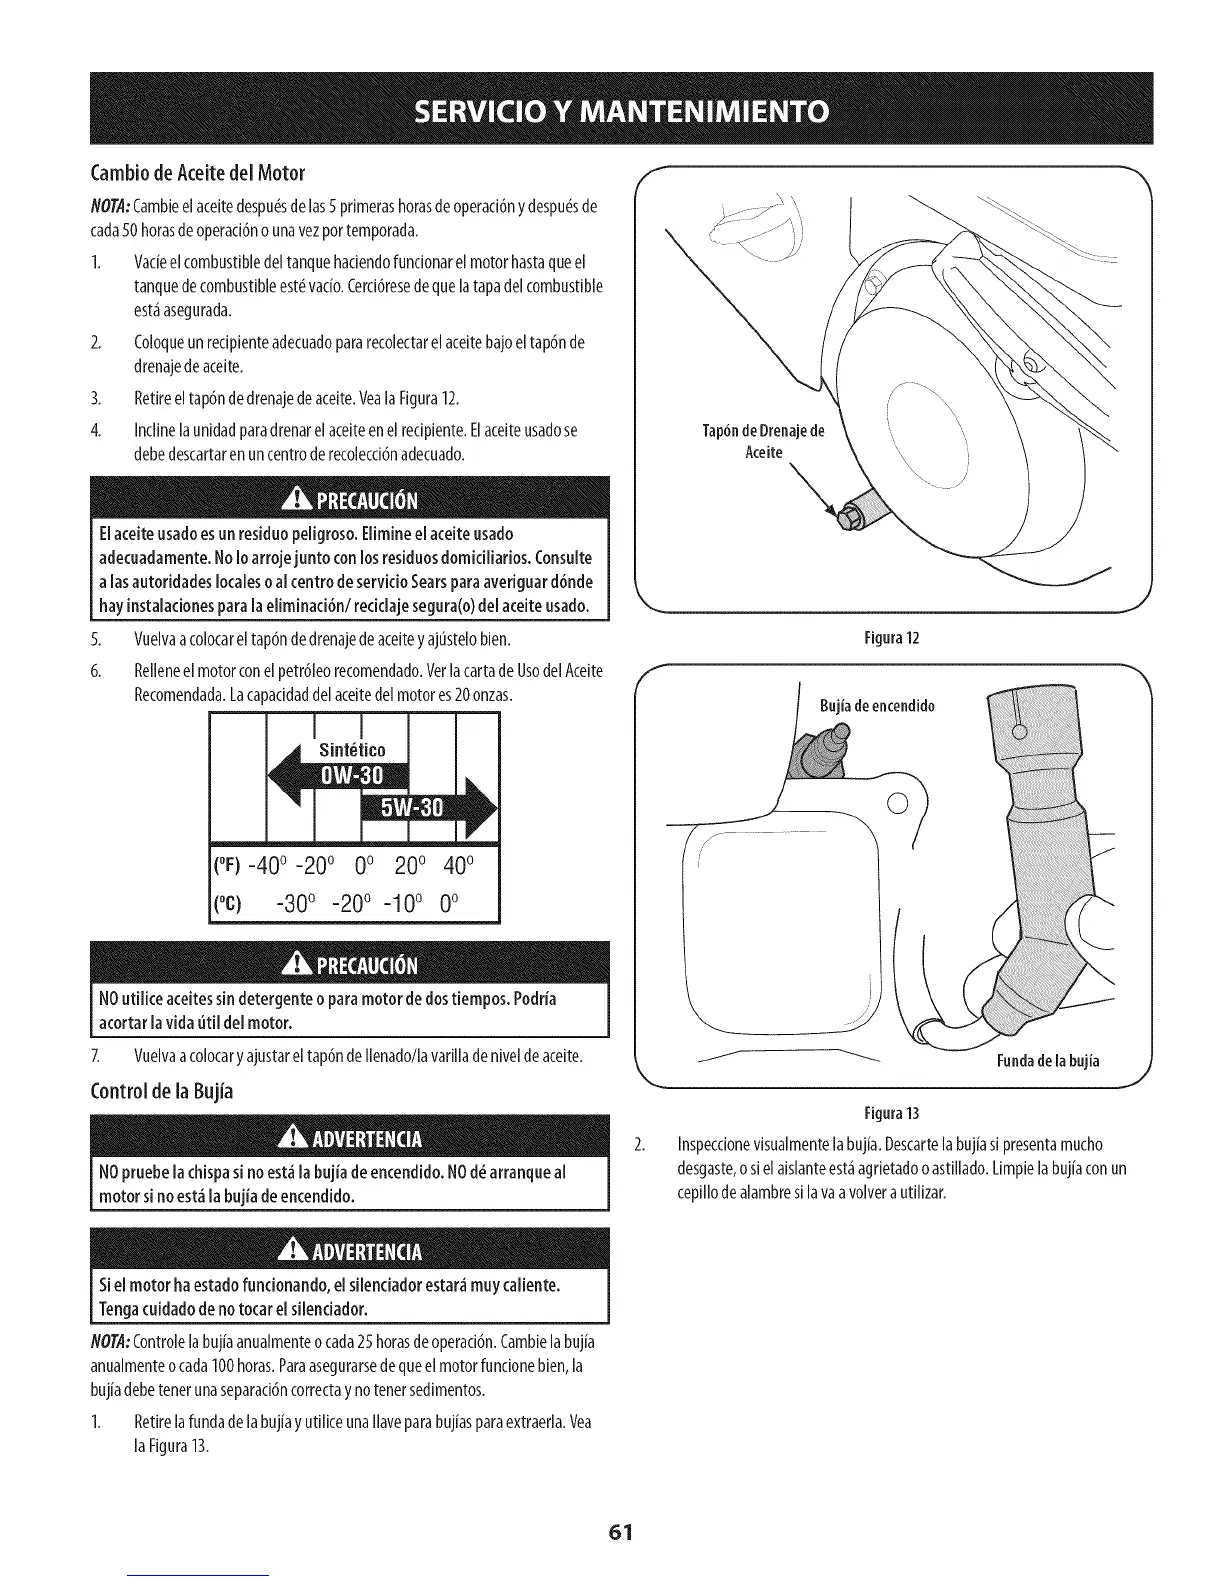
3. Retireeltap6ndedrenajedeaceite.VealaFigura12.
4. Inclinelaunidadparadrenarelaceiteenelredpiente.Elaceiteusadose
debedescartarenuncentroderecolecci6nadecuado.
EIaceiteusadoesunresiduopeiigroso.Eiimineel aceiteusado
adecuadamente.No1oarrojejunto conlosresiduosdomiciiiarios.Consuite
alas autoridadeslocalesoal centrodeservicioSearsparaaveriguard6nde
hayinstalacionespara[aeliminaci6n/recidaje segura(o)delaceiteusado.
5.
6.
Vuelvaacolocareltap6ndedrenajedeaceiteyajtistelobien.
Relienee[ motorcone[petr61eorecomendado.VerlacartadeUsodelAceite
Recomendada.Lacapacidaddelaceitedelmotores20onzas.
(°F)-40 °-20 ° 0 o 200 400
(oc) -300 -200 -10° 0°
NOutiiice aceitessindetergenteoparamotordedostiempos.Podria
acortar[avidauti[de[ motor.
Z Vuelvaacolocaryajustareltap6ndeIlenado/lavarilladeniveldeaceite.
Control de la Bujia
NOpruebela chispasinoest_la bujiadeencendido.NOd_arranqueal
motor sinoest_la bujiadeencendido.
Tap6ndeDrenajede
Aceite
Figura12
Bujiade encendido
J
Fundadelabujia
J
Figura13
Inspeccionevisualmentelabujia.Descartela bujiasipresentamucho
desgaste,o sielaislanteest_agrietadooastillado.Limpielabuj[aconun
cepillodealambresilavaavolvera utllizar.
Siel motor haestadofuncionando,elsilendadorestar_muycaliente.
Tengacuidadodenotocarelsilendador.
NOTA:Controlelabuj{aanualmenteocada25horasdeoperad6n.Cambielabujia
anualmenteocada100horas.Paraasegurarsedequeelmotorfundonebien,la
buj[adebetenetunaseparad6ncorrectaynotenetsedimentos.
1. Retirelafundadelabuj[ayutiliceunaIlaveparabuj[asparaextraerla.Vea
laFigura13.
61
 Loading...