_w
r=AP=_ r =L|NI,t M Hequiredafter every 3rdto 5th
time thePowerSharp® Systemis usedto correctthe
side l_latesand depth gauges.
NOTE: If abrasive materials such as rocks, nails,
sand, or.dirt are contacted by the chain, the side
plates should be checked more often. Damage
to the cutters caused by abrasive materials
usually results in discoloration spots where the
chrome has been Worn away. Side plates should
be filed until these spots are removed.
Items Required: Gloves, 5!32" round file, File
holder, flat file, screwdriver, Vise.
1. Disconnect your saw from the power source.
2. Adjust the chain for proper tension, page 7.
3.'Clamp the bar in a vise to hold the chain
steady. Do not clamp the chain.
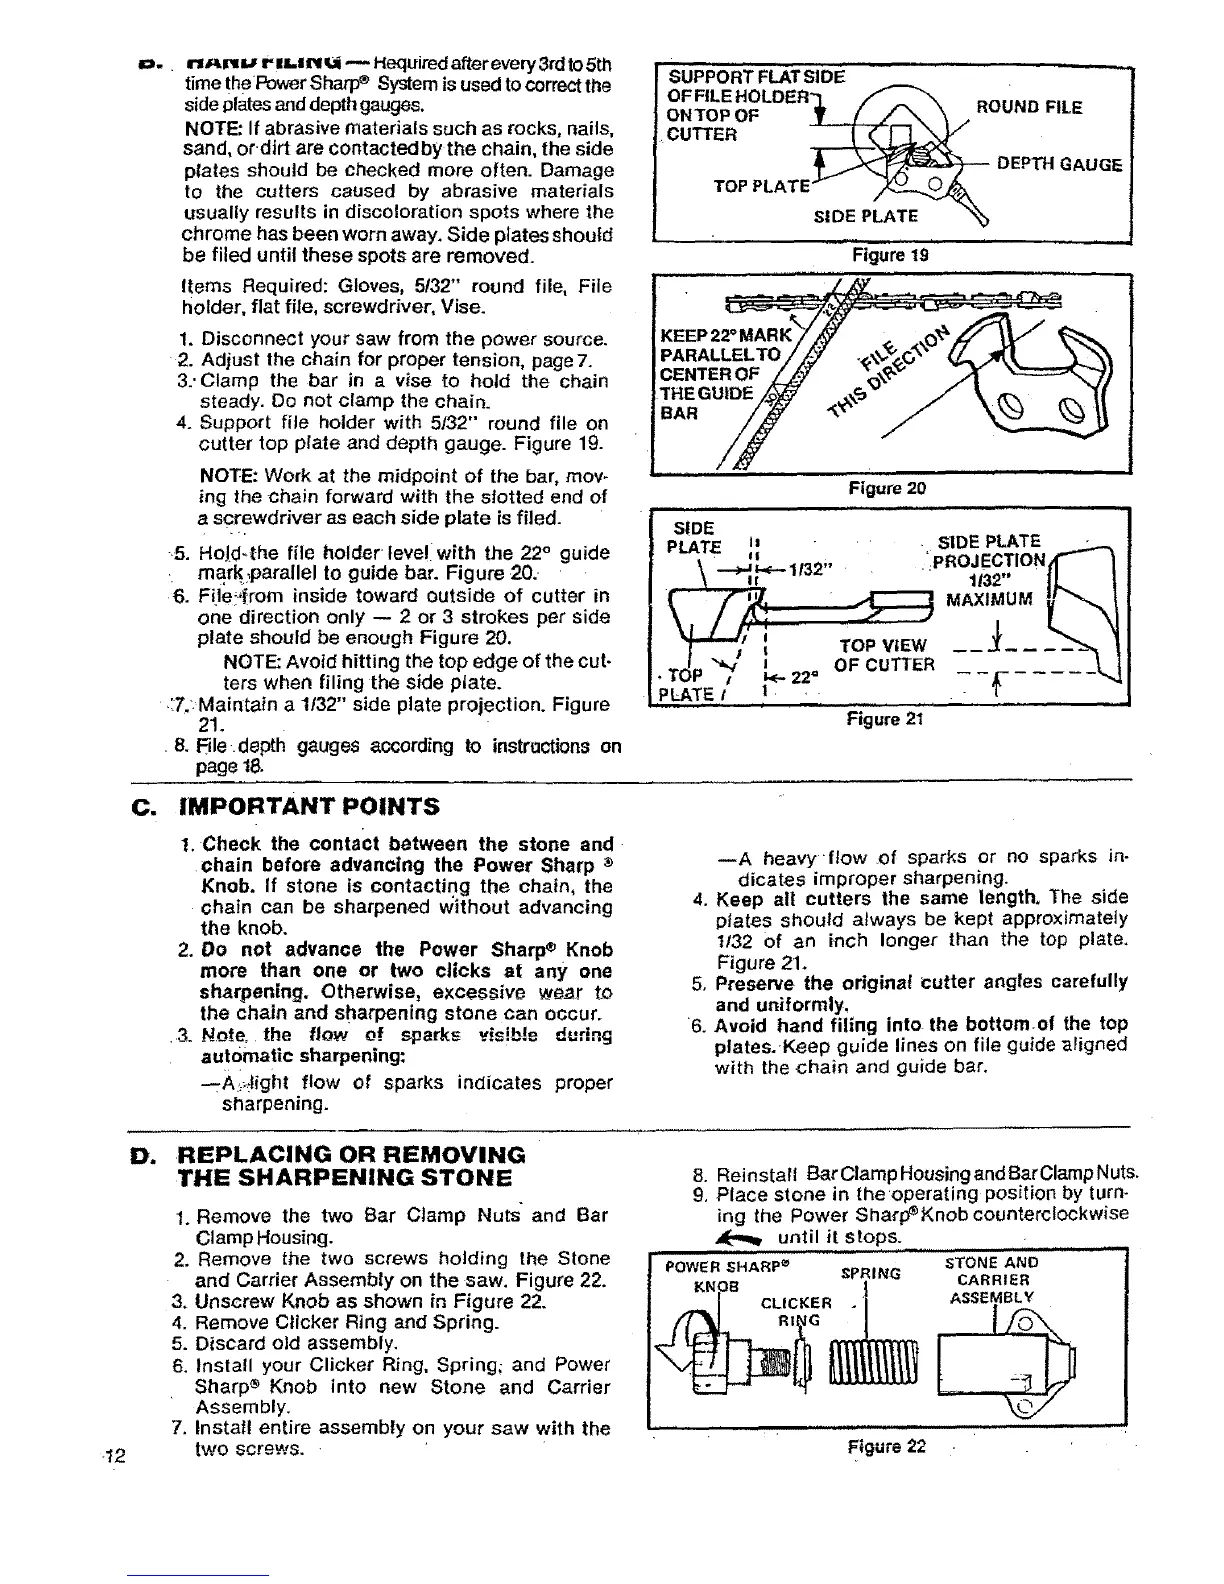
4. Support file holder with 5/32" round file on
cutter top plate and depth gauge. Figure 19.
NOTE: Work at the midpoint of the bar, mov-
ing the chain forward with the slotted end of
a screwdriver as each side plate is filed.
5. HoJd.{he file holder feve!iwith the 22° guide
mark:parallel to guide bar. Figure 20.
6. File_.,{rom inside toward outside of cutter in
one direction only -- 2 or 3 strokes per side
plate should be enough Figure 20.
NOTE: Avoid hitting the top edge of the cut.
ters when filing the side plate.
.:T.:Maintain a 1/32" side plate projection. Figure
21.
8. Ble.depth gauges according to instractions on
page l&
suPPoRT FLATSiDE ................ -
OFFILE HOLDER
ONTOP OF _-X_ i ROUND FILE
DEPTHGAUGE
TOPPLATE- ,/_
SIDE PLATE "_
Figure 19
CENTER OF
THEGUIDE
BAR
Figure 20
S!DE
PLATE is StDE PLATE
\ --_ L<---11._P,, , ':pROJECTION
.... 1132"
Figure21
C. IMPORTANT POINTS
1. Check the contact between the stone and
chain before advancing the Power Sharp •
Knob. If stone is contactin.g the chain, the
chain can be sharpened without advancing 4.
the knob.
2, Do not advance the Power Sharp® Knob
more than one or two clicks at any one
sharpening. Otherwise, excessive wear to 5,
the chain and sharpening stone can occur.
.3. No_re. the flow of =.sparks visi.b!e during 6.
automatic sharpening:
-.Ai,_ight flow of sparks indicates proper
sharpening.
--A heavyflow of sparks or no sparks in-
dicates improper sharpening.
Keep all cutters the same length, The aide
plates should always be kept approximately
t/32 of an inch longer than the top plate.
Figure 21.
Preserve the origina! cutter angles carefully
and uniformly,
Avoid hand filing into the bottom.of the top
plates.,Keep guide lines on file guide aligned
with the chain and guide bar.
D. REPLACING OR REMOVING
THE SHARPENING STONE
-12
1. Remove the two Bar Clamp Nuts and Bar
Clamp Housing.
2. Remove the two screws holding the Slone
and Carrier Assembly on the saw. Figure 22.
3. Unscrew Knob as shown in Figure 22.
4. Remove Clicker Ring and Spring.
5. Discard old assembly.
6. Install your Clicker Ring, Spring; and Power
Sharp ® Knob into new Stone and Carrier
Assembly.
7. install entire assembly on your saw with the
two screws.
8. Reinstall BarClampHousingandBarClampNuts.
9. Place stone in the operating position by turn-
ing the Power Sha_p_Knobcounterclockwise
,_ until it stops. . --
SPRING
STONE AND
CARRIER
ASSEMBLY