.
SUPPORT (Fig ure 31):
a. Inarea A:
1.) Undercut ;13of the way through the log.
2.) Finish with an overcut.
b. Inarea B:
t,) Overcut, 1/3 of the way through the log.
2.) Finish with an undercut.
BUCKING-- USING A STAND (Figure 32):
a. In areaA:
1.) Undercut1/3 of theway throughthe log.
2.) Finishwithan overcut.
b. in area B:
1.) Overcut 1/3of the way throughthe log.
2.) Finishwithan undercut.
/_.kWAHNIN_
DO not stand on the log being cut. The cut potion t
will roll down hill. I
USECOMMONSENSE
MAINTAIN SECURE FOOTING
D. DEBRANCHING AND PRUNING
• W0rk!sfowly, keeping, both hands on the saw
wit.ha firm grip. Maintain secure footing and bal-
ance_
o Watch out for springpoles. Use extreme caution
when cutting small size limbs. Slender material
may catch the saw chain and be whipped toward
you or pullyouoffbalance.
= Be alert for springback. Watch out for branches
that are bent or under pressure as you are cutting
toavoid being struckby thebranch orthe saw when
thetension inthe woodfibersis released.
• Keep a clear work area. Frequently clear bran-
chesout ofthe way toavoid trippingover them.
_WARNING
Never climb into a tr_e to debranch or prune. Do not
stand on ladders, platforms, a log or in any position
which can cause you to lose control of the saw.
1. DEBRANCHING
a. Always debranch a tree after it Is cut down,
.,0nly{hen candebranching be done safelyand
.... :properly.
b.Leave the larger lower limbs to support the
:tree as you work,
c. Start at the base of the felled tree and work
towards the top, cutting branches and limbs.
Remove small limbs with one cut. Figure33,
d. Keep the tree between you and the chain.
Cut from the side of the tree opposite the
branch youare cutting.
e. Remove larger, supporting branches with
the 1/3, 2/3 cutting techniques described in
the bucking section.
1.) Start with an overcut
2.) Finish with an overcut
f. Always use an overcut tocut small and freely
hanging limbs. Undercutting could cause
limbs tofalt and pinch the saw.
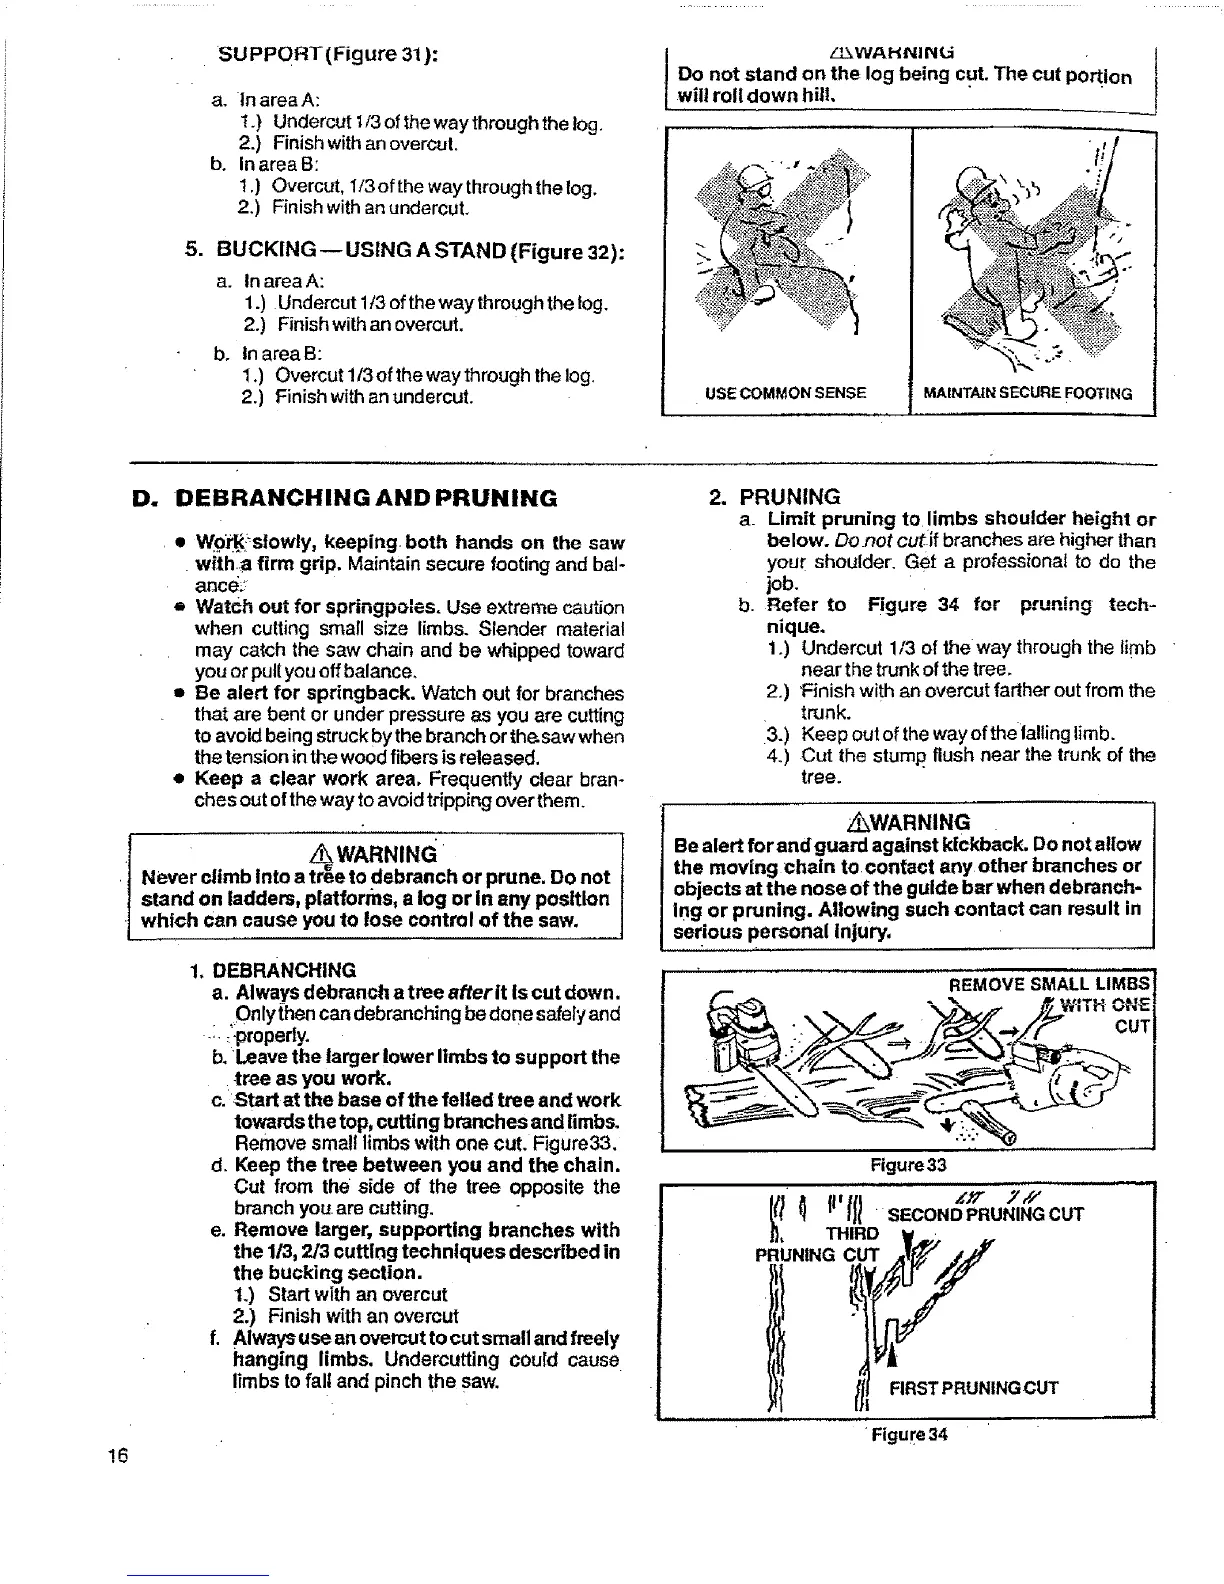
2. PRUNING
a_ Limit pruning to limbs shoulder height or
below. Do not cutif branches are higher than
your shoulder. Get a professional to do the
job.
b. Refer to Figure 34 for pruning tech-
nique.
1.) Undercut 1/3 of theway through the limb
near the trunk ofthe tree.
2.) Finish with an overcut farther out from the
trunk.
3.) Keep out of the way oftheialting limb.
4.) Cut the stump flush near the trunk of the
tree.
Z_WARNING
Be alert for and guard against kickback. Do not atiow
the moving chain tocontact any other branches or
objects at the nose of the guide bar when debranch-
Ing or pruning. Allowing such contact can result in
serious personal Injury,
REMOVE SMALLLIMBS
F WiTH ONE
CUT
Figure33
luJ,
i /.27" _'//"
[_t__ {I Ill " SECONDPRUNINGCUT
1, THIRD ¥_ ..
PRUN|NG _!_#
RRSTPRUNINGCUT
•Figure34
!6