USING THE POWER SHARP ®SYSTEM
(MODEL 358.34031 )
Model 358.34031 is equipped with a Power Sharp® Sys-
tem that will perform approximately 80% of the sharpening
necessary for the saw chain. The Power Sharp® System
uses a built-in gdnding stone to sharpen the cutter top
plates:_.nd set depth gauges. As the built-in sharpener is
used, the cutter side plates gradually wilt be altered_ About
every:3rd to 5th time the Power Sharp® System is used,
hand filing is required to correct the cutterside platesand
depth • gauges.
jCAUTION:JAIways wear gloves when handling
the chain. The chain is sharp and can cut
you easily, even when it is not moving.
• _Sharpen the saw chain when:
--wood chips become small and powdery.
Wood chips made by the chain should be
about the size of the teeth of the chain.
--saw cuts to one side.
--saw has to be forced through the cut.
• Replace the sharpening Stone when a new
Power Sharp '_chain is installed. The sharpen-
ingstone will wear to the shape ofthe worn chain
and willcause excessivewear toa new chain ifnot
replaced. Replacement Power Sharp,_ Chain.
Stock No. 71-3618, comes supplied with a Shar-
pening Stone Replacement, Refer to replacement
instrucUons in thissection.
• Remove the sharpening stone if a standard or
conventional, chisel-type chain is substituted
'for the P0wer Sharp '-_Chain. See instructions for
removing the sharpening Stone below, Use as re-
placement chain Stock No. 71-3623. Follow stan-
dard chain,sharpening instructions,page 18.
A. AUTOMATIC SHARPENING
1. Disconnect the saw from the Dower source.
2._Pt'ace the saw on a solid, flat surface and
make sure that the chain will not contact any
object.
3. Adjust the chain for proper tension. Refer to
Chain Tension, page 9.
NOTE: The Power Sharp ® System will not
sharpen correctly unless the chain is property
tensioned.
4. Connect the power cord and run saw during
steps "5", "6", and "7".
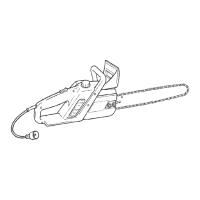
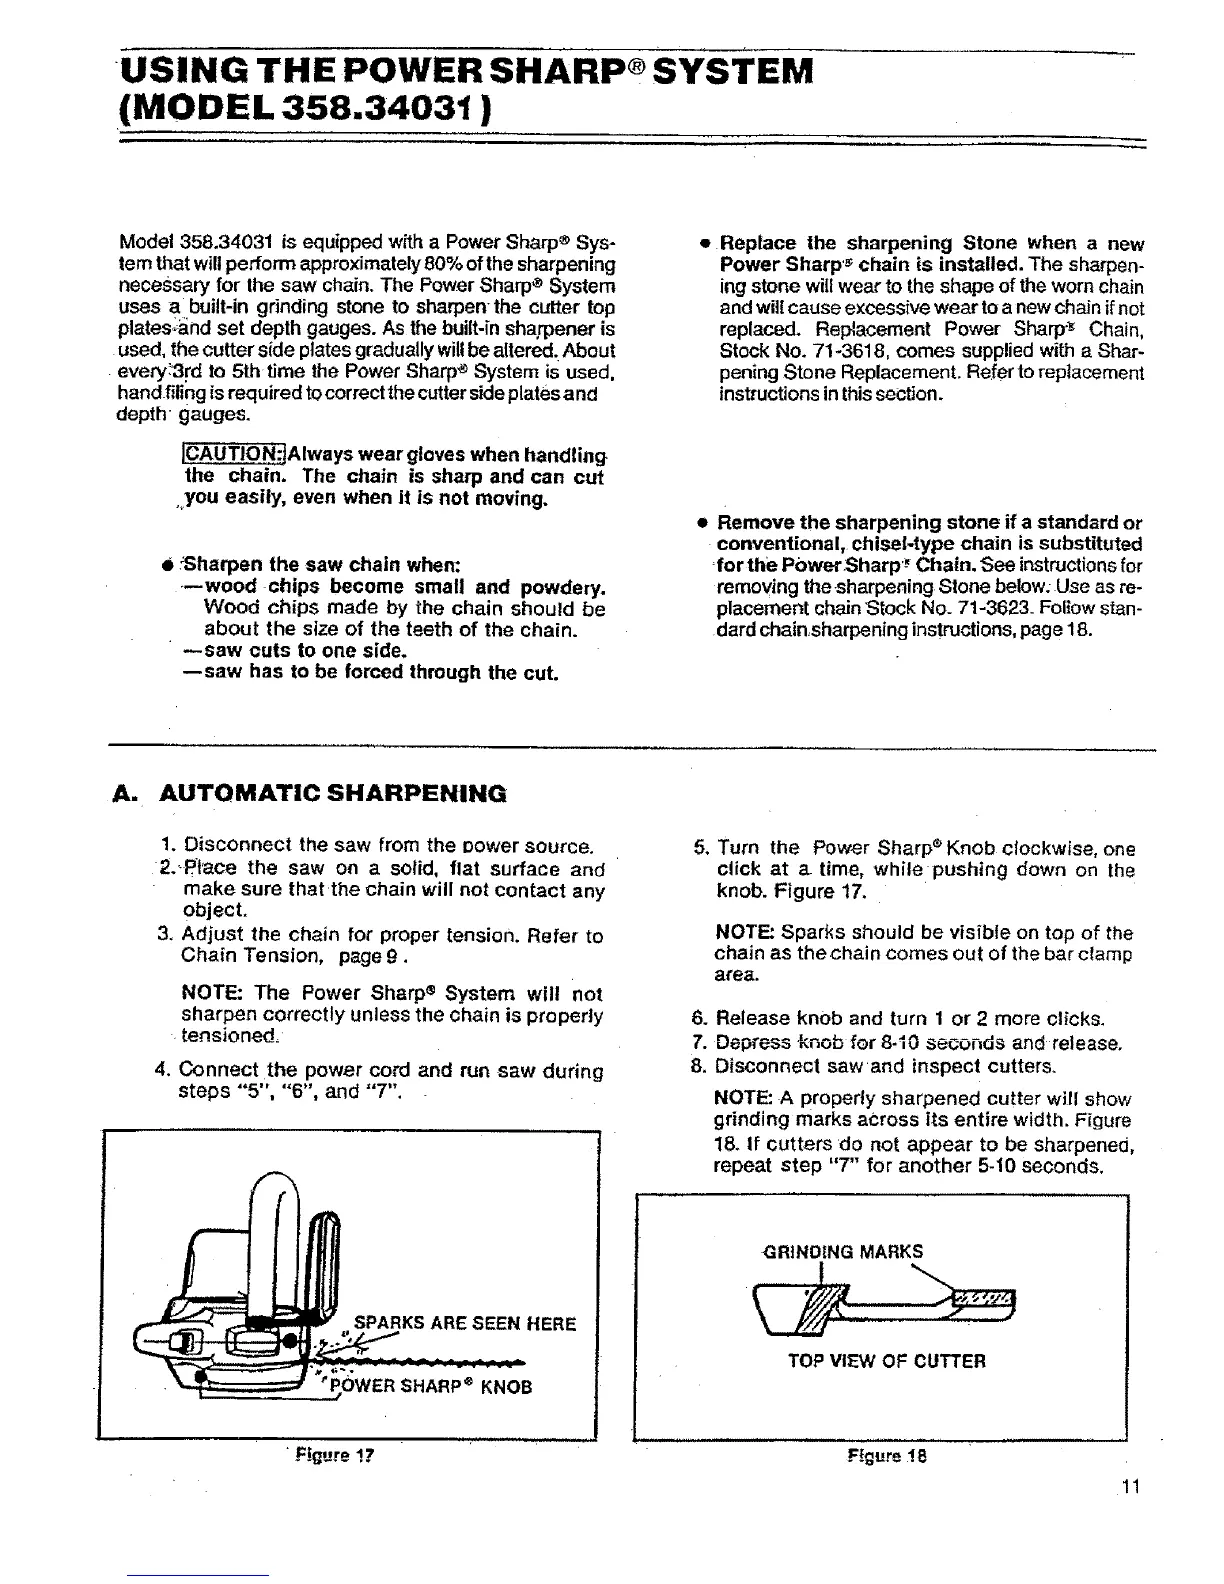
SPARKS ARE SEEN HERE
pOWER SHARP® KNOB
•Figure !?
,
, ,,,L,
.
7.
8.
Turn the Power Sharp ®Knob clockwise, one
click at a time, whilepushing down on the
knob. Figure 17.
NOTE: Sparks should be visible on top of the
chain as thechain comes out of the bar clamp
a_'ea.
Release knob and turn 1 or 2 more clicks.
Depress knob for 8-10 seconds and release.
Disconnect saw and inspect cutters.
NOTE: A propedy sharpened cutter will show
grinding marks across its entire width. Figure
18. if cutters do not appear to be sharpened,
repeat step "7" for another 5-10 seconds.
GRINDING MARKS
TOP VIEW OF CUTTER
F{gure 4.8
11