C. CHAIN REPLACEMENT
1.) Replace the chain when cutters or links
break.
2.) See your Sears Service Centerto replace
and sharpen individual cutters to match
your chain.
3.) Always replace a worn sprocket when
installing a new chain toavoid excessive
wear to the chain.
2. GUIDE BAR MAINTENANCE
• Conditions which can require guide bar
maintenance:
saw.cuts to one side
saw has to be forced through a cut
inadequate supplyof oiltobar and chain.
,, Check the condition ofthe guide bar each
time the chain is sharpened. A worn guide
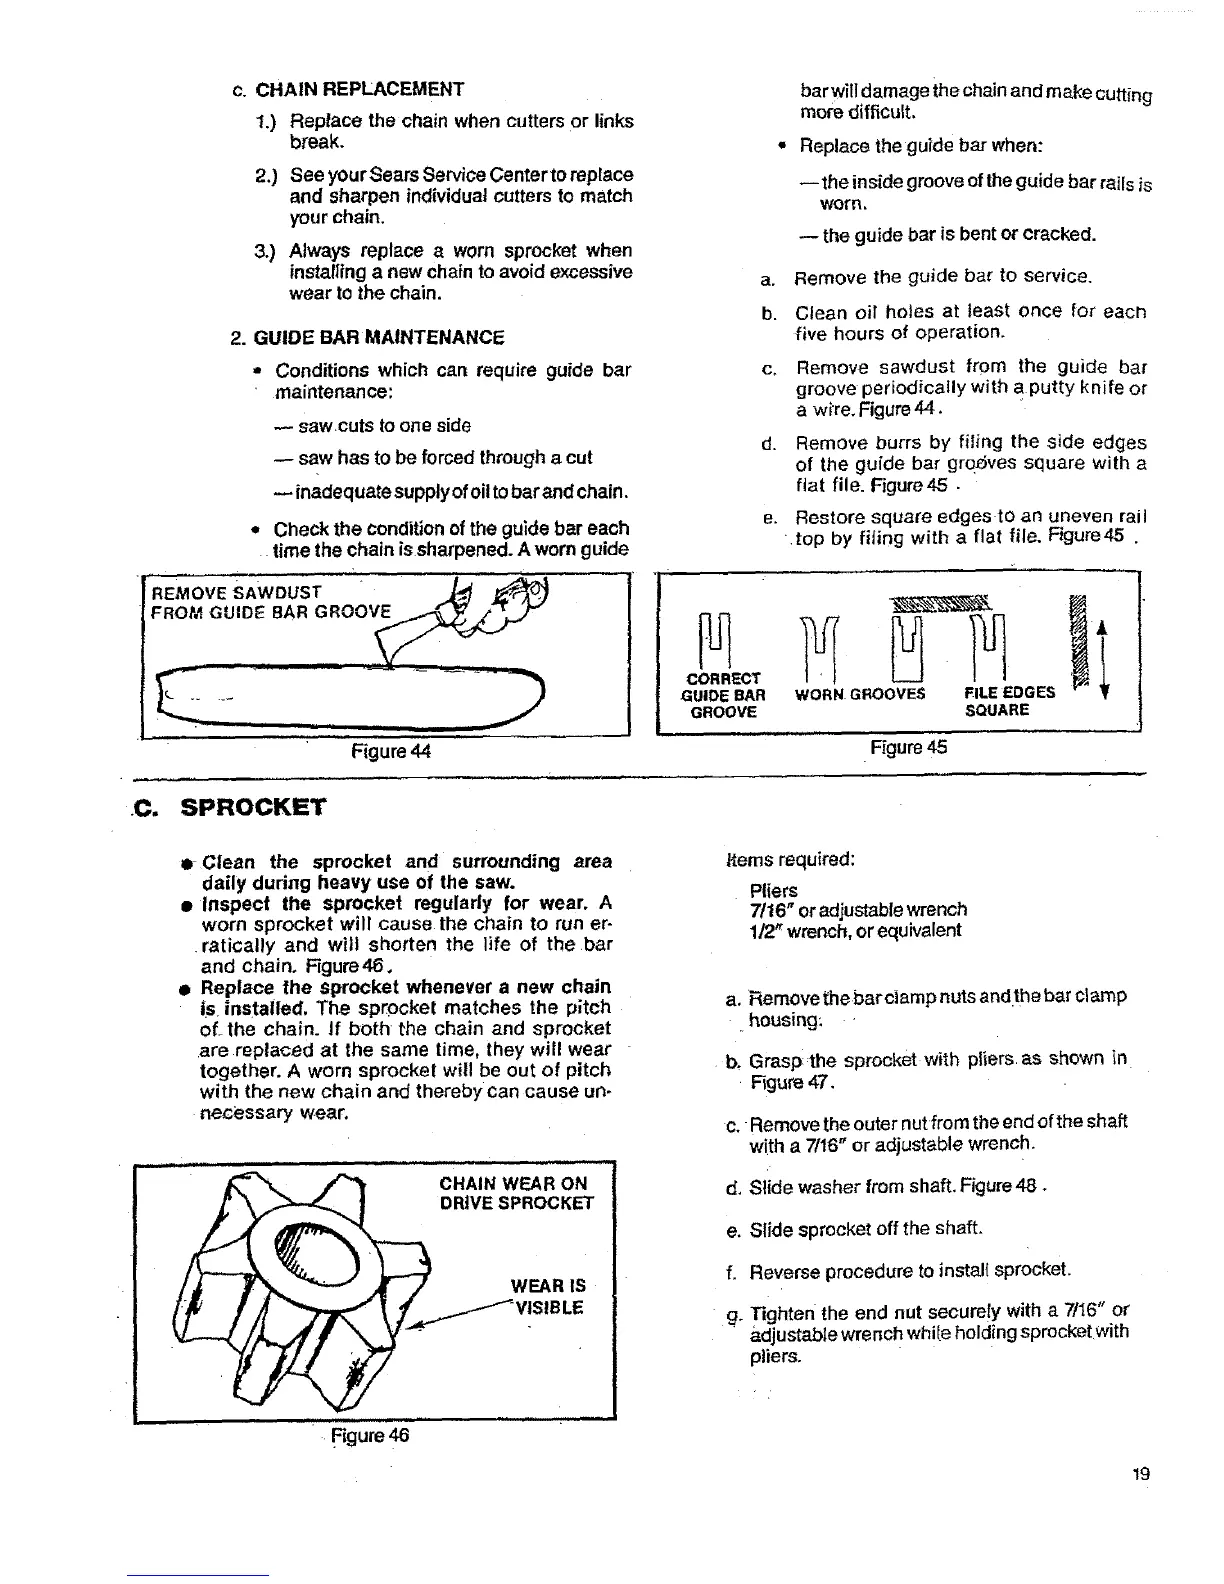
REMOVESAWDUST " _ ""'_
FROM GUIDE BAR GROOV_j_/"
Figure44
a.
b.
C. SPROCKET
• Clean the sprocket and surrounding area
daily during heavy use of the saw.
• Inspect the sprocket regularly for wear. A
worn sprocket will cause the chain to run er-
•ratically and will shorten the life of the bar
and chain, Figure46o
• Replace the sprocket whenever a new chain
iS_installed. The sprocket matches the pitch
of the chain. If both the chain and sprocket
are replaced at the same time, they will wear
together. A worn sprocket will be out of pitch
with the new chain and thereby can cause un-
necessary wear.
WEAR IS
' g re46
C_
bar will damage the chainan dmake cutting
more difficult,
Replace the guide bar when:
-- the inside groove of the guide bar rails is
worn,
the guide bar is bent or cracked.
Remove the guide bar to service.
Clean oil holes at least once for each
five hours of operation.
Remove sawdust from the guide bar
groove periodically with a putty knife or
a w_re. Figure44.
d. Remove burrs by filing the side edges
of the guide bar grodves square with a
fiat file. Figure45.
e. Restore square edges to an uneven rail
,top by fiiing with a flat file. F_gure45 .
GUIDE BAR WORN GROOVES FILE EDGES
GROOVE SQUARE
Figure 45
Items required:
Pliers
7116"or adjustable wrench
1/2_wrench, or equivalent
a. Remove the bare|amp nuts andthe bar clamp
.housing:
b. Grasp_the sprocket with pliers as shown in
Figure 47,
c. Remove the outer nutfrom the end of the shaft
with a 7116"or adjustable wrench.
d, Slide washer from shaft. Figure48.
e. Slide sprocket off the shaft.
f. Reverse procedure to instal{ sprocket.
g. Tighten the end nut securely with a 7116"or
• adjustable wrench while holding sprocket with
pliers.
19