EasyManuals Logo

Creality Ender User Manual

Creality Ender
19 pages
To Next Page IconTo Next Page
To Previous Page IconTo Previous Page
Page #8 background imageLoading...
Page #8 background image
8
11
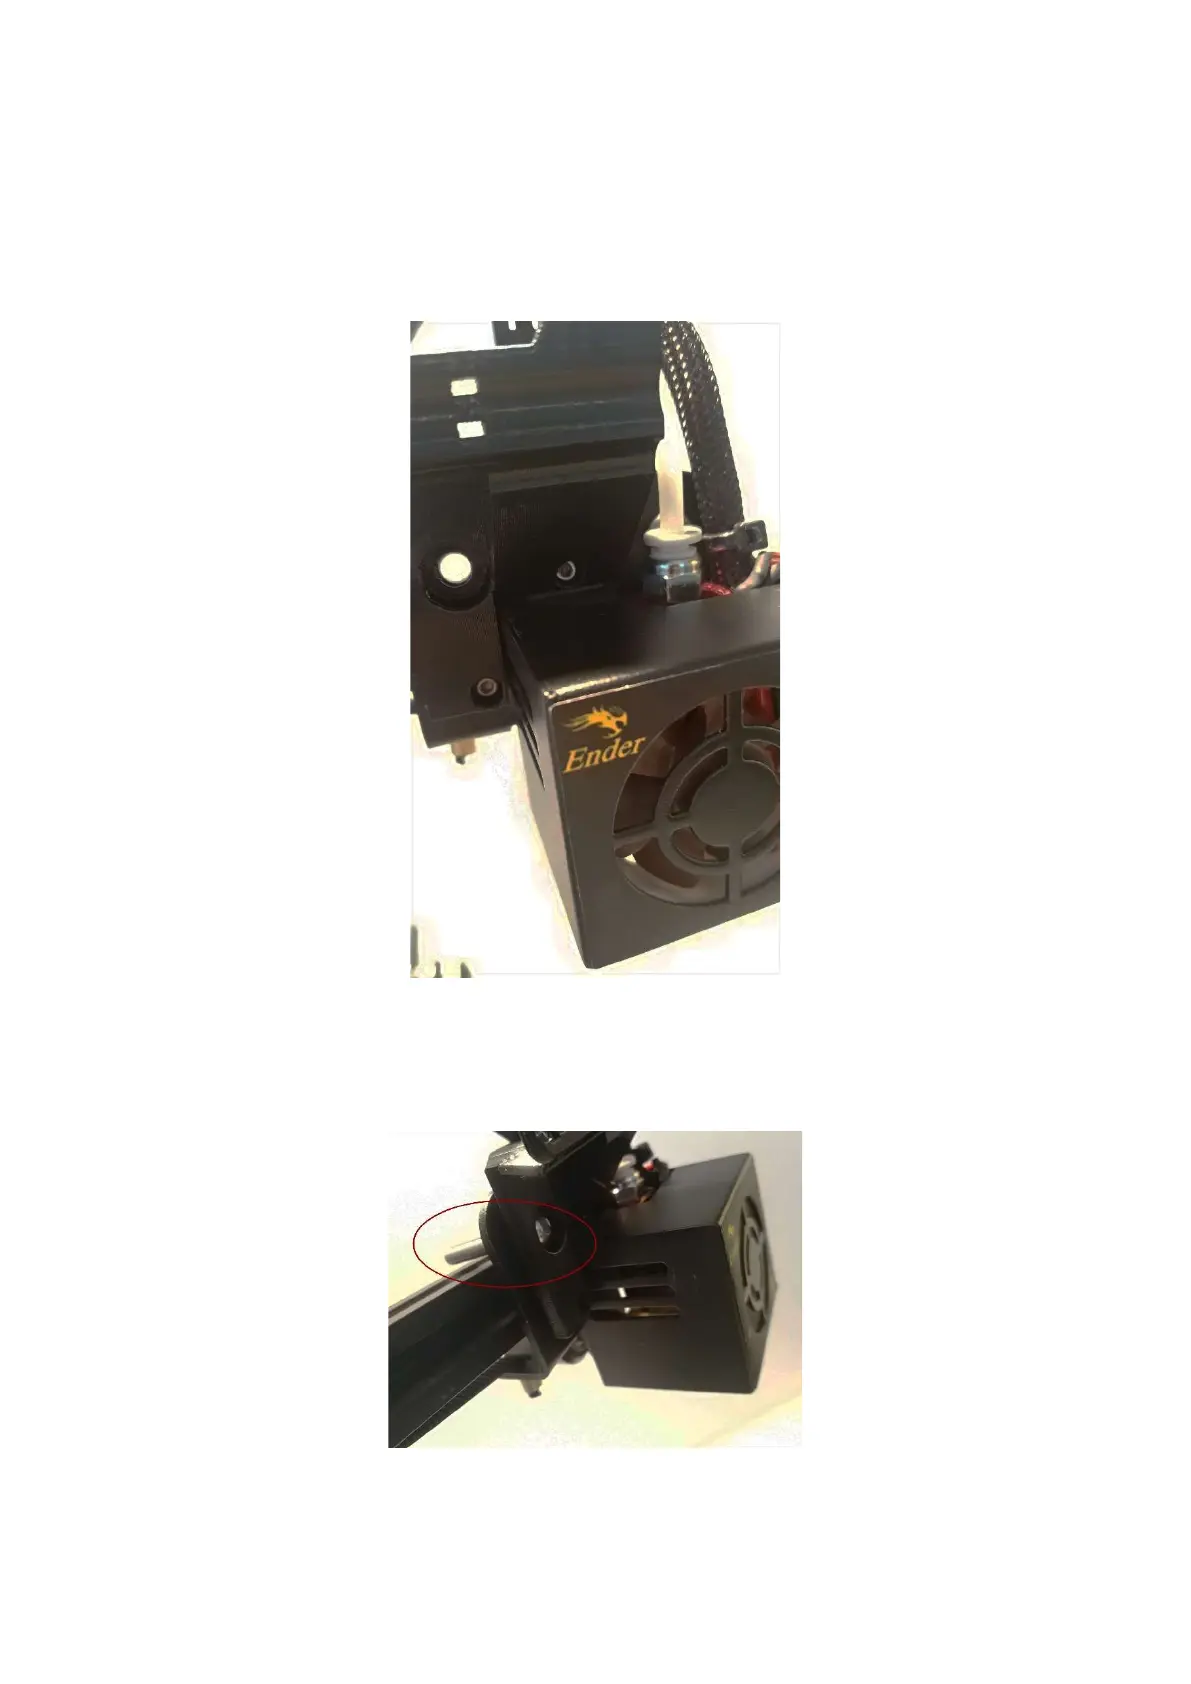
Now place the hotend shroud back on the carriage and align the PETG adaptor as shown below –
screw the two short screws into the holes you unscrewed them from in step 6. You may want to
have someone help you hold the pieces in place while you screw them in. Tighten the bolts gently,
making sure you do not crack the plastic.
12
Insert the big bolt as shown here.

Questions and Answers:

Question and Answer IconNeed help?

Do you have a question about the Creality Ender and is the answer not in the manual?

Creality Ender Specifications

General IconGeneral
Build Volume220 x 220 x 250 mm
Layer Resolution0.1 - 0.4 mm
Nozzle Diameter0.4 mm
Filament Diameter1.75 mm
ConnectivitySD Card, USB
Bed LevelingManual
TechnologyFDM
Machine Dimensions440 x 410 x 465 mm
DisplayLCD
Supported MaterialsPLA, ABS, TPU
FrameAluminum
Power Supply24V 350W

Related product manuals