EasyManua.ls Logo

Crown K1 - Service Manual

Crown K1
116 pages
Print Icon
To Next Page IconTo Next Page
Loading...
Service Manual
KSVCK1K2
03/98
Rev. A
K SERIESK SERIES
K SERIESK SERIES
K SERIES
PROFESSIONAL AUDIO AMPLIFIERSPROFESSIONAL AUDIO AMPLIFIERS
PROFESSIONAL AUDIO AMPLIFIERS
Models:
K1, K2
© 1999 by Crown International, Inc., P.O. Box 1000, Elkhart, Indiana 46515-1000 U.S.A. Telephone: 219-
294-8000.
K Series
amplifiers are produced by Crown International, Inc. Trademark Notice:
Balanced
Current Amplifier
™ is a trademark, and
Crown
®
and
BCA
®
are registered trademarks of Crown
International, Inc. Other trademarks are the property of their respective owners.
BALANCED CURRENT AMPLIFIER
Enable
Clip
Thermal
Signal
IOC
2
Enable
Clip
Thermal
Signal
IOC
2
1
0 dB
3
1
5
7
9
11
13
15
17
19
21
25
45
30
10 0
1
1
0 dB
3
1
5
7
9
11
13
15
17
19
21
25
45
30
10 0
1
0 dB
3
1
5
7
9
11
13
15
17
19
21
25
45
30
10 0
0 dB
3
1
5
7
9
11
13
15
17
19
21
25
45
30
10 0

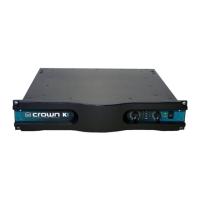
Table of Contents

Other manuals for Crown K1

Questions and Answers

  • M
    Maxwell HenryJul 25, 2025
    Why does my Crown K1 not meet power specs?
    • T
      Tyler RiceJul 26, 2025
      If your Crown Amplifier isn't reaching its specified power output, examine your power source. A drop in AC voltage below the amplifier's operational voltage can prevent it from reaching its full rated output.
  • D
    Daniel RayJul 31, 2025
    What to do if my Crown K1 Amplifier gets extremely warm at idle?
    • E
      Eric ReyesJul 31, 2025
      If your Crown Amplifier is getting excessively warm when idle, check the Enable indicator on the front panel. If the amplifier doesn't enter Sleep Mode (indicated by half intensity of the Enable light) when there's no signal, the issue likely resides on the Input PWA. In that case, discharge the supplies and then inspect the Input PWA.
  • J
    Joseph WrightAug 4, 2025
    What to do if there is distortion in one or both channels with IOC indication in Crown K1?
    • H
      Heather ShieldsAug 4, 2025
      If you're experiencing distortion in one or both channels of your Crown Amplifier, accompanied by an IOC indication, the problem most likely lies within either the Output PWA or the Main PWA. Begin by inspecting the Output PWA. If the Output PWA is functioning correctly, then repair or replace the Main PWA.
  • B
    Beth CoffeyAug 9, 2025
    What to do if there is no signal with Enable light only in Crown Amplifier?
    • A
      Adam DunnAug 9, 2025
      If your Crown Amplifier shows no signal but the Enable light is on, the issue probably stems from the Input PWA. If the Input PWA is not the problem, then the Main PWA is at fault.
  • D
    diazdanielAug 14, 2025
    How to resolve distortion with no IOC in Crown K1 Amplifier?
    • C
      carolyntoddAug 14, 2025
      If you notice distortion in one or both channels of your Crown Amplifier without any IOC indication, the problem is most likely located on the Input PWA. First, check the levels on the affected channels with no load. If the levels are correct, discharge the supplies, and then repair or replace the Input PWA.
  • M
    Martin WilliamsAug 20, 2025
    What to do if there is no signal with IOC on in Crown K1 Amplifier?
    • S
      Sean MarksAug 20, 2025
      A constant IOC condition indicates a problem in the signal path including the Error Amp circuit. This includes the Main and Output PWAs. The problem most likely exists on the Main PWA.

Summary

1 Introduction

1.1 Introduction

Provides an overview of the K1 and K2 power amplifier service manual contents.

1.1.1 The K Series Amplifiers

Describes the K Series amplifiers as efficient, compact, high-power audio amplifiers for professional use.

1.2 Warranty

Outlines warranty policies and directs users to Crown Factory Service or Authorized Warranty Service Centers.

1.3 Repair Strategy

Explains the modular design and module exchange program for K Series amplifiers, emphasizing PWA replacement.

1.4 Service Procedure

Details the steps for servicing K Series amplifiers, including PWA return and warranty claim procedures.

2 Specifications

2.1 Performance

Details frequency response, output power, signal-to-noise ratio, voltage gain, damping factor, and line voltage requirements.

2.2 Controls

Describes the front panel level controls and rear panel switches for input sensitivity and operation.

2.3 Indicators

Explains the function of the front panel LEDs: Thermal, Clip, IOC, Signal, and Enable.

2.4 Input;Output

Details input connectors, input stage, impedance, sensitivity, output connectors, and DC output offset.

2.5 Output Signal

Describes the stereo and bridge-mono output signal configurations.

2.6 Protection

Details general protection features and TLC protection circuitry for the amplifier.

2.7 Construction

Describes the chassis, cooling system, dimensions, and weight of the amplifier.

Turn On

Describes the state-of-the-art 'soft start' feature that prevents large inrush current when turned on.

3 Theory

3.0 Overview

Explains the general operation of the K Series amplifier, covering Power Supplies, Input Stage, DC Servo, Sleep Circuit, Error Amp, and Modulator.

3.1 Power Supplies

Details the main high energy power supply and low energy power supplies found within the K Series amplifiers.

3.1.1 Main Power Supply

Describes the AC line cord termination, fuse, AC line filter circuit, and path to the power transformer primary.

3.1.2 Low Voltage Power Supplies

Explains how ±Vcc power supplies initiate and power up the 125KHz oscillator and gate driver.

3.2 Input Stage

Details input connectors, signal path, impedance, and input sensitivity selections.

3.3 DC Servo

Explains the DC correction circuit added to compensate for DC offset voltages that can appear.

3.4 Sleep Circuit

Describes how the sleep circuit monitors for signals and sends a Standby signal to the main module.

3.5 Error Amp

Explains how audio signal and negative feedback signals are processed by the error amplifier.

3.6 Modulator

Details high speed differential comparators used in the modulator circuit and their balanced output.

3.7 Triangle Generator

Explains the origin of the 250KHz triangle wave and its journey through various stages.

3.8 Proportional Vcc Generator

Describes the generator that outputs a DC voltage varying with ±Vcc levels to influence the 250KHz output level.

3.9 Output

Details how the modulated 250KHz signal enters the output assembly via U02 and U52.

3.10 Output Filter

Explains the output filter consisting of three individual filters to eliminate residual signals.

3.11 Current Monitor

Describes how audio output current levels are monitored by transformer T100.

3.12 Current Limiter

To prevent excessive output current, the K series amplifiers are incorporated with a current limiting protection circuit.

3.13 Overlap Correction and Adjustment

Explains how the Overlap adjustment corrects for DC shift in the Triangle waveform using a potentiometer.

3.14 Display Circuitry

Describes the IOC (Input Output Comparator) circuit and its function with error signals.

3.15 Control Circuitry

Details the functions that can disable the modulator circuit and disable the amplifier.

3.16 Crowbar Circuit

Explains the DC protection comparator circuitry and how it latches the fault circuit.

4 Line Voltage Conversion

4.1 Line Voltage Conversion

Details how the K Series amplifier can be configured to operate at any line voltage worldwide.

5 Maintenance

5.1 Where to Begin

Outlines the three basic steps for effective repair: determine symptom, identify cause, and repair unit.

5.2 Disassembly for Inspection & Service

Explains that the extent of disassembly required depends on the inspection and service needed.

5.2.1 Bottom Cover Removal

Provides step-by-step instructions for removing the bottom cover of the amplifier.

5.2.2 Power Supply Discharge

Details the procedure for safely discharging the power supplies before disassembly.

5.2.3 Back Panel Assembly Removal

Explains how to remove the back panel assembly to access the Input and Main PWAs.

5.2.4 Front Panel Assembly Removal

Provides instructions for removing the front panel assembly to access specific components.

5.2.5 Input PWA Removal

Details the steps for removing the Input PWA after the back panel assembly is removed.

5.2.6 Main PWA Removal

Explains how to remove the Main PWA after the back panel assembly is removed.

5.2.7 Output PWA Removal

Provides instructions for removing the left and right Output PWAs.

5.2.8 Control PWA Removal

Details the steps for removing the Control PWA.

5.2.9 Line Filter PWA Removal (Early non-CE Units Only)

Explains how to remove the Line Filter PWA for early non-CE units.

5.2.10 Power Transformer Removal

Details how to remove the Power Transformer, which requires front panel removal.

5.2.11 Display PWA Removal

Explains how to remove the Display PWA after the front panel assembly is removed.

5.2.12 Bridge PWA Removal

Details how to remove the Bridge PWA after the front panel assembly is removed.

5.3 Troubleshooting

Guides the technician on how to identify and verify amplifier symptoms, including intermittent issues.

5.3.2 Identifying and Repairing the Cause

Outlines the process of visual inspection, using spare PWAs, and checking voltages to identify faults.

5.4 Required Test Equipment

Lists essential test equipment and recommended models for servicing the K Series amplifier.

5.5 Electrical Checkout Procedures

Details various electrical checkout procedures to verify amplifier operation and troubleshoot problems.

5.5.1 Quiescent AC Power Draw

Specifies and describes the procedure for measuring the amplifier's quiescent AC power draw.

5.5.2 Gain Switches

Details the specifications and procedures for testing the 1.4V and 26dB gain switch settings.

5.5.3 “Y” Input Switch Operation

Describes the procedure to test the 'Y' input switch for proper operation and phase alignment.

5.5.4 Bridge Mono Operation

Details the procedure to test the bridge mono switch for proper voltage and phase.

5.5.5 Frequency Response

Specifies and describes the procedure for measuring the amplifier's frequency response.

5.5.6 Short Circuit Test

Details the procedure to test the amplifier's short circuit protection.

5.5.7 Output Power

Specifies and describes the procedure for measuring the output power for K1 and K2 models.

5.5.8 Intermodulation Distortion

Specifies and describes the procedure for measuring intermodulation distortion.

5.5.9 Signal to Noise Ratio

Specifies and describes the procedure for measuring the signal-to-noise ratio.

5.5.10 Crosstalk at 1 kHz

Specifies and describes the procedure for measuring crosstalk at 1 kHz.

5.5.11 Post Test Settings

Details the factory default settings to return the amplifier controls to after testing.

5.6 Calibrations

Provides procedures for calibrating the Gaussian filter and adjusting overlap correction.

5.6.1 Gaussian Filter Calibration

Provides procedures for calibrating the Gaussian filter using a multimeter.

5.6.2 Overlap Correction and Adjustment

Details the procedure for adjusting overlap correction on the output assembly.

6 Parts

6.1 General Information

This chapter includes mechanical and electrical parts lists. All serviceable parts have a Crown Part Number (CPN).

6.2 Ordering and Receiving Parts

Provides guidance on ordering parts, including product model, description, and part number.

7 Exploded View Parts

7.1 General Information

This chapter includes a mechanical part list. All serviceable parts and assemblies will have a Crown Part Number (CPN).

7.2 Main Chassis Assembly

Lists major parts of the main chassis with descriptions, part numbers, quantities, and notes.

7.3 Front Panel Assembly

Provides an exploded view and parts list for the front panel assembly.

7.4 Back Panel Assembly

Lists parts for the back panel assembly, including PWAs, connectors, and screws.

8 Module and Schematic Information

8.1 General Information

Introduces updates and revisions to K Series amplifiers and lists all modules used as of printing.

8.2.1 Main PWA:

Lists Main PWAs with their part numbers and corresponding PWB revisions.

8.2.2 Input PWA:

Lists Input PWAs for K1 and K2 models, including part numbers and revisions.

8.2.3 Output PWA:

Lists Output PWAs and recommends ordering complete Output Assemblies.

8.2.4 Control PWA:

Lists Control PWAs with their part numbers and associated PWB revisions.

8.2.5 Bridge Rectifier PWA:

Lists Bridge Rectifier PWAs with part numbers and revisions.

8.2.6 Display PWA:

Lists Display PWAs with part numbers and revisions.

8.2.7 Line Filter PWA:

Lists Line Filter PWAs with part numbers and revisions.

8.3 Schematic Diagrams

Provides references to schematic diagrams for various PWAs, including revision letters.

9 Module Parts

9.1 General Information

This chapter includes electrical parts lists for this product. All serviceable parts and assemblies will have a Crown Part Number (CPN).

10 Schematic Diagrams

Crown K1 Specifications

General IconGeneral
Signal to Noise Ratio> 100 dB
Total Harmonic Distortion<0.05%
Input Sensitivity1.4V
Weight22 lbs (10 kg)
Channels2
Input Impedance20 kOhms balanced, 10 kOhms unbalanced
CoolingConvection cooled
Frequency Response20Hz - 20kHz
Dimensions19" x 3.5" x 11.5" (483 x 89 x 292 mm)

Related product manuals