INTRODUCTION
DualCom Pro oers Installers easier, faster installation of professional signalling systems with even greater
resilience. It also provides access to CSL Live, our brand new device management portal, as well as the My Base
App.
Using the onboard serial connections or pin triggering, DualCom Pro is compatible with a wide range of control
equipment including systems installed to EN50136 & PD6662. The range consists of:
DigiAir Pro - our single path solution that utilises a Radio or LAN path to signal an alarm. The Radio variant uses a
4G WorldSIM to send its signal and is also supplied with a network diverse standby SIM to safeguard your system,
should the primary SIM lose its connection.
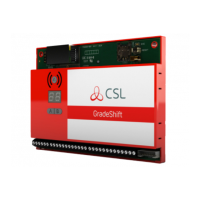
GradeShift Pro - our dual path solution that utilises a combination of two Radio paths or one Radio and one LAN
path to signal an alarm.
5
STEP 1. SITE SURVEY
VARIANTS WITH RADIO
Use a Signal Analyser (available from the CSL Installer Shop) to determine if enough base stations (2 or more) are
available at the site and that they can supply sucient signal strength (30% and above). This will determine the
optimum location for the DualCom’s aerial to be mounted.
If you do not have a Signal Analyser we recommend powering up the DualCom Pro, connecting the aerial/s,
going through the commissioning process and checking the signal strength before permanently fitting the aerial.
We recommend signal strength on the DualCom Pro should be 3 (30%) or above.
VARIANTS WITH LAN
Ensure there is a LAN port adjacent to the alarm panel. DualCom Pro uses DHCP as default, fixed IP settings
can be added/amended via My Base or via the A & B buttons. Fit the Ethernet Cable to the device (as per Figure
2) and connect to the customer’s router. Ensure the customer’s LAN socket is live and has the correct network
setting, as per below:
• Port 50561 open for outbound trac
• NAT enabled
• UDP data
The LED on the LAN connector adaptor will flash green to indicate connection.
STEP 2. INSTALLATION
DualCom Pro must be installed within an enclosure suitable for the installation certification. The unit should be
fixed securely using the adhesive pads supplied or via the screw fixings accessible by removing the lid.
Once fitted, ensure:
a. As required the aerial/aerials are connected and/or the LAN connector is installed
b. The alarm panel or PSU is powered down, then connect the DualCom Pro PWR +ve and –ve terminals
to the 12/24V DC output of the control equipment
c. If required, connect the serial cable - RS485, RS232 or TTL (panel dependent) – see Figure 1 for
more information
d. Connect any hardwired alarms into the device – see Figure 4
e. Connect the fault output - see Figure 5
f. Restore power to the alarm panel or PSU
QUICK GUIDE
SITING THE AERIAL
DO...
INSTALL VERTICALLY IN AN OPEN SPACE.
COMPLETE A SIGNAL TEST BEFORE INSTALLING IN THE FINAL POSITION.
DON’T ...
INSTALL CLOSE TO METAL OR SOURCES OF INTERFERENCE, I.E. WIRING, LIGHTING,
ELECTRICAL INSTALLATIONS, COMPUTERS, MONITORS, ROUTERS & OTHER EQUIPMENT.