MANUFACTURER PANEL CONNECTION CABLE/PLUG ON
SUPPLIED
CABLES
Honeywell Galaxy RS485
4 Pin
(cable provided)
Green
Blue
Red
-
-
-
RTN
RS485-B
RS485-A
Orisec All TTL
4 Pin
(cable provided)
Green
Blue
Red
-
-
-
RTN
TTL-T
TTL-R
Pyronix Euro/Enforcer RS232
6 Pin
(cable provided)
Green
Blue
Red
-
-
-
RTN
RS232-R
RS232-T
Texecom Premier/Elite TTL
5 Pin
(cable provided)
Green
Blue
Red
-
-
-
RTN
TTL-R
TTL-T
For Risco, Eaton and UTC, please purchase the relevant cable from the CSL Installer shop. For other connections
or further instructions on Control Panel programming please review the Panel Guides on the Installer Zone of our
website: www.csl-group.com/uk/installer-zone-panel-guides
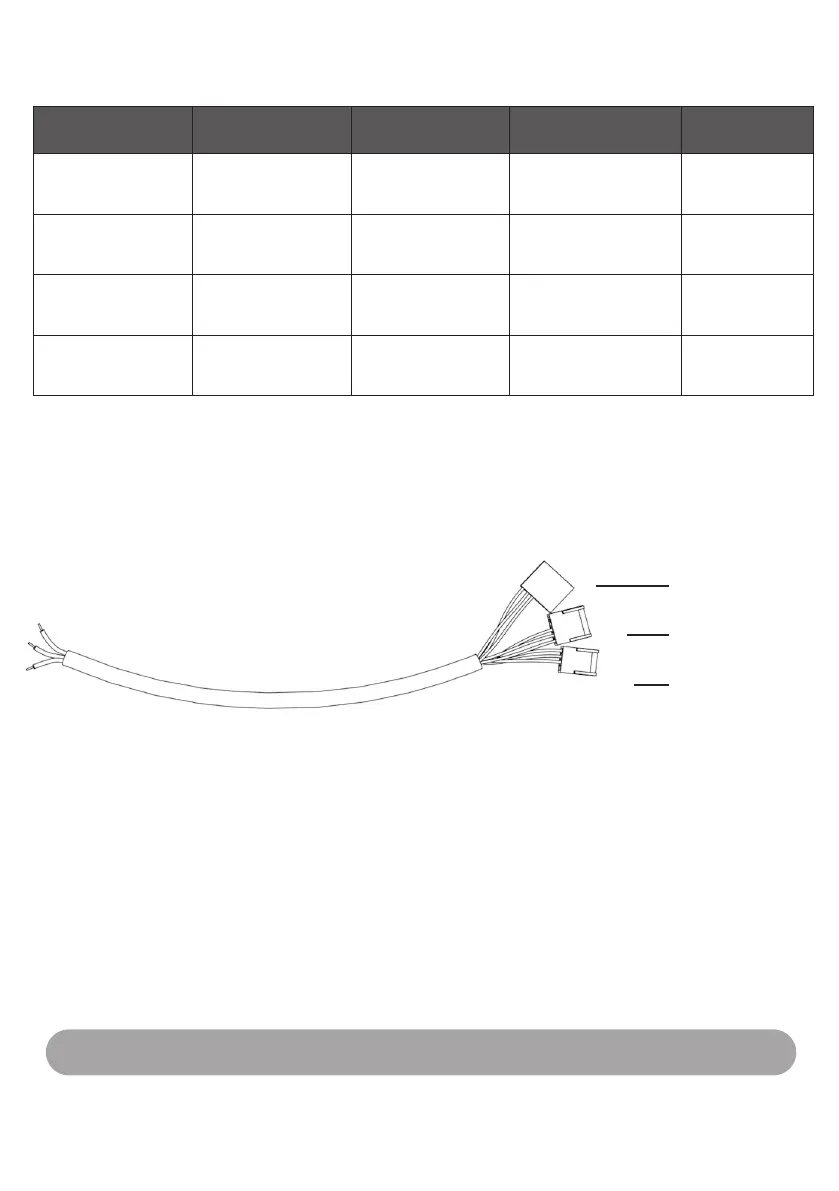
Figure 7 - Serial Cable (RS232/485/TTL)
6 Pin - Pyronix
5 Pin - Texecom
4 Pin - Honeywell /
Orisec
Figure 6 - Panel Connection Information
STEP 4. TESTING
Please also ensure that you put your device on test with the ARC and perform a full range of test signals
from your control equipment. DualCom Pro paths can be tested using the following method:
• Tap button A until S is shown
• Tap button C to indiciate Path Test
• The display will read out PATH TEST and return to Menu S for 30 seconds before returning to
signal strength
Once you have successfully tested your device, make sure that you check with your ARC to see that
they are receiving signals. This can be achieved by calling your ARC or using their web based secure
platform.
IF YOU HAVE PURCHASED A DUAL PATH DEVICE, YOU MUST ENSURE BOTH PATHS ARE CONNECTED
BEFORE LEAVING SITE.
9