8
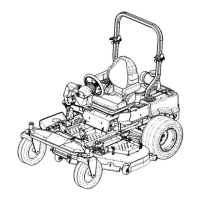
Insert the PTO assembly P#(A1821) into the slots on the
PTO mount plate assembly. Secure the PTO assembly
with (1) mount pin P#(B0274) and (1) hair pin clip
P#(K0086).
Remove the belt guard P#(B0679) and hardware in
preparation for the belt installation. Refer to Figure 2-4a.
2-4 PTO Assembly Installation
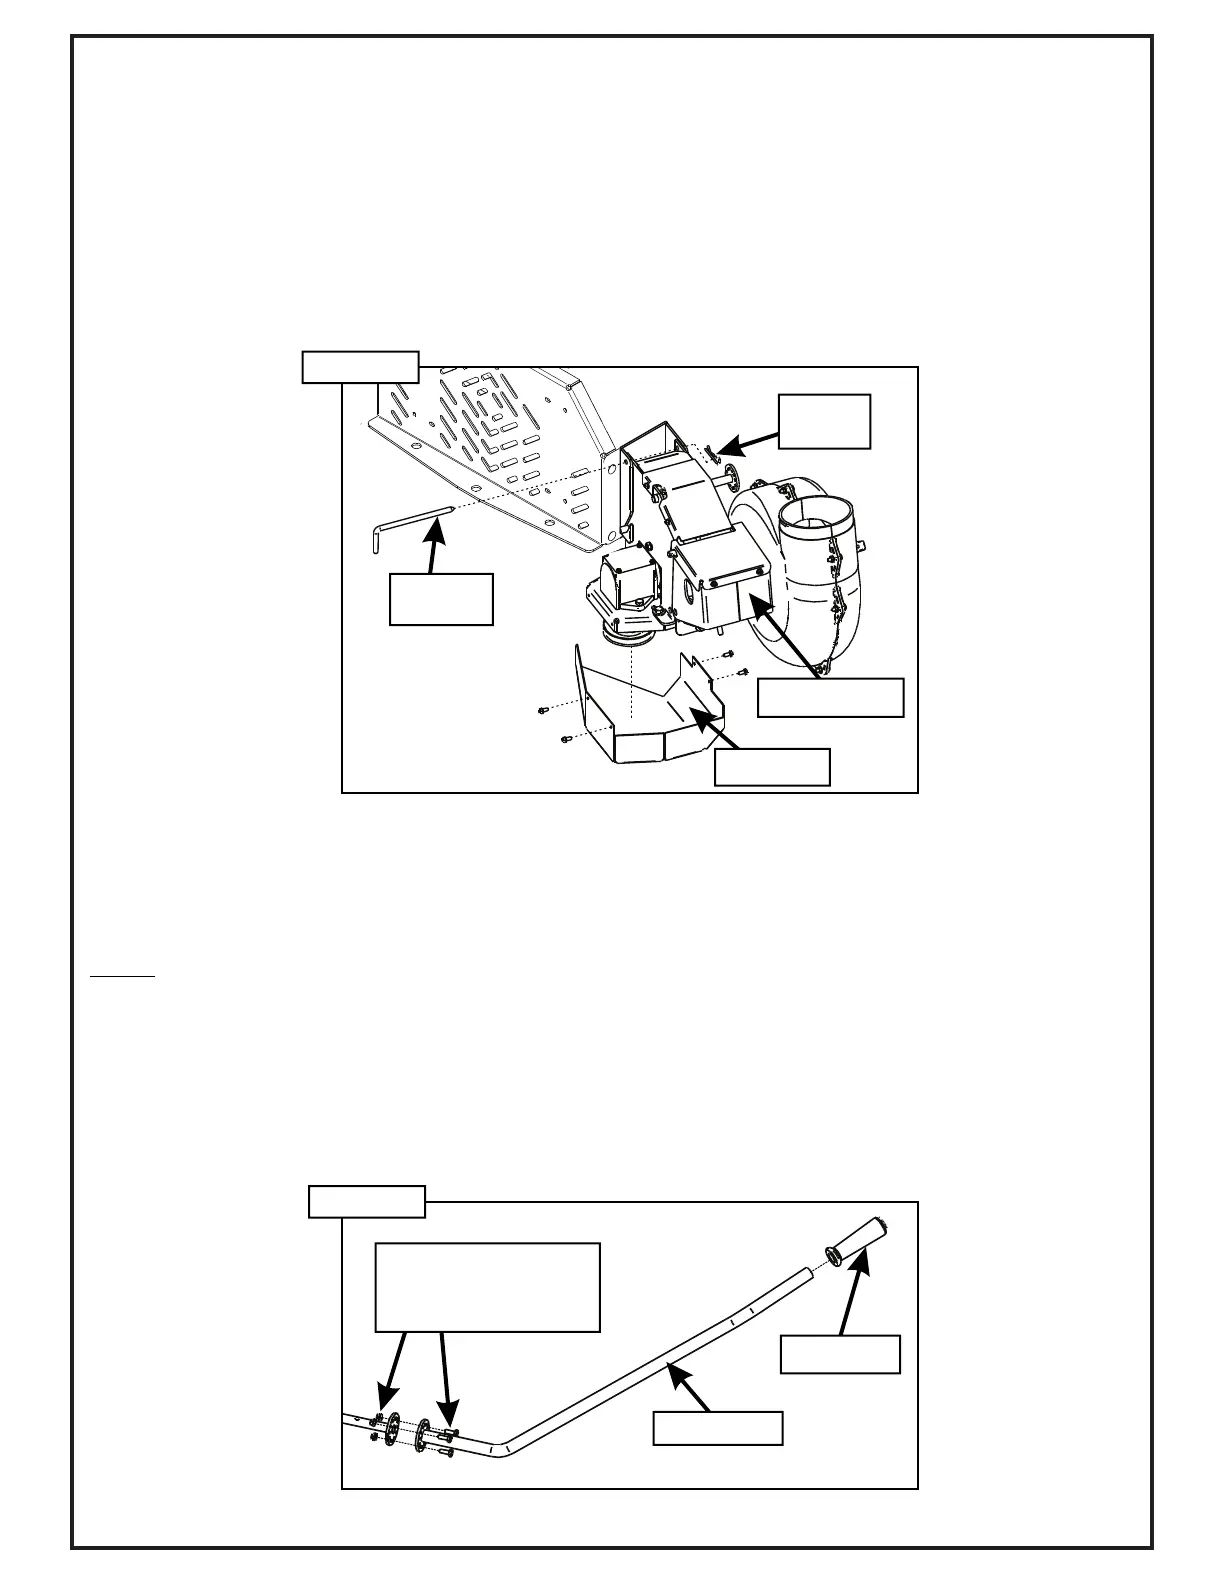
Attach the PTO handle P#(A1142) to the PTO assembly
using (3) 1/4”-20 x 3/4” HHCS P#(K1222) and (3) 1/4”-
20 nylon flange locknuts P#(K2014). Attach the handle
grip P#(J0522) to the PTO handle. Refer to Figure 2-4b.
NOTE: The PTO Handle can be adjusted after
performing Step 2-6 to achieve proper belt adjustment.
To adjust the handle, remove (3) 1/4”-20 x 3/4” HHCS
P#(K1222) and (3) 1/4”-20 nylon flange locknuts
P#(K2014), rotate handle until positioned in the desired
location (while aligning holes) and reattach. The bolts
should be kept approximately 120 degrees apart to
ensure proper fastening.
PTO Handle
Handle Grip
Figure 2-4b
(3) 1/4”-20 x 3/4” HHCS
(3) 1/4”-20 Nylon
Flange Locknut
PTO
Mount Pin
Hair Pin
Clip
Belt Guard
PTO Assembly
Figure 2-4a

 Loading...