| 15 14 |
AERIUMAERIUM
11.2.1 Installing the saddle
The saddle can be simply and safely axed
using the Ritchey 1-bolt clamp, include in
the scope of delivery.
To enable the installation of various saddle
models, in addition to the 7x7mm clamps
for standard seat stays, a 7x9.6mm clamp
is included within the scope of delivery, for
oversized carbon seat stays.
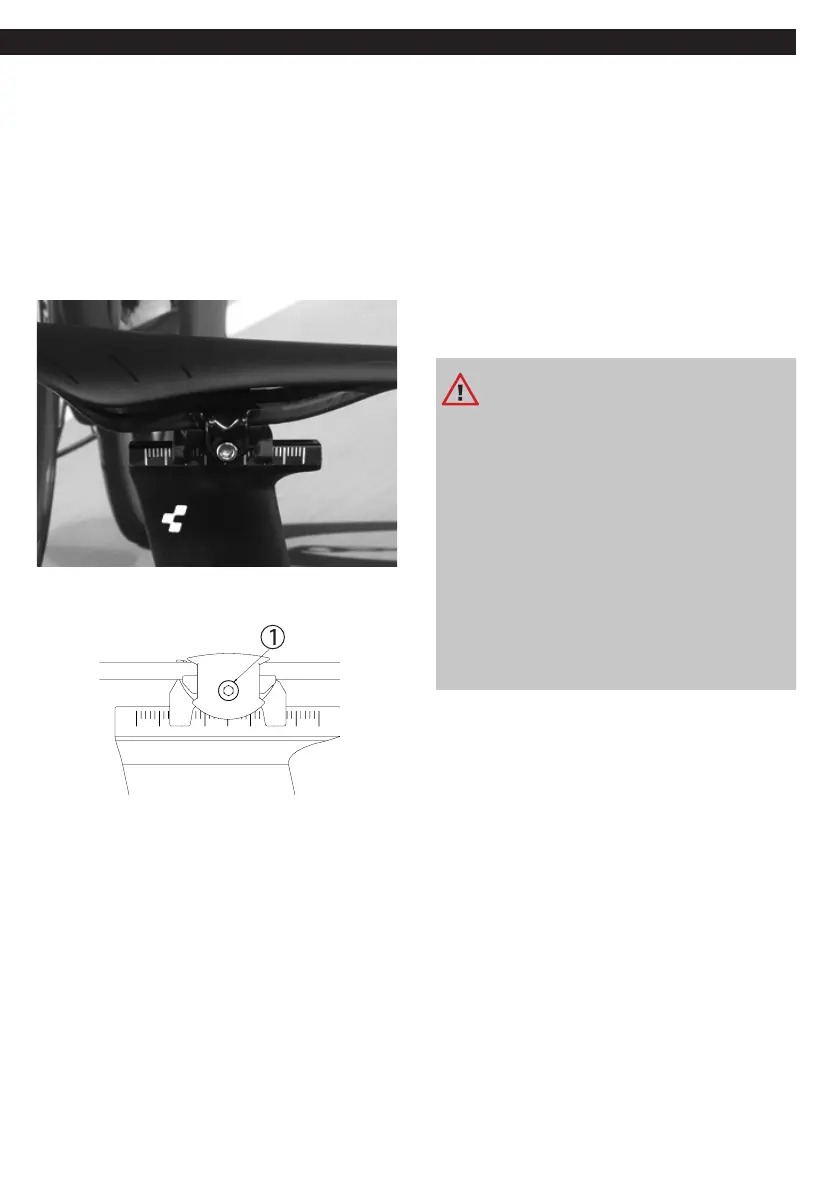
11.2.2 Installing Ritchey 1-bolt clamp
To install the saddle, loosen the transverse
retaining bolt (1) as far as possible, without
loosening the locking nut on the opposite
side of the clamping device. As a general
rule, you do not have to disassemble the
whole mechanism if it already has been
equipped with the appropriate external
clamp (7x7mm / 7x9.6mm) for your saddle
model. Then put the saddle in the clamp-
ing device and place it on the seatpost.
When axing the saddle, check that the
mounting mechanism of the seatpost is
clamped in the middle. Now gradually
tighten the retaining pin (1) and make
sure that the clamping device is still sitting
precisely in its correct location on the seat-
post, and that the saddle frame is equally
gripped by from both sides of the clamp.
Finally x the retaining pin (1), until you
reach the maximum specied torque
permitted according to the saddle manu-
facturer.
Risk of personal injury and material
damage!
The saddle must be clamped to the
seatpost only in the specied scaled
location. Note the stop markings on
the saddle, and do not exceed these.
Information about your saddle and
about correct clamping can be found
in the respective user manual of the
manufacturer.
Please note the maximum torque spec-
ied by the saddle manufacturer for
axing the saddle.
 Loading...