5
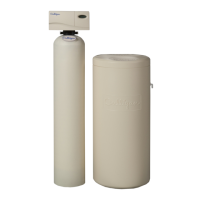
Connect the inlet on the RO/Filter system to the
port marked "RO/Filter
>
." Wet the end of the
plastic tubing with water and push it into the
quick connect tting adapter approximately 5/8˝
until it stops.
NOTE: This connection is plugged for remote
NOTE: This is the line that would normally come
from the supply tee or valve.
NOTE: Use the supplied adapter if your system
uses a 1/4" tube.
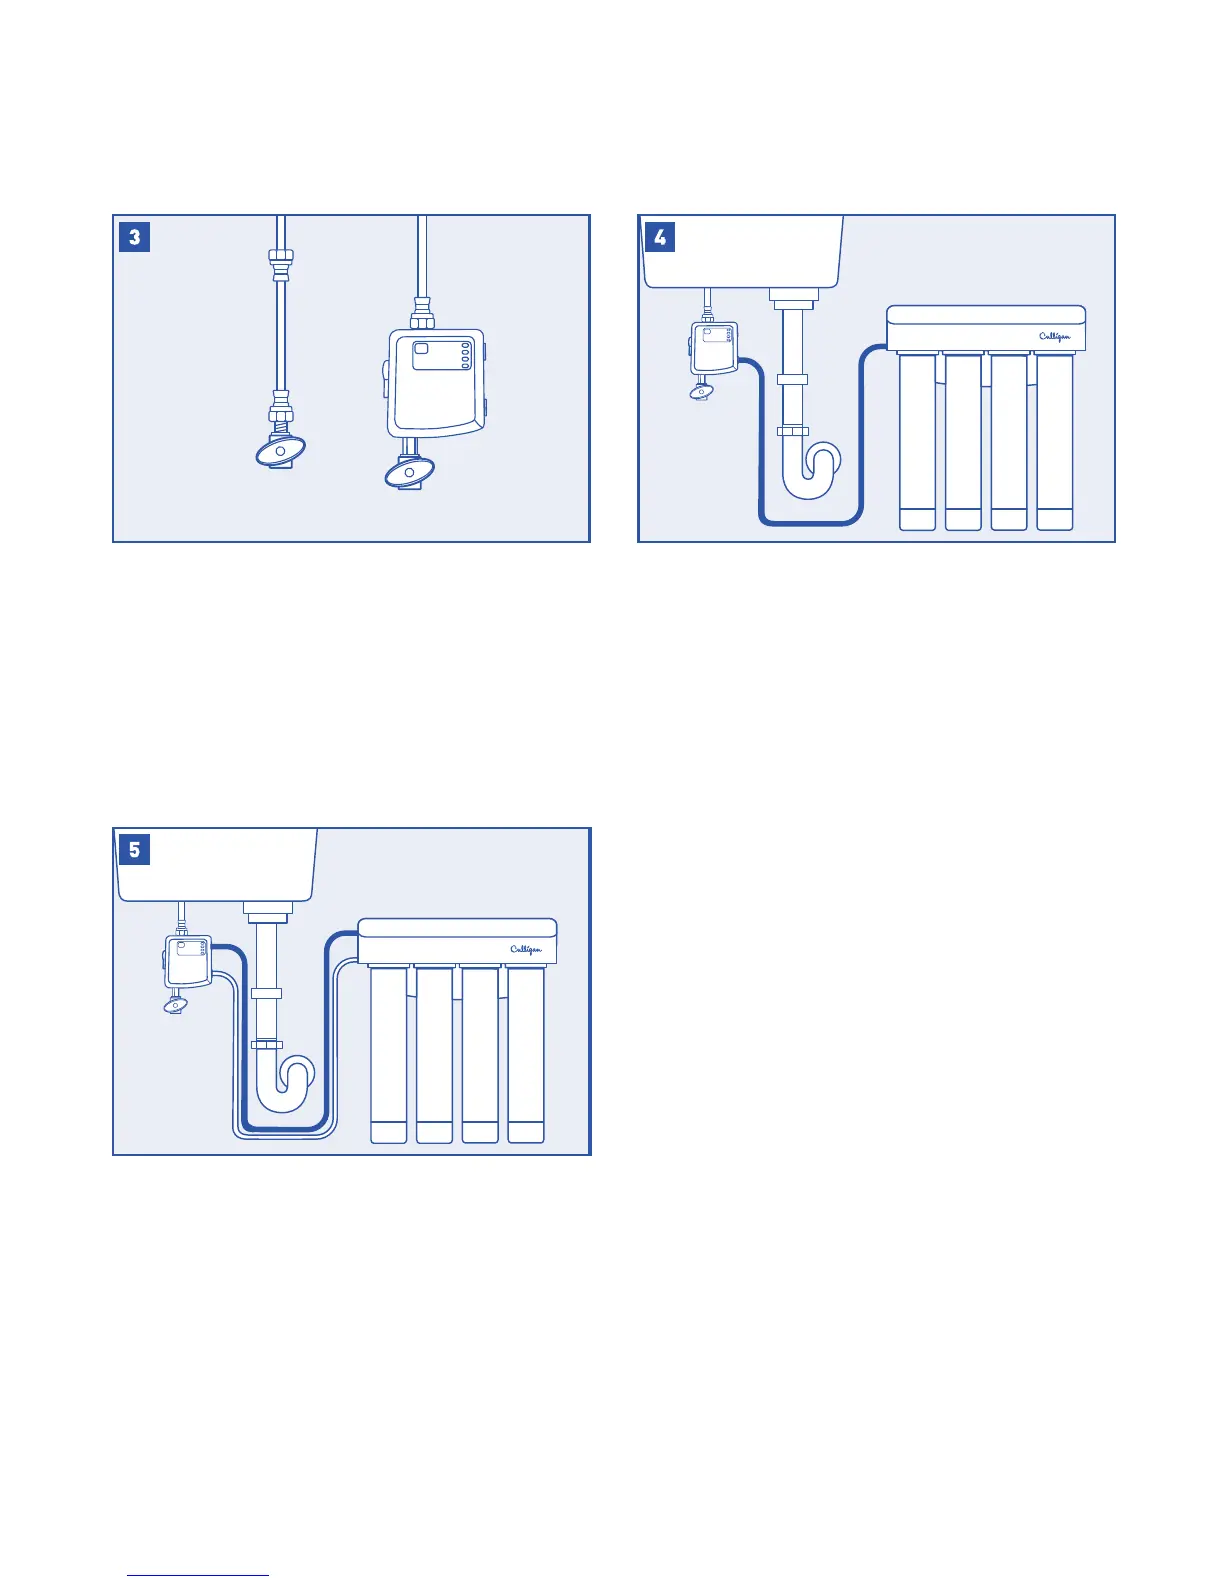
Connect the outlet on the RO/Filter system to the
port marked "RO/Filter
<
." Wet the end of the
plastic tubing with water and push it into the
quick connect tting adapter approximately 5/8"
until it stops.
NOTE: This is the line that would normally go to
your dedicated faucet.
NOTE: Connect the tank and/or post lter in
this line if required for your lter/RO system.
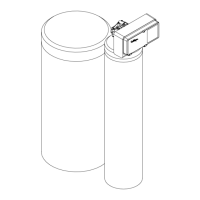
valve as shown. Tighten the lower end of cold water
line onto the top of the control box.
NOTE: The control box must be in a
vertical position.
NOTE: If space does not allow for mounting the
control box onto the valve, it can be alternatively
hung on a wall when using the holes on the back

 Loading...