EasyManuals Logo

Culligan ClearLink Pro User Manual

Culligan ClearLink Pro
88 pages
To Next Page IconTo Next Page
To Previous Page IconTo Previous Page
Page #6 background imageLoading...
Page #6 background image
6
AIR GAP
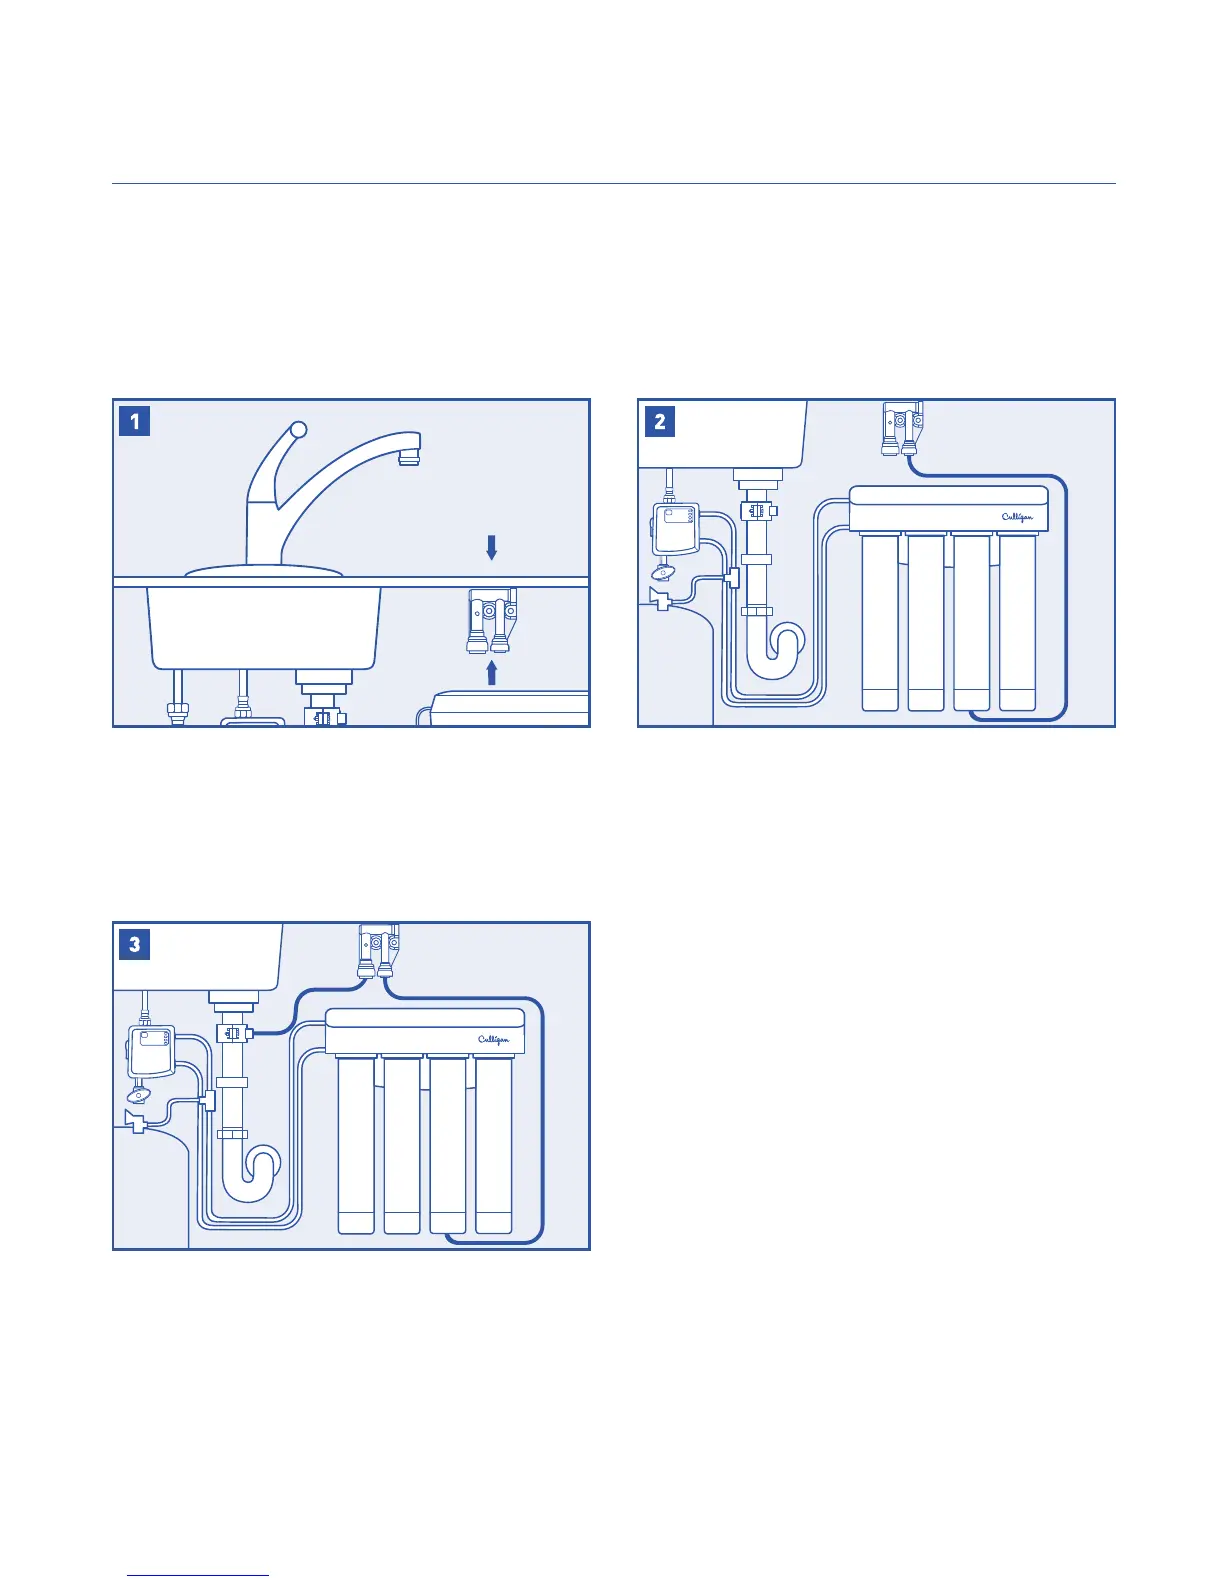
RO AIR GAP INSTALLATION
NOTE: These steps are only for RO installations using an air gap.
NOTE: If your ltration system is not an RO, skip to System Startup on Page 
NOTE: Install the drain connection to the drain plumbing according to the manual
provided with your RO system.
Connect the drain line coming from the RO
system to the small connection of the air
gap device.

top as possible and in a vertical orientation.
NOTE: Failure to mount the air gap device
vertically will cause it to leak water.
Connect the large tting of the air gap device to
the connection on the drain plumbing.

Other manuals for Culligan ClearLink Pro

Questions and Answers:

Question and Answer IconNeed help?

Do you have a question about the Culligan ClearLink Pro and is the answer not in the manual?

Culligan ClearLink Pro Specifications

General IconGeneral
BrandCulligan
ModelClearLink Pro
CategoryWater Dispenser
LanguageEnglish

Related product manuals