19
FLOOR/CHAIN MOUNT
— CONTINUED
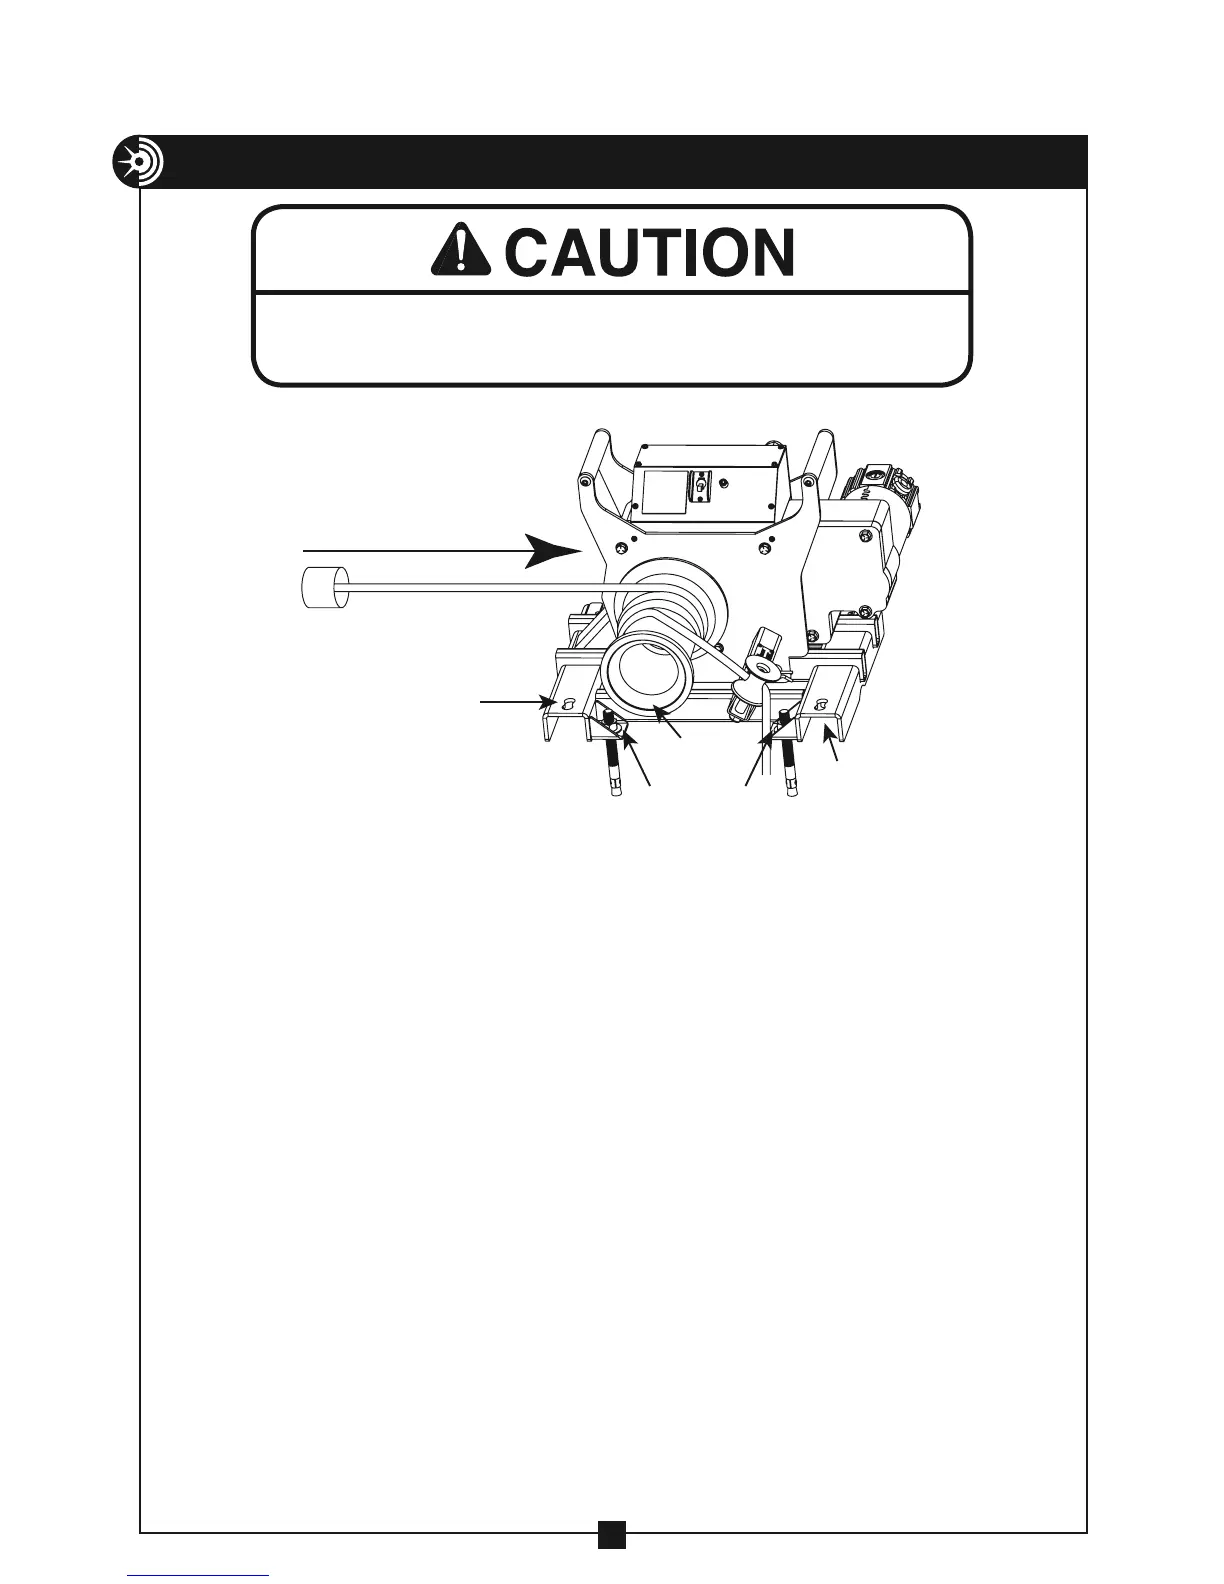
The pulling direction should ALWAYS be parallel to the base of the floor
mount. See Figure 19.
CORRECT
PULLING
DIRECTION
mounting chain
handle hole
capstan
mounting chain
handle hole
floor mount
holes (4 places)
Figure 19
Installation Instructions
1. Wear safety glasses.
2. Follow the safety instructions provided by the drill manufacturer.
3. Use only 5/8" diameter solid carbide tipped bits that meet ANSI B94-12.
4. Using the floor mount as a template, drill four 5/8" holes a minimum of
6" deep but not closer than 1 1/4" to the bottom (opposite surface) of the
concrete. Be sure to drill the holes perpendicular to the work surface and
do not ream the holes or let the drill bit wobble.
5. Clean the holes with compressed air and a wire brush. Clean holes are
necessary for proper performance.
6. Assemble the washer and nut on the anchor so the top of the nut is flush
with the top of the anchor.
7. Next, drive the 4 wedge anchors through the 4 floor mount holes (See
Figure 19 and 20a) and into the concrete holes, making sure the nut and
washer rests solidly against the floor mount.
8. Tighten the anchors with a torque wrench to 75-90 ft. lbs.
NOTE: If anchor spins, pull up on the anchor using the claw end of
hammer and then torque. If spinning still occurs, DO NOT use this
location; reposition the floor mount and repeat this installation procedure.
9. Install model #1450 puller onto the floor mount by lowering the puller
over the floor mount and inserting the puller mount pins (see Figure 20b).
Secure the puller mount pins with spring clips. NOTE: The puller MUST be
mounted onto the floor mount with the capstan on the same side as the
mounting chain handle holes (see Figure 19).