©2020 Cyber Power Systems (USA), Inc. All rights reserved. All other trademarks are the property of their respective owners.
22
UPS REPLACEMENT WITH MBP63A2 CONT.
7 8
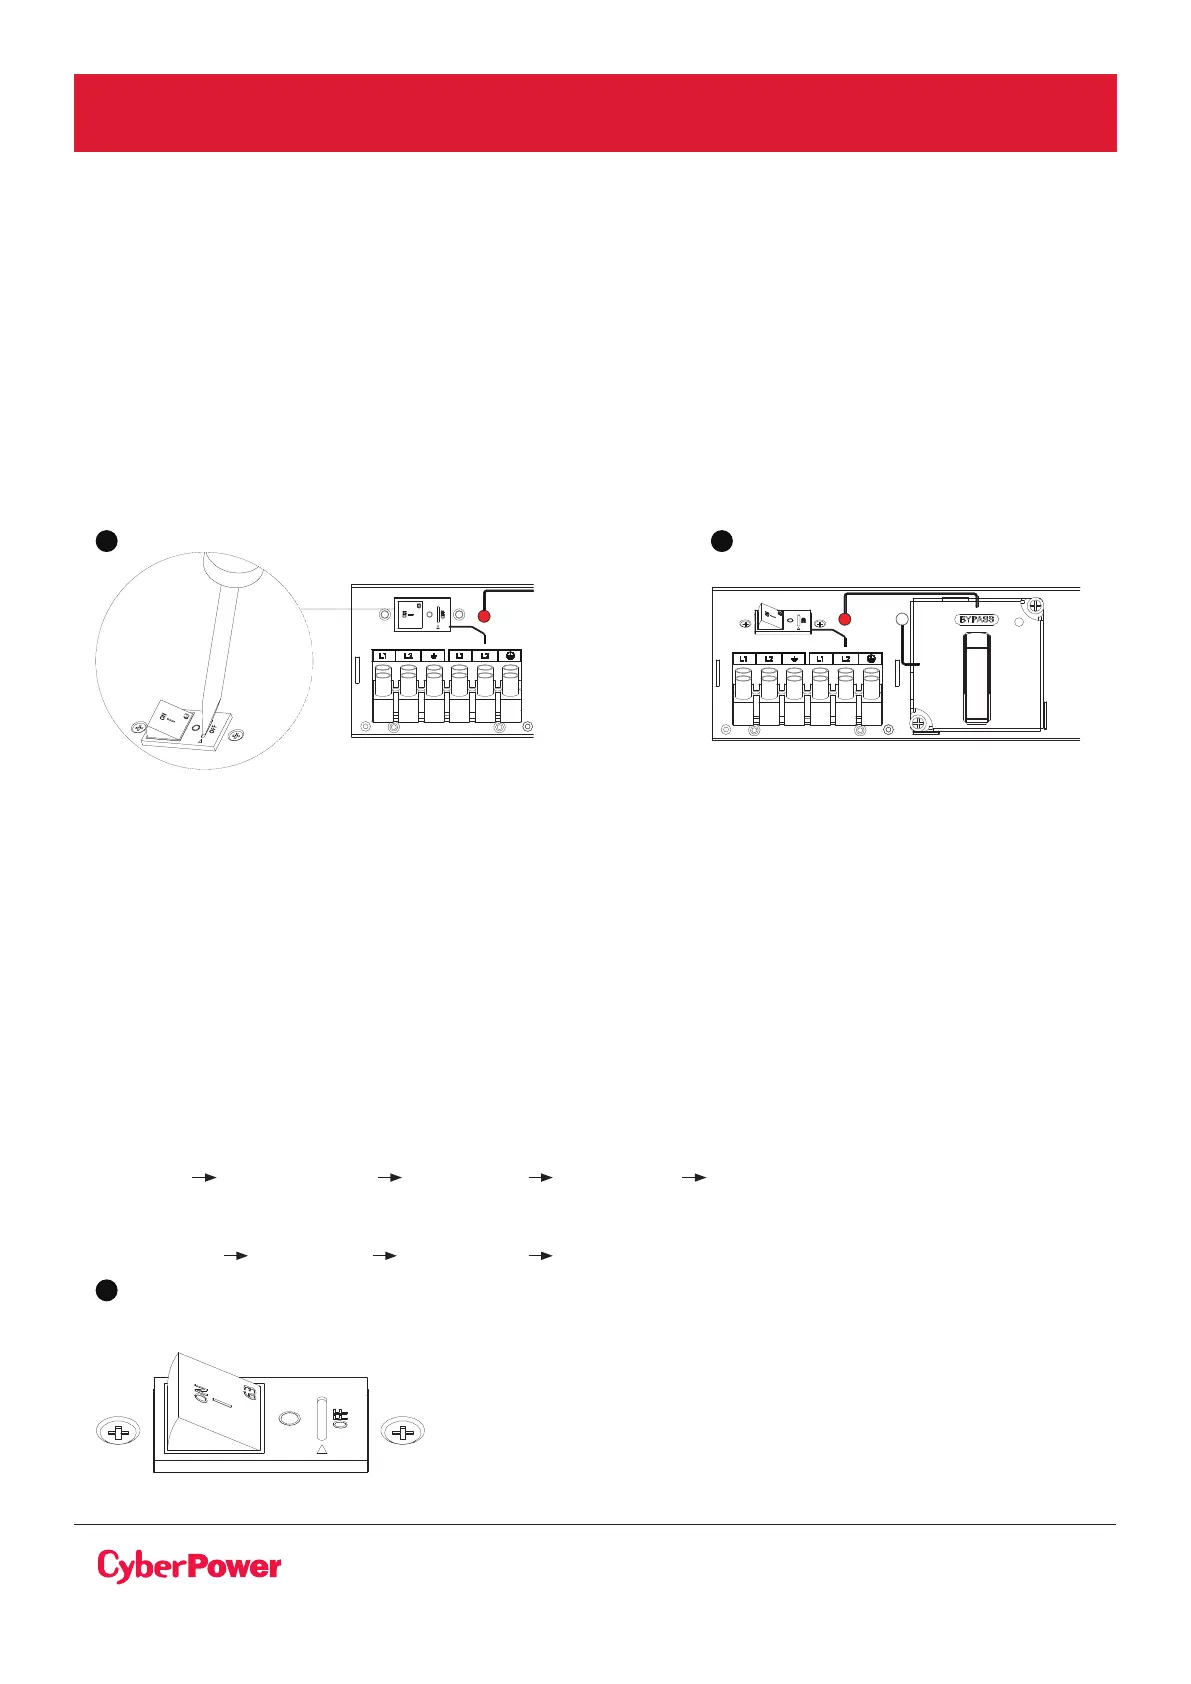
7. Set the UPS INPUT switch of the MBP to the “O” off position and wait 90 seconds to make sure
UPS is totally shut down.
8. UPS stops, the UPS can now be disconnected, as described below:
(1) First opening the I/O terminal blocks cover of UPS, check if hazardous voltage is no longer
present on UPS terminal blocks by using an electrical safety tester.
(2) Disconnect the MBP conduits.
9. Replace the UPS
! Hazardous voltage and lost load risk: do not operate the MBP manual Bypass switch without
UPS connected to the MBP power conduits.
FROM UPS OUTPUT
63A / 250V~
TO UPS NORMAL AC SOURCE
Bypass
Normal
MAINTENANCE
BYPASS SWITCH
UPS INPUT SWITCH
OK
FROM UPS OUTPUT
63A / 250V~
TO UPS NORMAL AC SOURCE
to switch
Bypass
Normal
MAINTENANCE
BYPASS SWITCH
UPS INPUT SWITCH
UPS
OK
RETURN TO NORMAL OPERATION:
1. Check that the new UPS is correctly connected to the MBP, as described below:
(1) Firstly check that UPS INPUT switch of the MBP is still locked to the “O” off position.
(2) After opening the UPS I/O terminal blocks cover, connect to UPS the MBP conduits but no
need to connect MBP detection.
(see previous chapter HARDWIRING THE INPUT/OUTPUT TERMINALS connecting for more details).
2. Set the INPUT switch of the MBP to the “I” on position.
3. Verify that the UPS is correctly powered (UPS display panel illuminates)
4. Enable EPO or ROO function (refer to the UPS user manual as following)
(1) OL5KRTHD/OL6KRTHD models :
Set up Communication Signal input EPO or ROO Save Change?
(2) OL6KRT/OL8KRT/OL10KRT/OL6KRTF/OL8KRTF/OL10KRTF models :
Configure Signal input EPO or ROO Save ?
63A / 250V~
UPS INPUT SWITCH
1
ELECTRICAL INSTALLATION CONT.
 Loading...