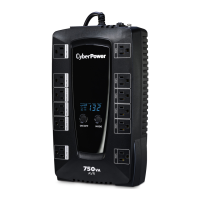
BATT. CAPACITY readout will show a single shaded segment, equaling 20% battery capacity remaining) indicating the UPS batteries are
nearly out of power. If this occurs, it is recommended that you save your files and manually power down your equipment immediately.
Automatic Voltage Regulation (AVR) icon:
This icon appears whenever your UPS is automatically correcting low AC input line voltage without using battery power. This is a normal,
automatic operation of your UPS, and no action is required.
SILENT MODE icon:
This icon appears whenever the UPS is in silent mode. The buzzer does not beep during silent mode until the battery reaches low capacity.
OVER LOAD icon:
This icon appears and an alarm sounds to indicate the battery-supplied outlets are overloaded. To clear the overload, unplug some of your
equipment from the battery-supplied outlets until the icon turns off and the alarm stops.
FAULT icon:
This icon appears if there is a problem with your UPS.
BATT. CAPACITY meter:
This meter displays the approximate charge level (in 20% increments) of the UPS’s internal battery. During a blackout or severe brownout the
UPS switches to battery back up power the BATT. CAPACITY icon appears and the charge level decreases.
LOAD CAPACITY:
This meter displays the approximate output load level (in 20% increments) of the UPS’s battery outlets.
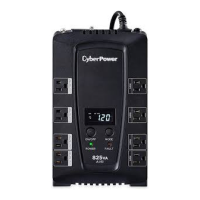
The LCD display indicates a variety of UPS operational conditions. All descriptions apply when the UPS is plugged into the AC outlet and
turned on or when the UPS is on battery
LCD STATUS AND SETUP FUCTIONS
General Mode:
1. Press the “Display” button to check the status of the
2. Press and hold the Display toggle for 4 seconds,
If the machine is in the Battery Mode, it enters the status of Mute.
If the machine is in the Line Mode, it proceeds Self Test.
3. If the Display toggle remains untouched for over 30 seconds, the LCD backlight will turn off automatically
Item Unit
1 Input Voltage V
2 Output Voltage V
3 Output Frequency Hz
4 Load Kw
5 Estimate Run Time Min
6 Load Capacity %
7 Battery Capacity %
8 Centigrade ℃
9 Fahrenheit ℉
Set-up Mode
Step 1:
The machine enters Set-Up Mode after holding the Display toggle for 10 seconds. Icon 3,4,5,6,7,8 lights to indicate Set-Up Mode.
Step 2:
By pressing the Display toggle, users can switch between setup functions. User configurable functions are as follows: