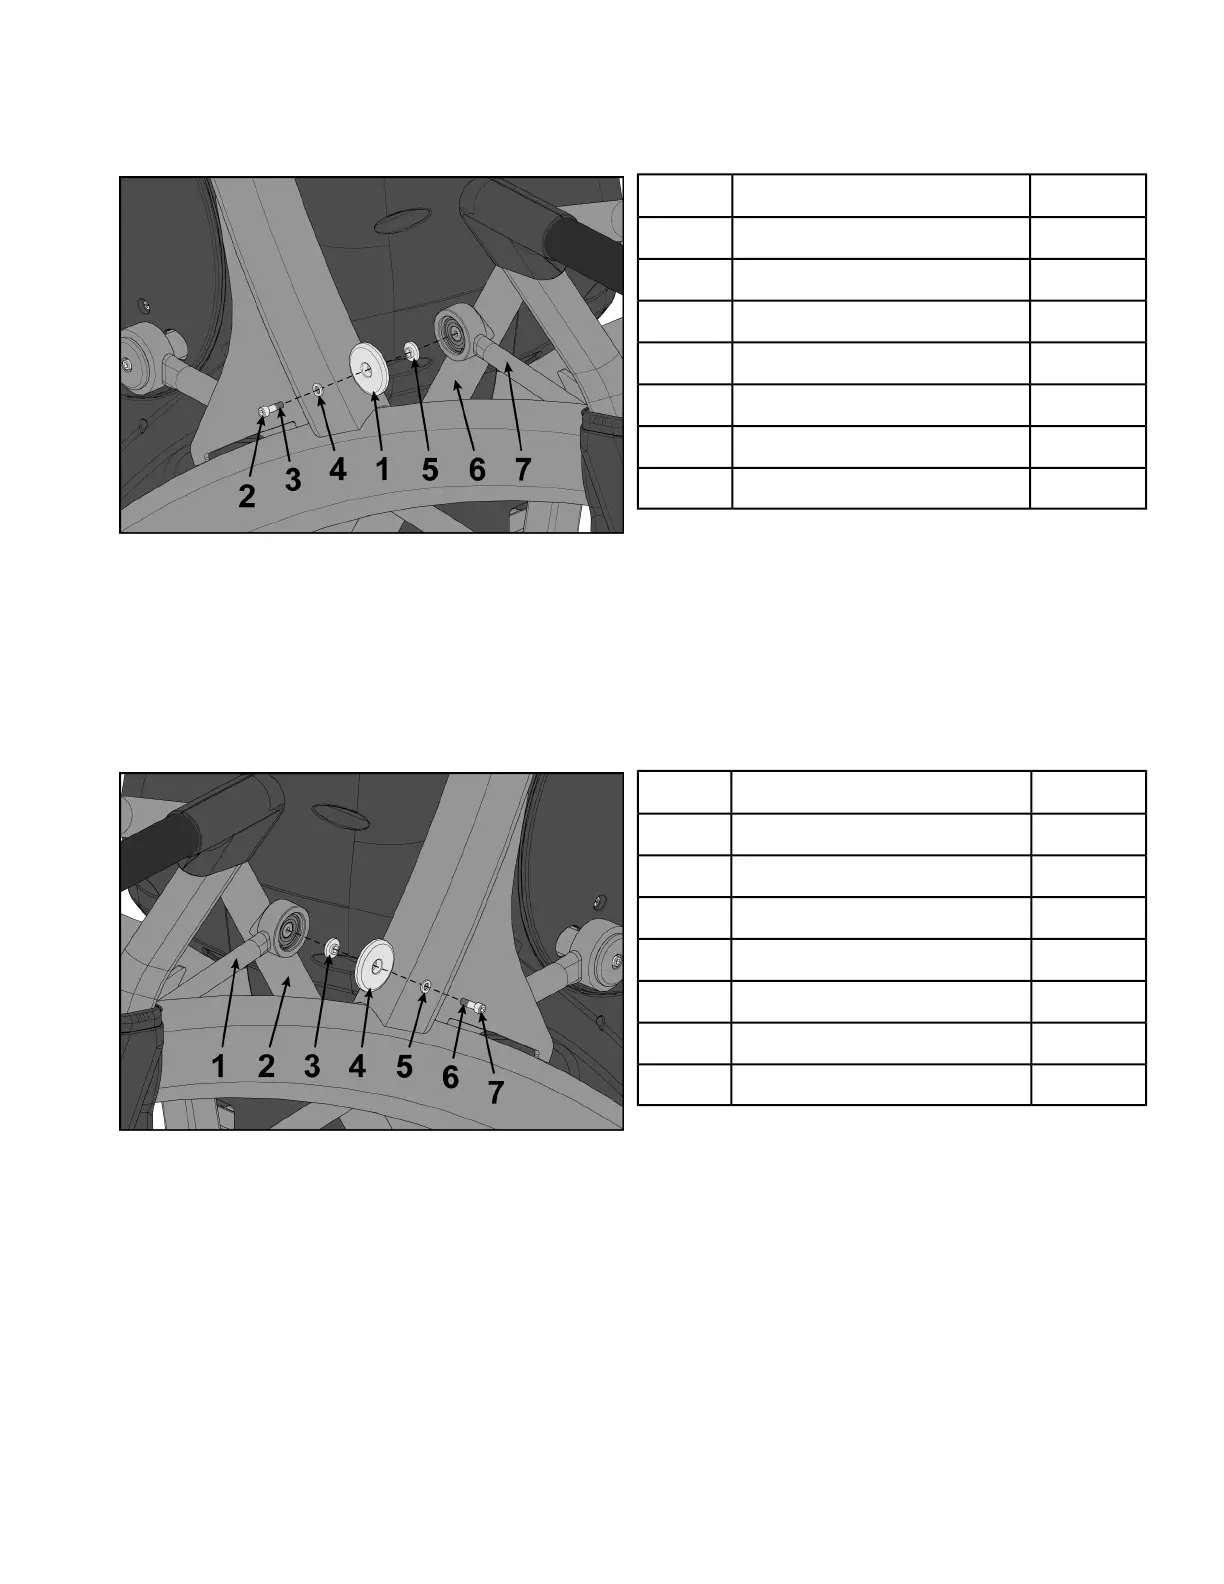
Install left linkage rod
1. Pivot left handle assembly up and slide left linkage rod onto left arm.
Qty.Description
1Linkage rod cap1
1Screw2
1Loctite3
1Washer4
1Flange spacer5
1Left arm6
1Left linkage rod7
2. Place a drop of Loctite onto the screw.
3. Install the screw, washer, linkage rod cap, and flange spacer using a 3/16” Allen wrench.
4. Tighten screw to a minimum of 90 in/lbs.
Install right linkage rod
1. Pivot right handle assembly up and slide left linkage rod onto left arm.
Qty.Description
1Right linkage rod1
1Right arm2
1Flange spacer3
1Linkage rod cap4
1Washer5
1Loctite6
1Screw7
2. Place a drop of Loctite onto the screw.
3. Install the screw, washer, linkage rod cap, and flange spacer using a 3/16” Allen wrench.
Page 38 of 95
Cybex 771A/771AT, 772A/772AT Arc Trainer Part Number 5771-4 K
 Loading...