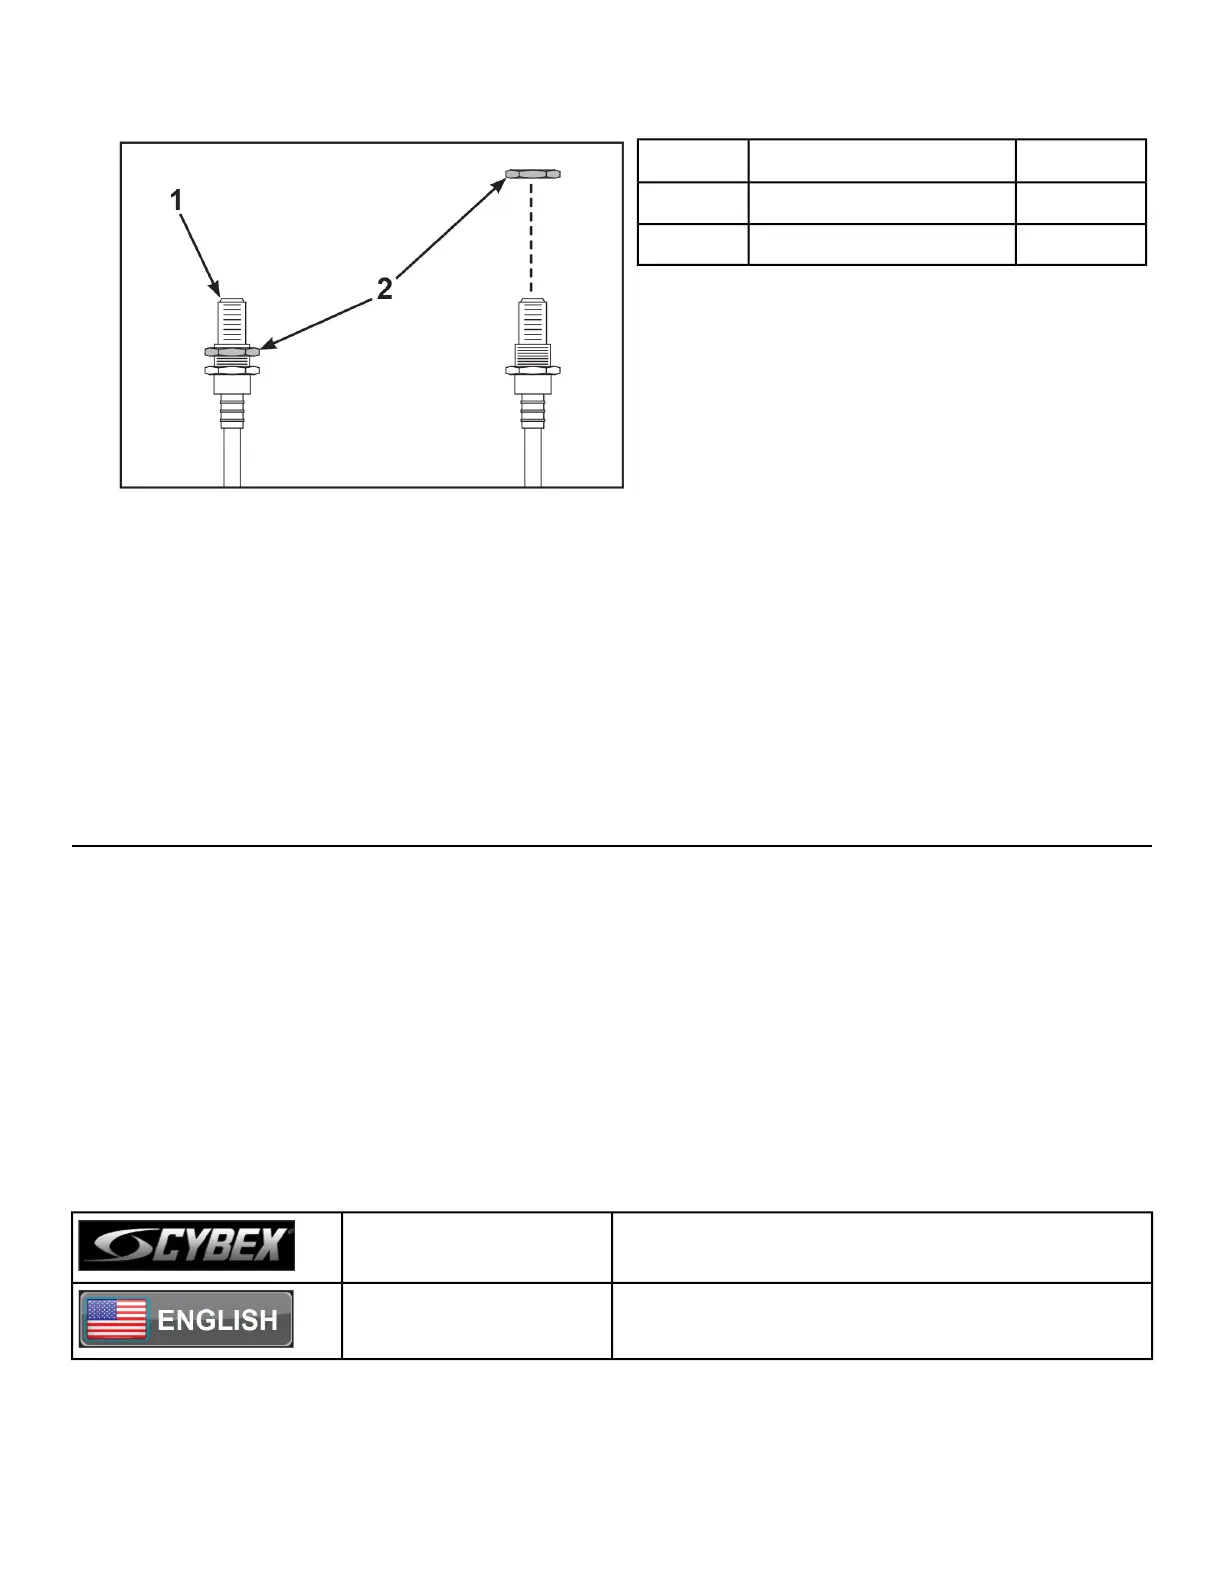
2. Remove the nut at the end of the coax cable.
Qty.Description
1Coax cable1
1Nut2
3. Insert the coax cable into the D-shaped hole in the mounting plate on the front of the unit.
4. Thread the nut removed in step 2 onto the coax cable.
5. Install the coax cable to the mounting plate on the front of the unit using a 14 mm open end wrench.
6. Plug the Ethernet or HDMI cable into the coupler on the front of the unit.
Visually inspect unit
1. Remove any packing material from unit.
2. Examine the unit to ensure that the assembly is correct and complete.
Setup
Use the following instructions to setup the unit.
1. Plug the optional power cord or E3 View Monitor power cord (E3 View Monitor units only) into a
power outlet from a grounded circuit.
Coil up the remainder of the power cord and place it out of the way. The control panel will light up
and be in the Dormant Mode.
2. Hold the handrails to steady self while stepping into the foot plates.
3. Begin striding.
Initial setup
Perform this procedure during the installation of the unit. Once complete, refer to Setup Options below.
Press and hold Cybex logo for 6 seconds to access
Screen Lock and Toolbox.
CYBEX LOGO
Press and hold language logo for 6 seconds to ac-
cess Screen Lock and Toolbox.
LANGUAGE ICON
1. Tap the Access Toolbox icon to display the Access to Toolbox login screen.
Page 43 of 95
Cybex 771A/771AT, 772A/772AT Arc Trainer Part Number 5771-4 K