25
DEENIT
• If the ISOFIX anchorage points (19) of your vehicle are
GLI¿FXOWWRDFFHVVSOHDVHXVHWKHSURYLGHG,62),;LQVHUW
JXLGHVWKDW¿[RQWKH,62),;DWWDFKPHQWSRLQWV
permanently.
• Se i punti di ancoraggio ISOFIX (19) della vettura
VRQRGLI¿FLOLGDUDJJLXQJHUHFRQVLJOLDPRGLXWLOL]]DUH
OHJXLGH,62),;IRUQLWHLQGRWD]LRQH¿VVDQGROH
permanentemente ai punti di ancoraggio ISOFIX (19).
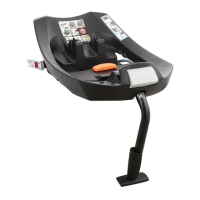
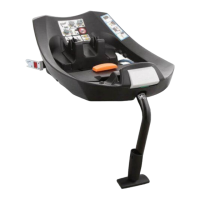
Installation of the base Installazione della base
NOTE! The ISOFIX anchorage points (19) are two metal
lugs per seat and are located between the backrest and the
seat of the car. If you are in any doubt, consult your car‘s
instruction manual for assistance.
NOTA BENE! I punti di ancoraggio ISOFIX (19) sono due
clip metalliche per ogni sedile, posizionate tra lo schienale
e la seduta del sedile del veicolo. In caso di dubbio
consultare il manuale istruzioni della vettura.
NOTE! Do not put any objects in the foot area in front of
the child seat.
NOTA BENE! Non lasciare nessun oggetto nell'area piedi
di fronte al seggiolino.
CONNECTING THE INFANT CAR SEAT WITH BASE INSTALLARE IL SEGGIOLINO SULLA BASE
Please select an appropriate seat in the vehicle. Collocare il seggiolino sul sedile dell'auto appropriato.
• Always fold out the supporting leg (21) until it locks.
• Release the lock of the ISOFIX connectors (22). Both locks
can be adjusted independently. Push both buttons (23 and
24) simultaneously and pull the ISOFIX connectors out of
the base to the endstopper.
• The ISOFIX connectors (22) have to lock into the ISOFIX
anchorage points (19) with an audible click.
• 0DNHVXUHWKDWWKHVHDWVWD\V¿UPO\LQSODFHE\WU\LQJWR
pull it out of the ISOFIX connect guides.
• The green safety indicator (25) must be clearly visible on
both ISOFIX release buttons.
• Next, push the base in the direction to the backrest until it
is fully aligned with the backrest.
• 3RUWDUHLQSRVL]LRQHLOSLHGHGLVXSSRUWR¿QRD
quando si blocca.
• Sbloccare la chiusura dei connettori ISOFIX (22). Entrambe
le chiusure possono essere regolate singolarmente.
Premere entrambi i pulsanti (23 e 24) simultaneamente ed
HVWUDUUHLFRQQHWWRUL,62),;GDOODEDVH¿QRD¿QHFRUVD
• I connettori ISOFIX (22) devono agganciarsi saldamente ai
punti di ancoraggio ISOFIX (19) con un sonoro "click".
• 9HUL¿FDWHFKHLOVHJJLROLQRVLD¿VVDWRIHUPDPHQWH
cercando di tirarlo verso la parte opposta alle guide di
connessione ISOFIX.
• L'indicatore di sicurezza verde (25) deve essere ora
chiaramente visibile su entrambi i pulsanti di rilascio ISOFIX.
• 4XLQGLVSLQJHUHODEDVHYHUVRORVFKLHQDOH¿QRDTXDQGR
si trova perfettamente allineata con esso.