Cybex Pro
3
Treadmill Owner’s Manual
Preventive
Maintenance
Page 4-5
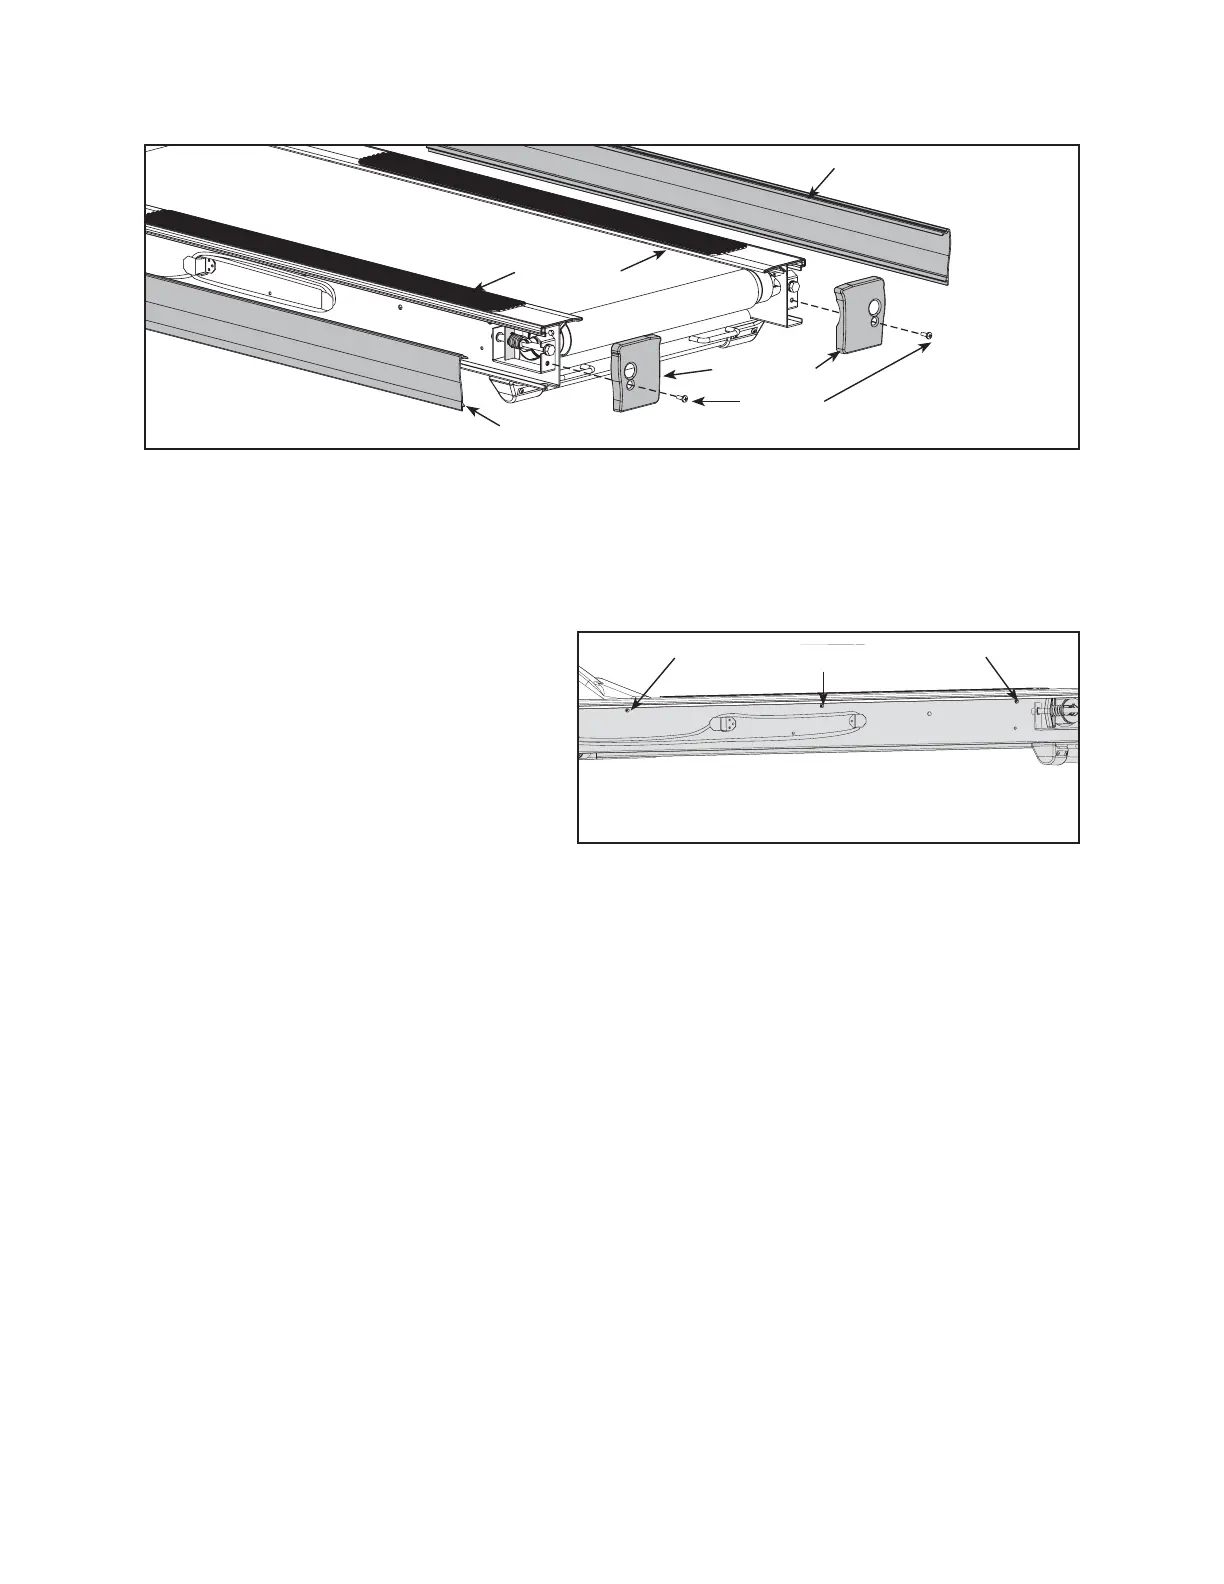
4. Remove the side panels.
Pull each side panel out and off the treadmill. See Figure 3.
5. Remove the top steps.
Using a Phillips head screwdriver,
remove the three screws that hold
each top step in place. See Figure 4.
Grasp each top step and lift it out and
off the treadmill. See Figures 3 and 4.
6. Check the belt and deck condition.
Look at the edges of the belt while
you roll it by hand. If the belt has any
rips or looks excessively worn the belt
needs to be replaced.
Run your hand under the belt on the top of the deck surface. If you feel excessive ridges or
cracks, or if the deck feels grooved yet highly polished, the deck should be fl ipped to an unused
surface or replaced. In time, a worn belt and deck can cause high current draw and ultimately,
motor failure. NOTE: When replacing the deck, replace the belt at the same time.
7. Clean under the belt.
To minimize the effect of friction between the deck and the running belt, Cybex recommends
cleaning the underside of the running belt and the top of the running deck surface by wiping
them with a clean, dry towel. This cleaning should be done each time you check the belt and
deck condition to prevent premature wear of the deck, running belt and the drive motor system.
See the Service Schedule in this chapter.
A.
A.
B.
A.
B.
A.
End Caps
Side Panel
Screws
Figure 3
Side Panel
Top Steps
Figure 4
Screws (3 Under Each Top Step)