5
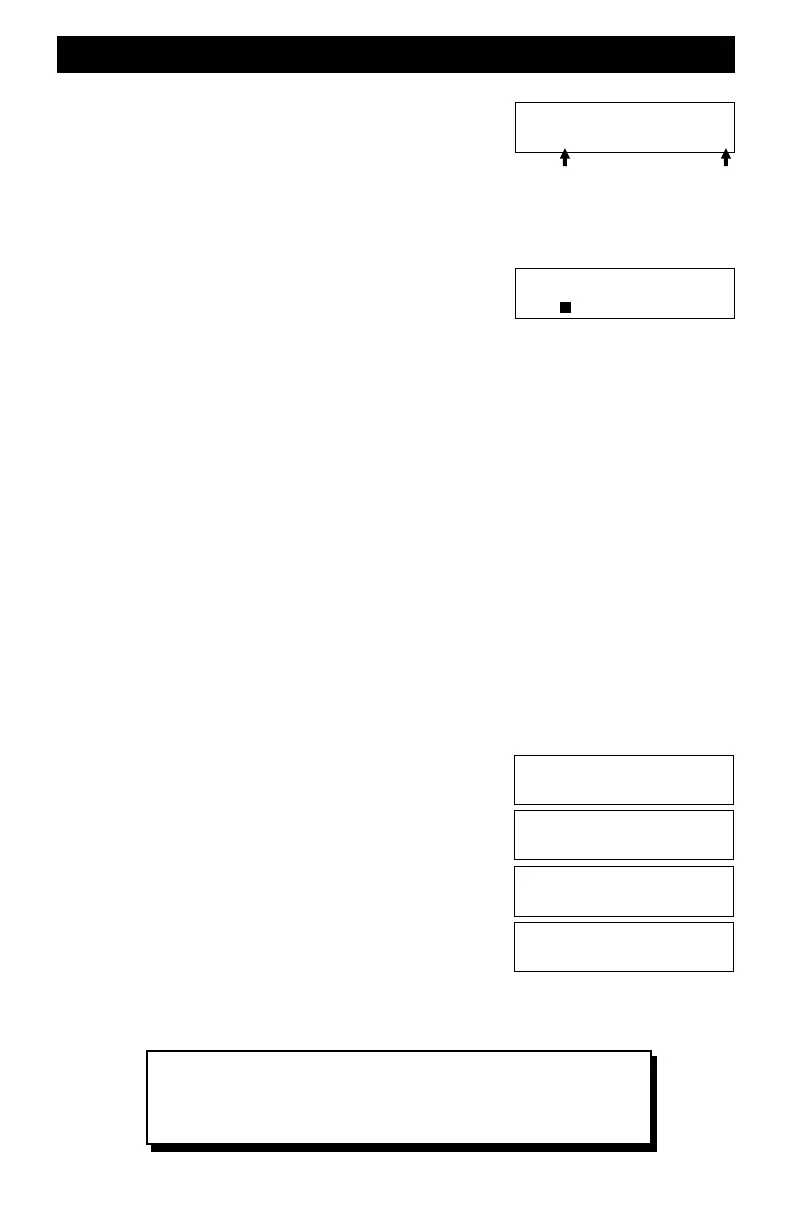
Loco 0003 Fcn#=?
Fn=ooooooooooooo
V6xx T=00 M=255
A=0003 B=2920
Controlling Locomotive Decoder Functions - F0 to F9
To control locomotive functions such as lighting or sound
effects, function keys are used. Push the key labeled
FUNCTION for the A throttle. The LCD will show the status for
the 13 possible locomotive functions for the locomotive
assigned to throttle A.
The far left square is function 0 and the far right square is function 12. The open squares
indicate the function is not activated. If a square is filled in, the function is on or activated.
While the function status display is showing, the Command
Station’s number keys become the function keys. For example,
the 0 key control Function-0 which we shorten to F0. This is
typically the headlight control.
Push and release the 0 key while watching the locomotive headlights. Notice the first square fills
in indicating function 0. Push the 0 key again to shut off the headlights. Notice the square shows
open.
If the decoder also has sound effects, push the “2” key to blow the horn. Pushing and holding the
key will continuously sound the horn. Release the key to stop the horn from blowing.
Push the ESC key to cancel the function status display and return to the home page.The function
status is remembered but the status display can be brought up any time by pushing the “function”
key.
Controlling Locomotive Decoder Functions - F10 to F12
To activate F10 to F12, first push the SETUP/ASSIGN key to add 10 to any subsequent number
key. For example, for F10, push and release SETUP/ASSIGN and then push 0.
Changing The Locomotive Address
Running two locomotives is a lot more fun than just one locomotive. Adding another locomotive
and assigning it’s address to Throttle-B is easy. But there is one requirement: the new locomotive
must have a different address. Fortunately, this is easily done by using the programming track to
change the new locomotive’s address. Here’s how to do this.
1. Place the locomotive on the programming track and be sure all wheels are on the track.
2. Push the SVC PRGM key. This is a severe abbreviation of
“Service Program.” Notice it is asking what do you want to
program using the Program Track.
3. Push the key labeled LOCO. The 4 blanks will allow any
number from 1 to 9999. For this example, the locomotive
decoder will be programmed to address 2920.
4. Push the number keys to put 2920 in the display. Push ENT
to program the decoder to the new address.
5. Push ESC to return to the home page.
Move the locomotive back to the main line and assign Throttle-
B to the new locomotive address. Speed, direction and function
control are the same as with Throttle-A.
Loco 0003 Fcn#=?
Fn=ooooooooooooo
Program Track
Program What?
Program Track
Loco Addr ____?
Program Track
Loco Addr 2920?
F0 F12
Basic Starter System - Quick Start continued
This concludes the Quick Start Section for the Basic Starter System.
Please go to page 15 for suggestions on permanently mounting your
system as well as recommendations and guidelines for ZoneMaster
booster installation and track wiring.