14D-Link ShareCenter Pulse DNS-320 User Manual
Section 3 - Installation
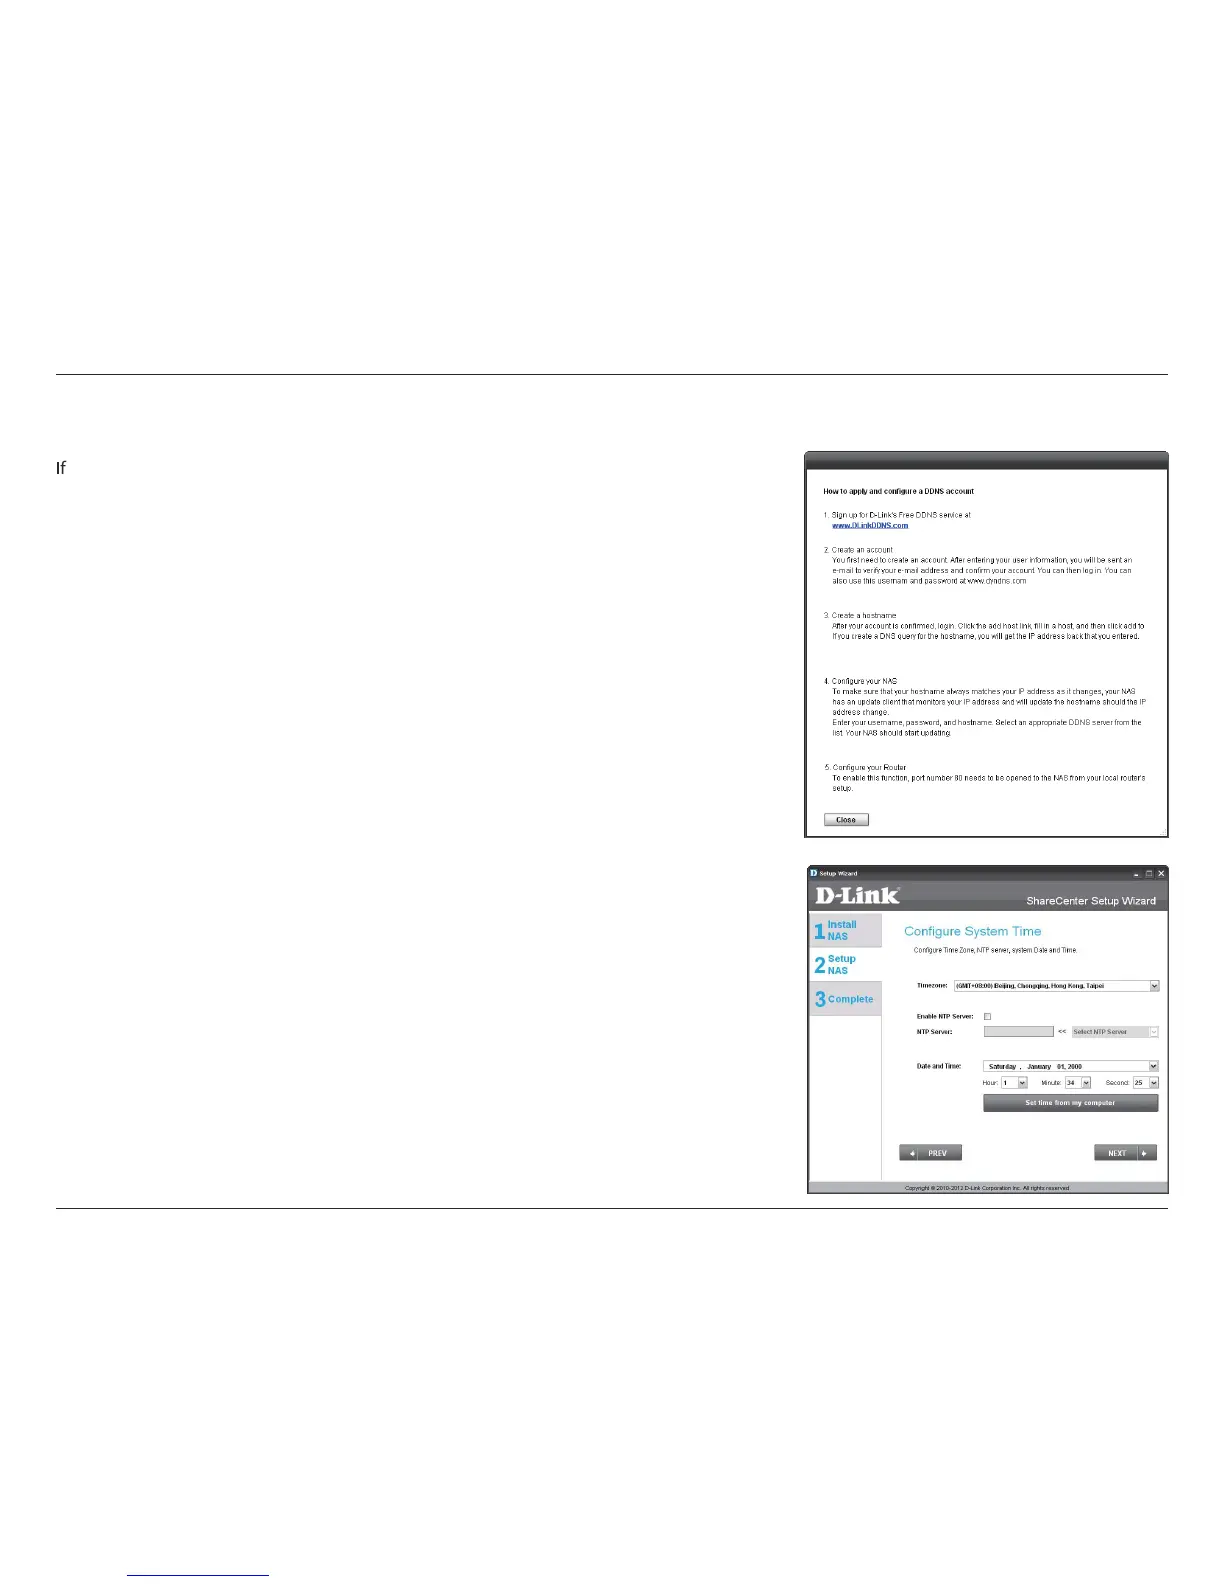
DDNS Account and System Time
f you want a DDNS account to use with your ShareCenter Pulse, D-Link provides a free
DDNS account by clicking on the web link shown. You will need to do the following:
• Create an account with a username and password.
• Create a hostname that the DDNS service will use to track your device no
matter what the Local Network WAN settings are (i.e. public IP address).
• Congure your device with the hostname and DDNS service provider
details.
• Congure your router to forward port 80.
Follow the steps listed here in order to create a DDNS account and congure your LAN
equipment and ShareCenter Pulse to work with the new settings.
Congure the time, date and time zone settings here. Select the time zone from the
drop-down menu. You can set the time and date manually, from a NTP server or from
the computer’s settings.
 Loading...