K1000896E Operation and Maintenance Manual Inspection, Maintenance and Adjustment 4-51
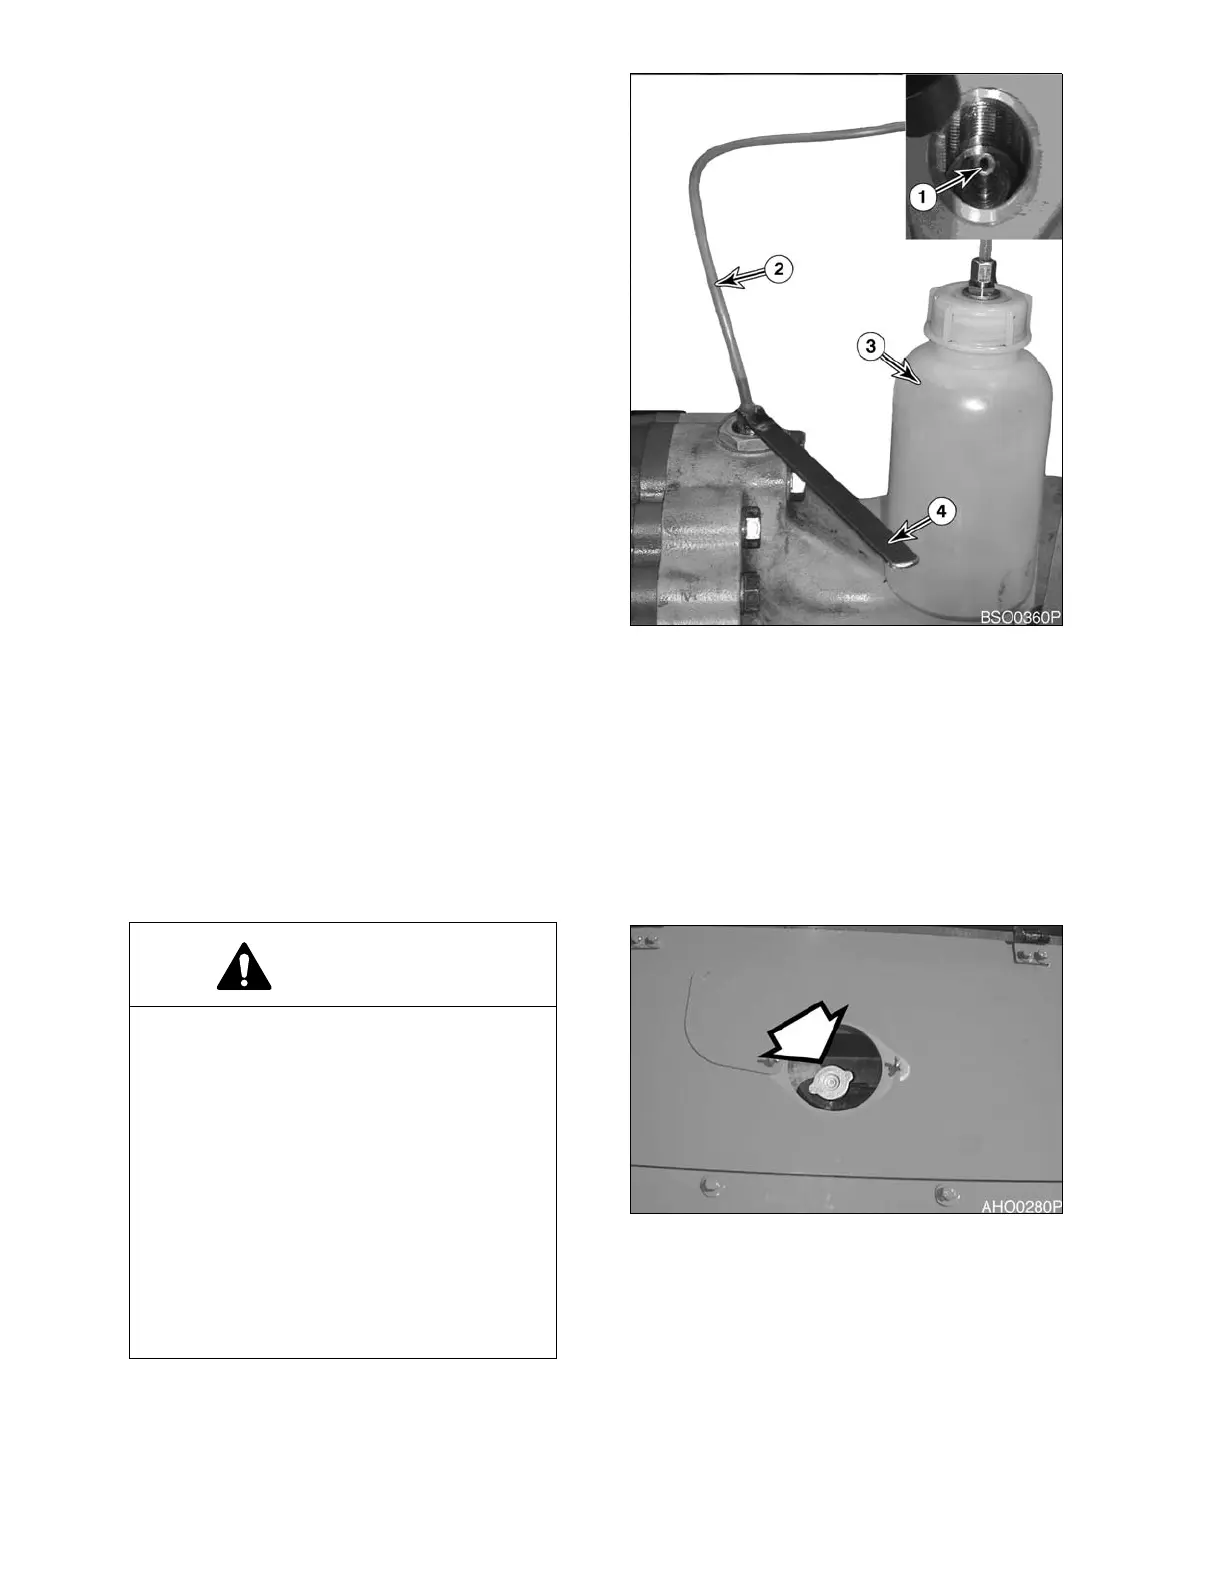
2. Remove plug (Figure 85) on axle. Increase
the height of bleeder (1, Figure 86) by
using special tool (4, Figure 86). Place one
end of a plastic hose (2, Figure 86) over
bleeder screw (1). Place other end of hose
in a container (3) filled with brake fluid.
NOTE: Dispose of drained fluids
according to local regulations.
3. Station one person in operator's cab, and
one person at bleeder screw on axle being
bled.
4. Open bleeder screw (1, Figure 86). Then
press down on brake pedal until it rests on
floor of cab. Hold pedal down on floor of
cab. Close bleeder screw while pedal is
being held down. After bleeder screw has
been closed, allow brake pedal to return to
upright position. Continue to open bleeder
screw and press down pedal as described
in this step, until fluid expelled from
bleeder hose has no air bubbles present.
5. Securely close bleeder screw (1, Figure
86). Install plug in axle.
6. Perform bleeding procedure on other three
locations.
CHANGE RADIATOR COOLANT
NOTE: Do not mix ethylene glycol and propylene glycol antifreeze together. If the two are mixed,
the protection level will be reduced to the level of the ethylene glycol. See “Engine Cooling
System” on page 4-60, for further details.
NOTE: This unit was factory filled with propylene glycol.
WARNING!
Allow the engine to cool before releasing
the radiator cap. Make sure to loosen the
cap slowly to release any remaining
pressure.
Radiator cleaning is performed while the
engine is running. Take extreme caution
when working on or near a running
engine. Make sure to lock out and tag the
controls notifying personnel that service
work is being performed.
Do not remove the radiator cap unless it is
required. Observe the coolant level in the
coolant recovery tank.
Figure 86
Figure 87