Installation 4
3 Installation
Installation Requirement 3.1
3.1.1 Notice
Do not install the VTO to places with condensation, high temperature, grease or dust,
chemical corrosion, direct sunlight, or zero shelter.
The installation and adjustment must be finished by professional crew, and do not
disassemble the VTO.
3.1.2 Guidance
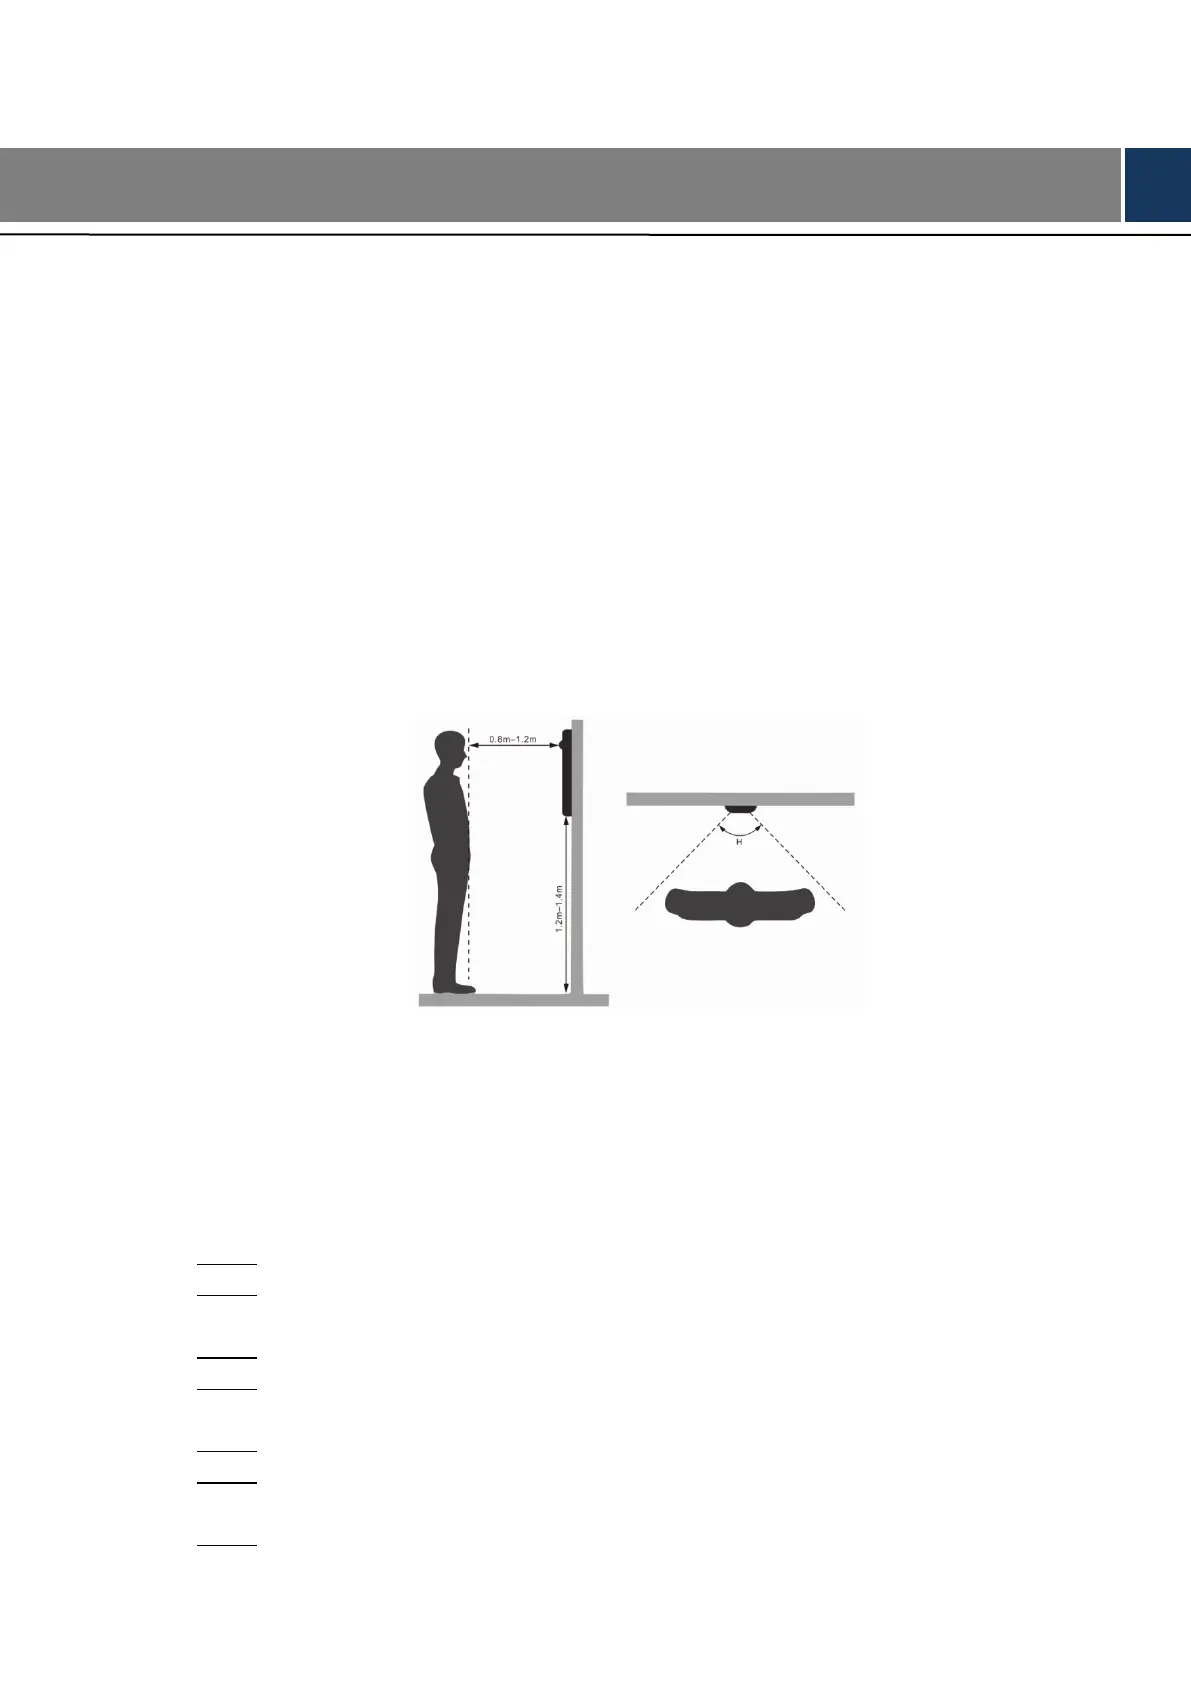
See Figure 3-1 for the reference of the installation position. The VTO horizontal angle of view
varies with different model, try to face the center of the VTO as much as possible.
Installation position reference Figure 3-1
Installing Process 3.2
The VTO can be installed on the wall or in the wall.
3.2.1 Installed on the Wall
With the help of installation diagram, hammer four expansion screws into the wall. Step 1
Install the waterproof silica gel pad on the mounting box from the back of the mounting Step 2
box.
Put four waterproof rings on four ST4×25 self-tapping screws. Step 3
Install the mounting box on the wall by screw the four ST4×25 self-tapping screws into Step 4
the expansion screws.
Put the VTO into the mounting box. Step 5
Fix the VTO to the mounting box by screwing two M3×8 screws from the bottom of the Step 6
mounting box.
Apply silica gel to gaps between the device and the wall. Step 7
 Loading...