5 Piping installation
Installation manual
17
EBLA09~16D + EDLA09~16D
Daikin Altherma 3 M
4P620239-1B – 2022.05
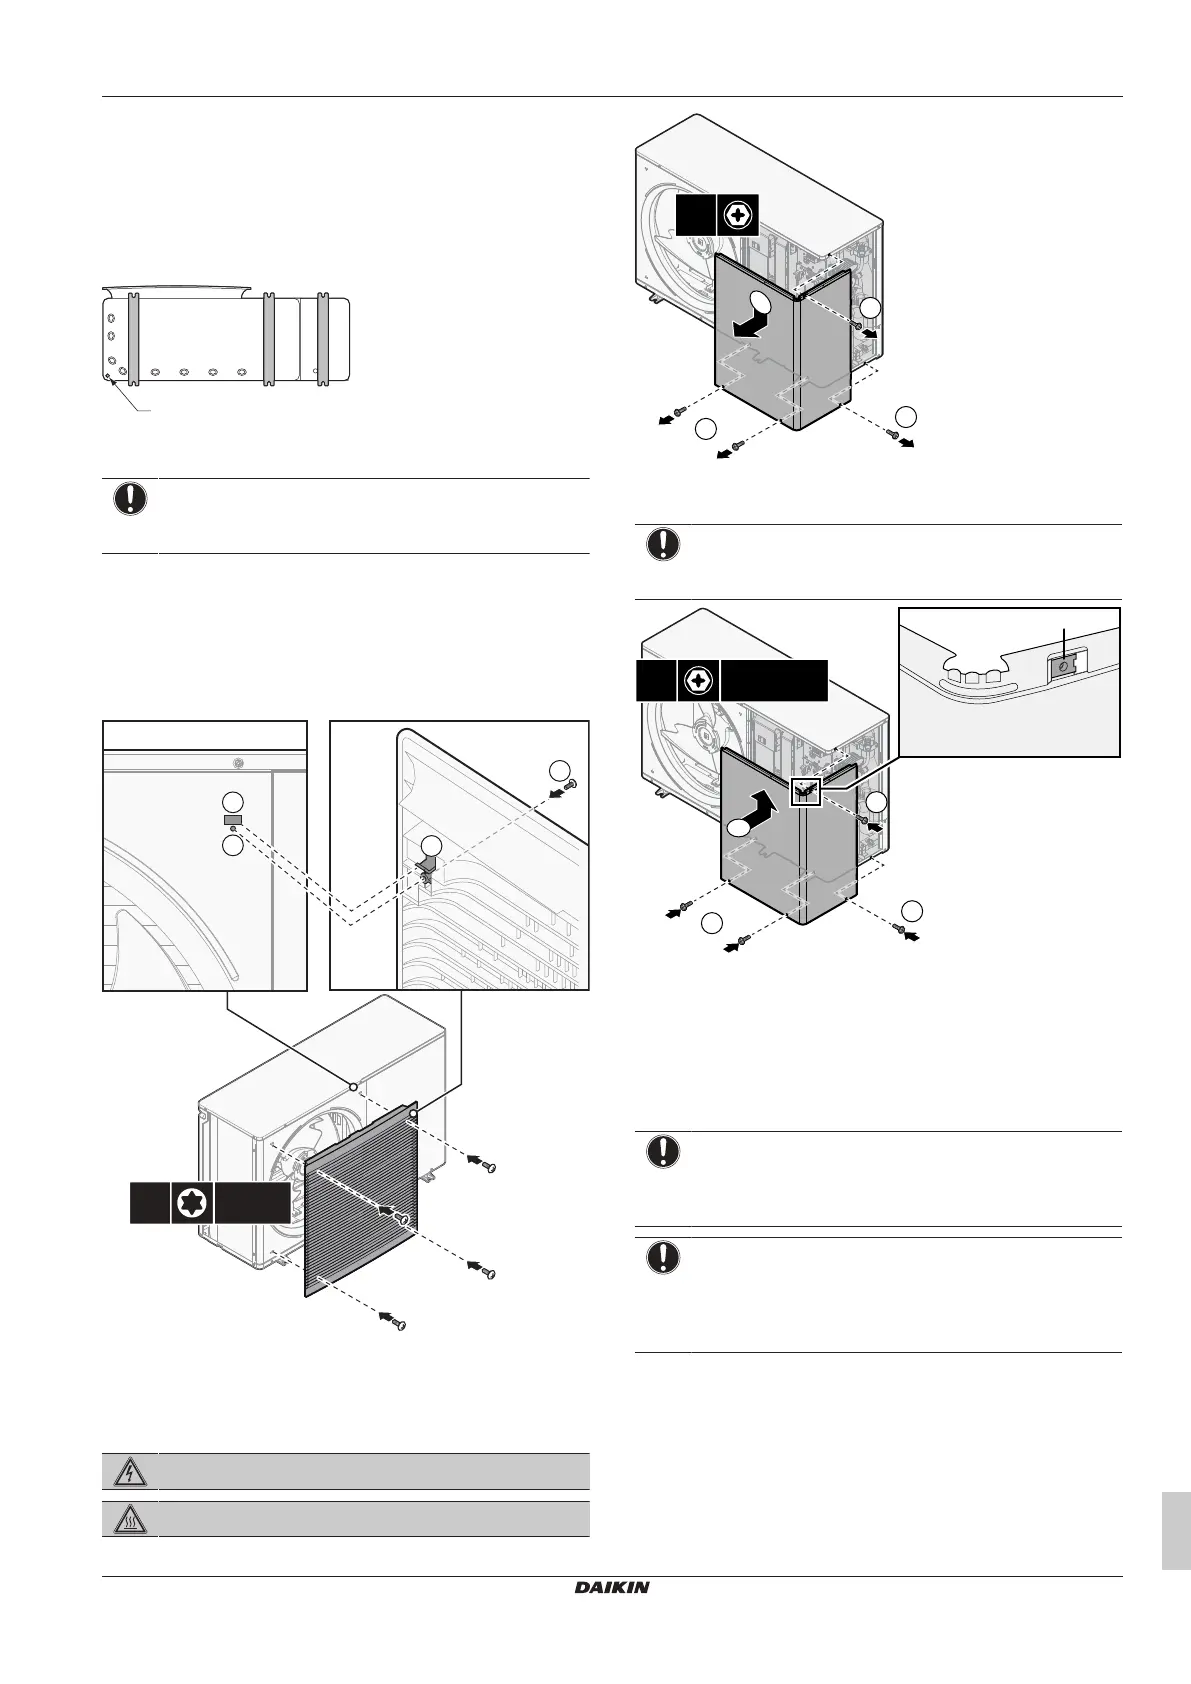
F Drain holes
Snow
In regions with snowfall, snow might build up and freeze between the
heat exchanger and the casing of the unit. This might decrease the
operating efficiency. To prevent this:
1 Remove the knockout hole (a) by tapping on the attachment
points with a flat head screwdriver and a hammer.
2 Remove the burrs, and paint the edges and areas around the
edges using repair paint to prevent rusting.
NOTICE
When making knockout holes, do NOT damage the casing
and underlying piping.
4.2.4 To install the discharge grille
1 Insert the hooks. To prevent breaking the hooks:
▪ First insert the bottom hooks (2×).
▪ Then insert the top hooks (2×).
2 Insert and fix the screws (4×)(delivered as accessory).
4.3 Opening and closing the unit
4.3.1 To open the outdoor unit
DANGER: RISK OF ELECTROCUTION
DANGER: RISK OF BURNING/SCALDING
4.3.2 To close the outdoor unit
NOTICE
Speed nut. Make sure the speed nut for the top screw is
correctly attached to the service cover.
a Speed nut
5 Piping installation
5.1 Preparing water piping
NOTICE
In case of plastic pipes, make sure they are fully oxygen
diffusion tight according to DIN 4726. The diffusion of
oxygen into the piping can lead to excessive corrosion.
NOTICE
Water circuit requirements. Make sure to comply with the
water pressure and water temperature requirements
below. For additional water circuit requirements, see the
installer reference guide.
▪ Water pressure. The maximum water pressure is 4bar. Provide
adequate safeguards in the water circuit to ensure that the
maximum pressure is NOT exceeded.
▪ Water temperature. All installed piping and piping accessories
(valve, connections,…) MUST withstand the following
temperatures: