260
FTX-N/U, FVXS-N, FDMQ-R Series EDUS091558E
C: 3P379751-5D
10
Read Before Operation
Turn on the circuit breaker
• After the power is turned on, the aps of the indoor unit open and close once to set the
reference position.
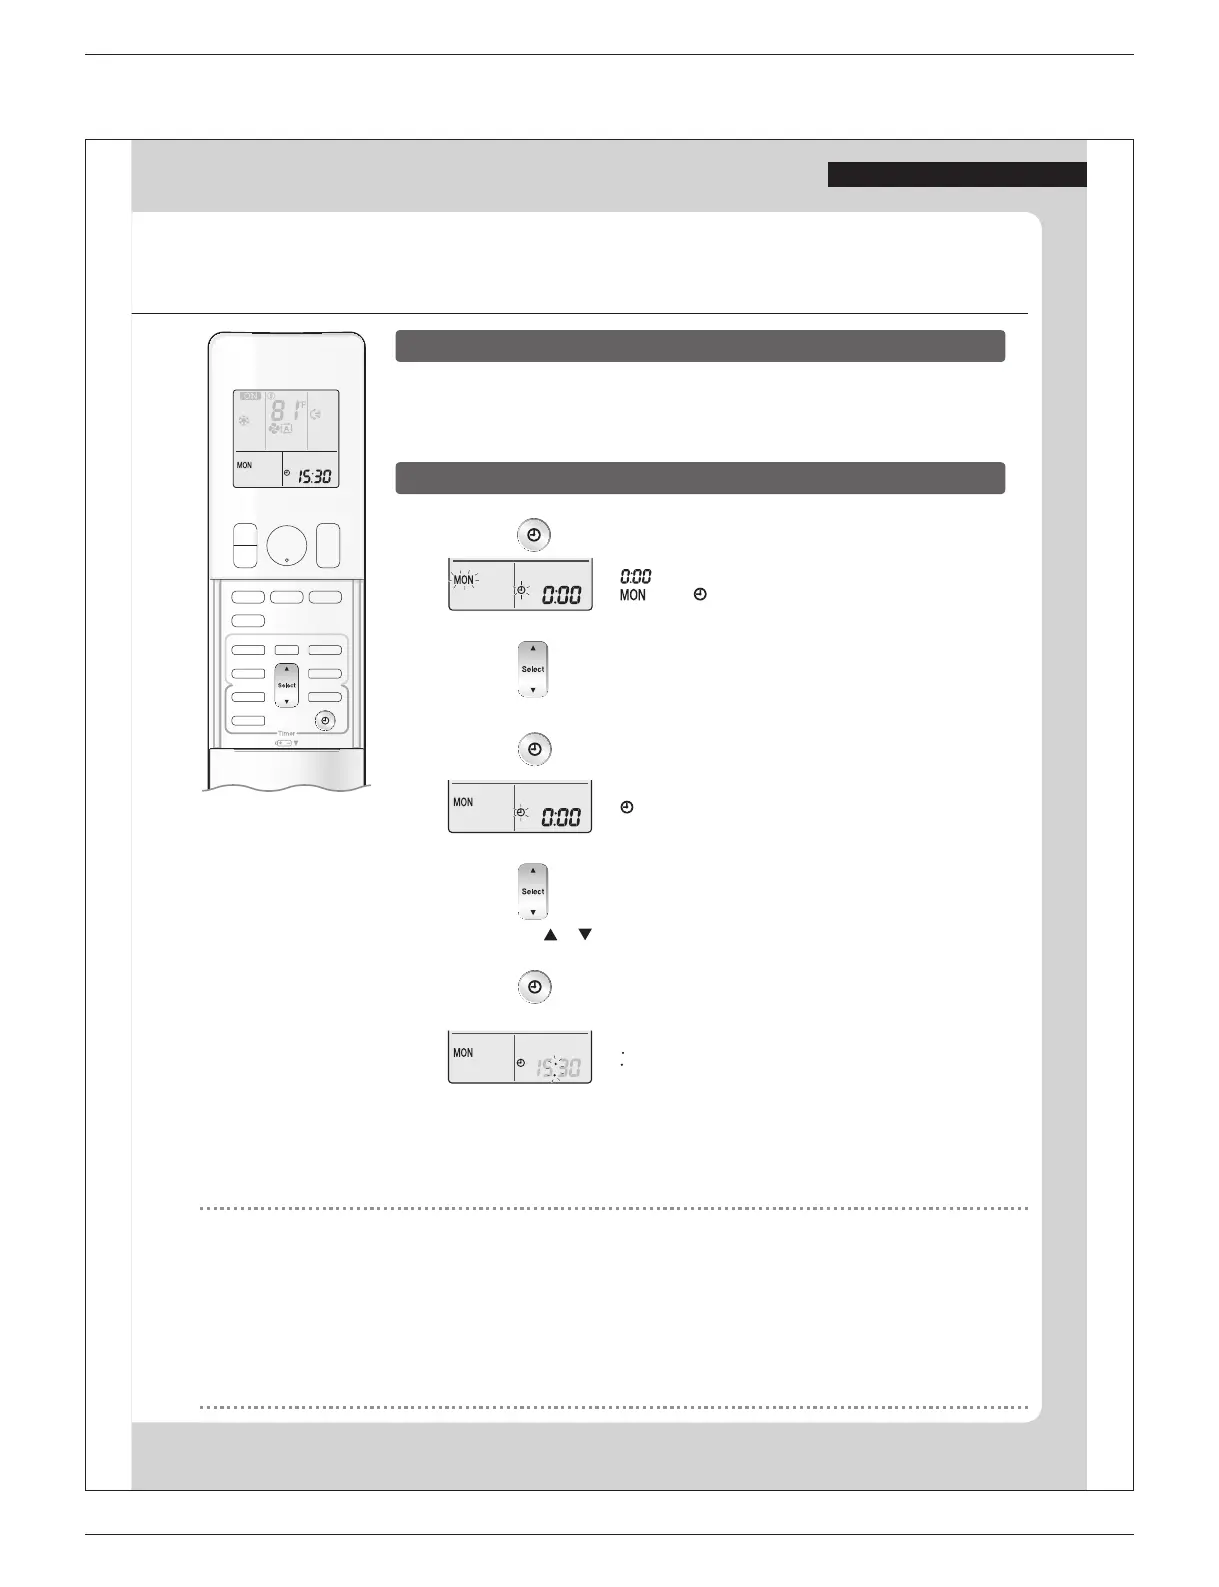
1. Press �
“ ” is displayed on the LCD.
“
” and “ ” blink.
2. Press to set the current day of the week�
3. Press �
“ ” blinks.
4. Press to set the clock to the present time�
• Holding down or rapidly increases or decreases the displayed time.
5. Press �
•Point the remote controller at the indoor unit when pressing the buttons.
“ ” blinks.
NOTE
Fahrenheit/Celsius display change function of remote controller
• The set temperature may increase when the display is changed to Celsius from Fahrenheit, because a fraction of 0.5°C is rounded up.
• Example: A set temperature of 65°F (equivalent to 18.5°C) will be converted into 19°C.
When the display is changed to Fahrenheit again, the set temperature will be converted into 66°F (equivalent to 19°C) instead of the
original set temperature (65°F) but a set temperature of 66°F (equivalent to 19°C) will be converted into 19°C with no temperature
change.
• A reception sound will go off for the transmission of set temperature to the indoor unit at the time of setting the Fahrenheit/Celsius display
change function.
Note on setting the clock
• If the indoor unit’s internal clock is not set to the correct time, the ON/OFF TIMER and WEEKLY TIMER will not operate punctually.
01_EN_3P379751-5D.indd 10 11/13/2018 2:17:05 PM



 To Next Page