Selecting a Location for Installation of the Indoor Units
Outdoor Unit
Level
difference: 24.6 ft
max.
Level
difference:
49.2 ft max.
Indoor Unit
Outdoor Unit
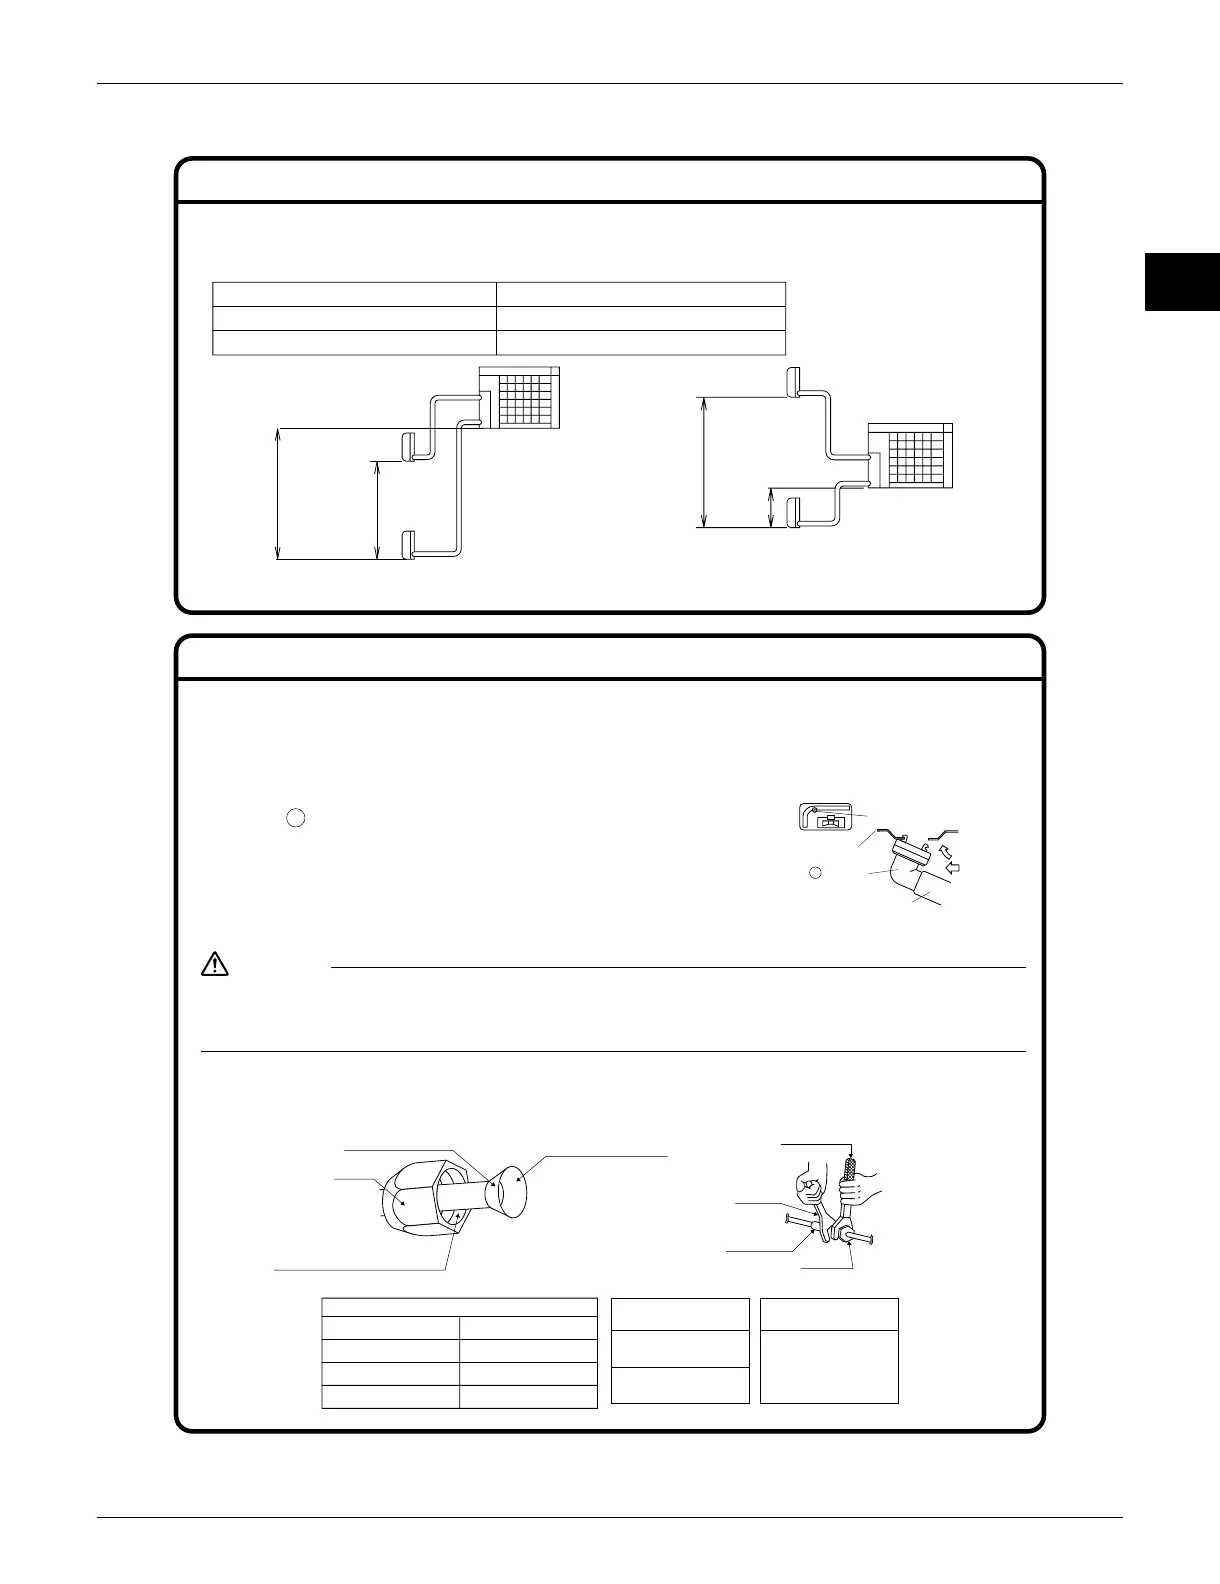
Drain-water hole
Bottom frame
B Drain plug
While pressing
Hose (available commercially,
inner dia. 5/8 in)
Flare nut tightening torque
Flare nut for φ1/4 10.5~12.7 ft-lbf
Flare nut for φ3/8 24.1~29.4 ft-lbf
Flare nut for φ1/2 36.5~44.5 ft-lbf
Flare nut for φ5/8 45.6~55.6 ft-lbf
Level
difference:
49.2 ft max.
Indoor Unit
Outdoor Unit
Level
difference:
24.6 ft max.
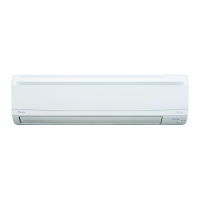
● The maximum allowable length of refrigerant piping, and the maximum allowable height difference between the
outdoor and indoor units, are listed below. (The shorter the refrigerant piping, the better the performance. Connect so
that the piping is as short as possible. Shortest allowable length per room is 9.8 ft.)
1. Installing Outdoor Unit
1)
When installing the outdoor unit, refer to “Precautions for Selecting the Location” and the “Indoor/Outdoor Unit Installation Drawings”.
2) If drain work is necessary, follow the procedures below.
3. Refrigerant Piping
2. Drain Work
1) Use B drain plug for drainage.
2)
If the drain port is covered by a mounting base or floor surface, place
additional foot bases of at least 1-3/16 inch in height under the outdoor unit’s
feet.
3) In cold areas, do not use a drain hose with the outdoor unit. (Otherwise,
drain water may freeze, impairing heating performance.)
If the outdoor unit is positioned higher than the indoor units.
If the one indoor unit is positioned higher than the outdoor
unit, and other indoor unit is positioned lower than it.
Outdoor unit capacity class
Piping to each indoor unit
Total length of piping between all units
2MXS18
82 ft max.
164 ft max.
Liquid pipe
19.5~23.8 ft-lbf
Gas pipe
35.5~44.0 ft-lbf
Valve cap tightening
torque
Service port cap
tightening torque
7.9~10.8 ft-lbf
1) Use the flare nut fixed to the main unit. (To prevent cracking of the flare nut by aged deterioration.)
2)
To prevent gas leakage, apply refrigeration oil only to the inner surface of the flare. (Use refrigeration oil for R410A.)
3) Use torque wrenches when tightening the flare nuts to prevent damage to the flare nuts and gas leakage.
Align the centres of both flares and tighten the flare nuts 3 or 4 turns by hand. Then tighten them fully with the torque wrenches.
CAUTION
Torque wrench
Piping union
Flare nut
Do not apply refrigeration
oil to the outer surface.
Flare nut
Apply refrigeration oil to the
inner surface of the flare.
Do not apply refrigeration oil to the flare
nut avoid tightening with over torque.
Spanner
[Apply oil] [Tighten]

 Loading...